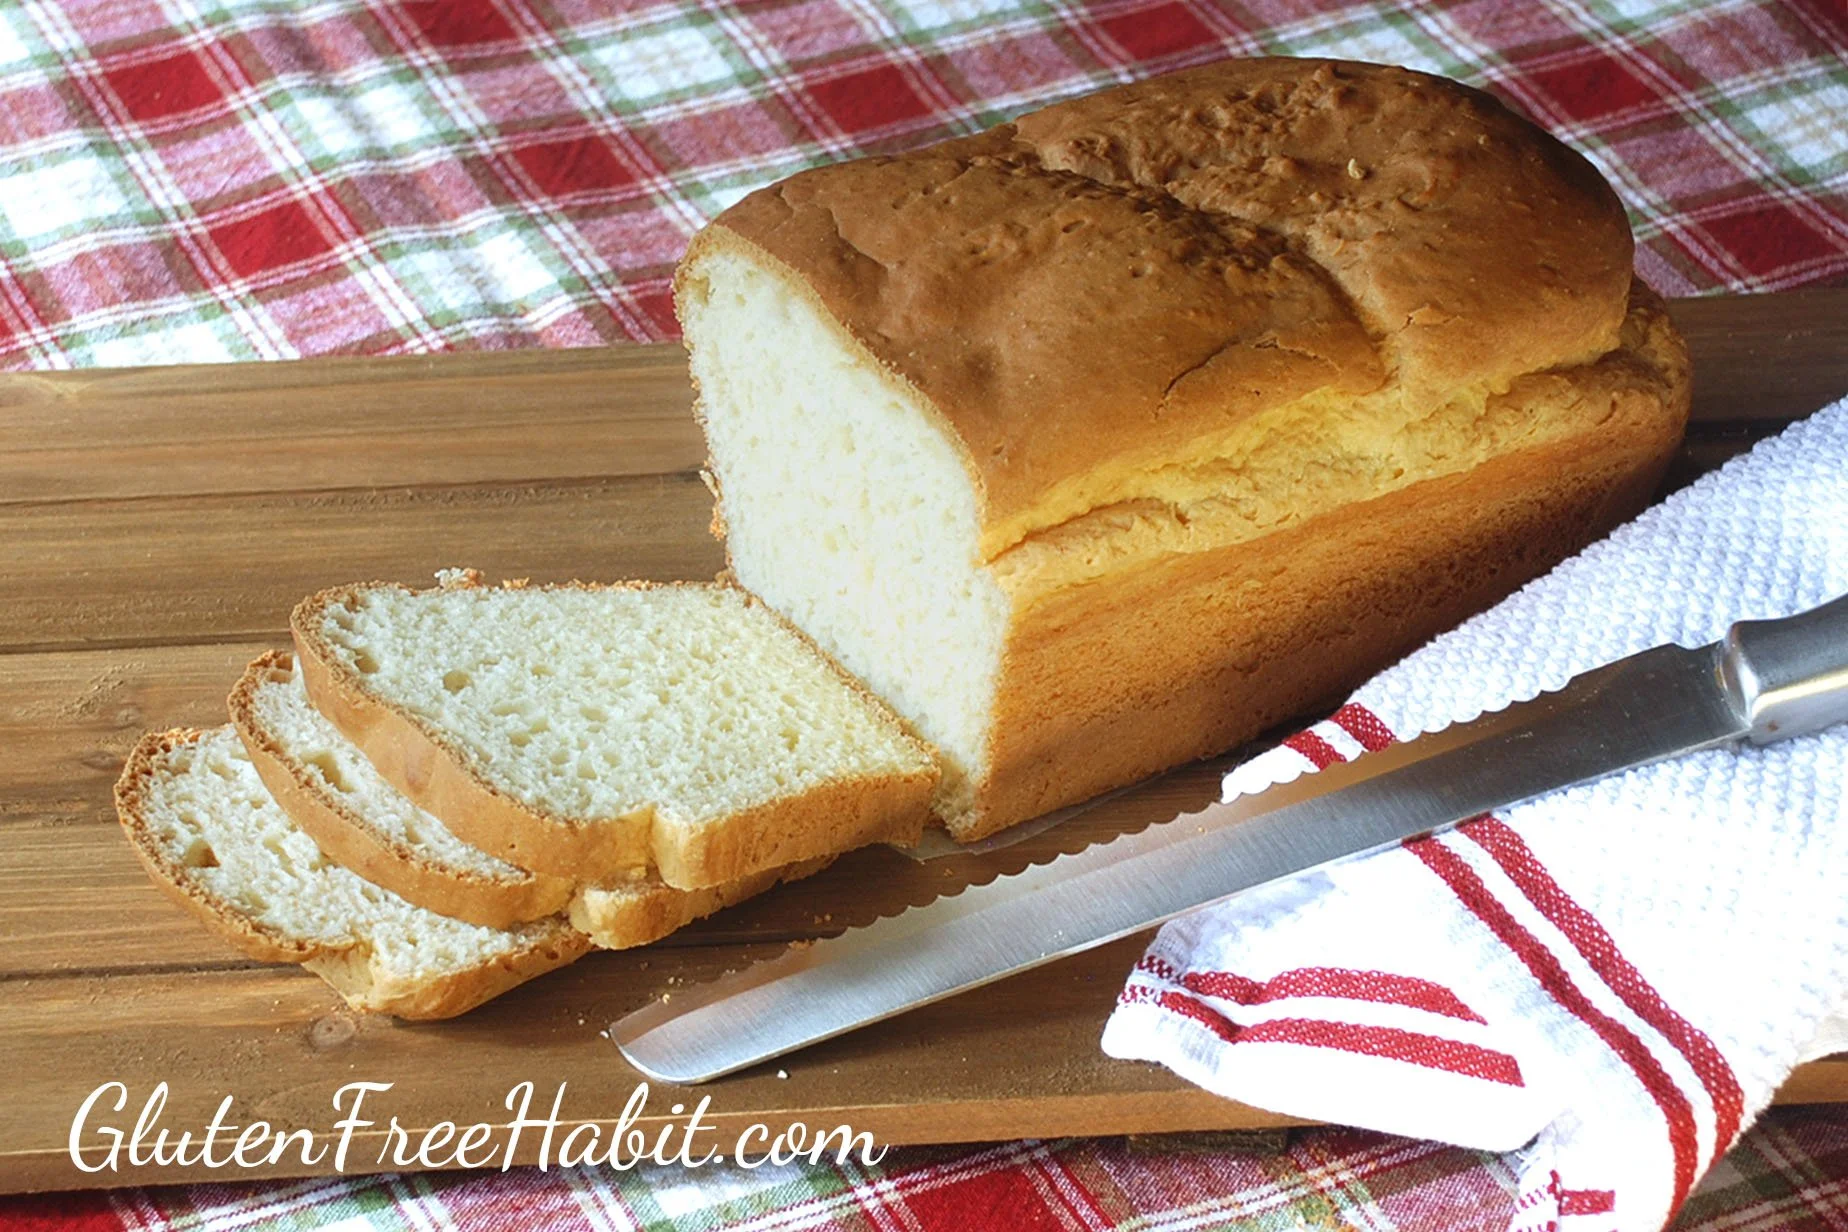
Gluten Free Sandwich Bread - Soft!

Anyone craving soft, delicious gluten free sandwich bread? Look no further! This is my go-to gluten free bread recipe. I make this gluten free bread once or twice a week and my family gobbles it up. Say, "goodbye" to hard, expensive, tiny, crumbly, store-bought gluten free breads and, "Welcome back" to your favorite sandwiches!
Makes: One 9x5 loaf

Show Me How

Walk Me Through It
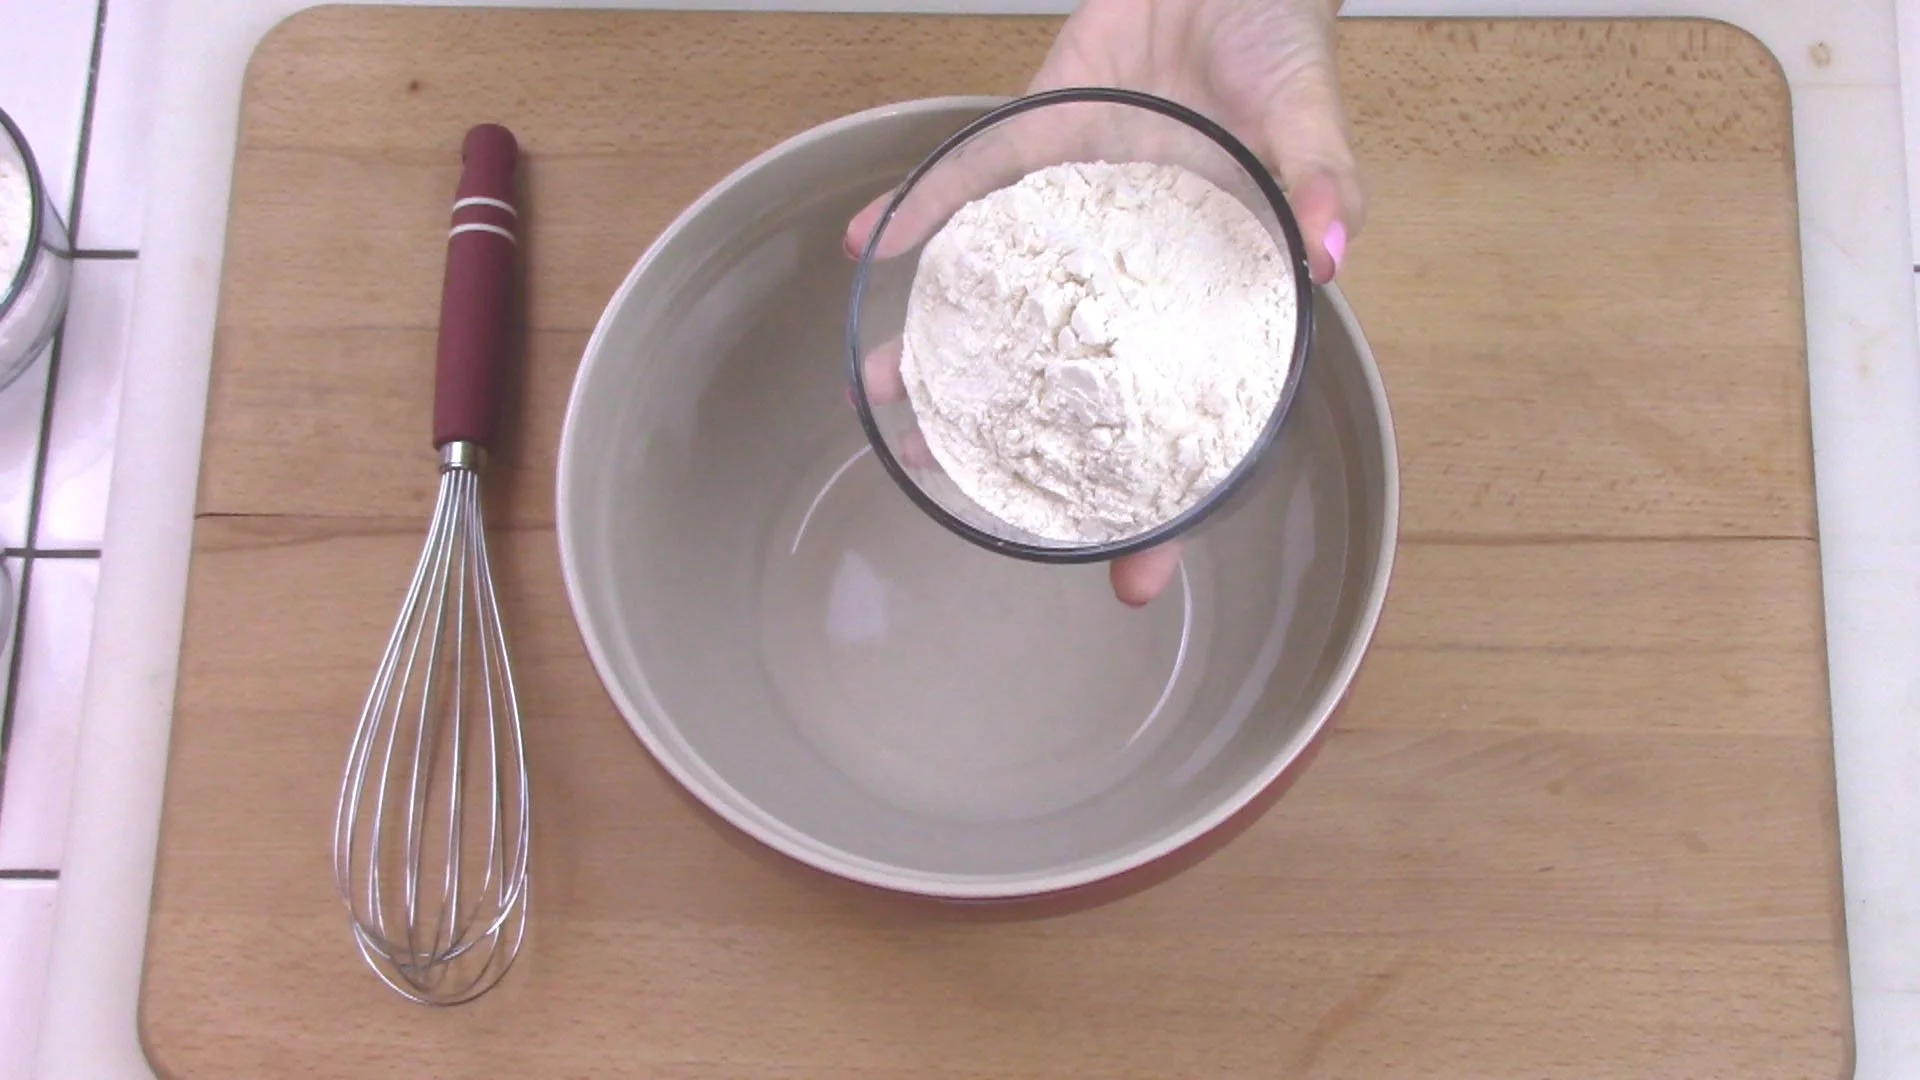
1
Set out eggs and butter to bring them to room temperature. Prepare your bread pan: Grease bottom and corners only - not sides.
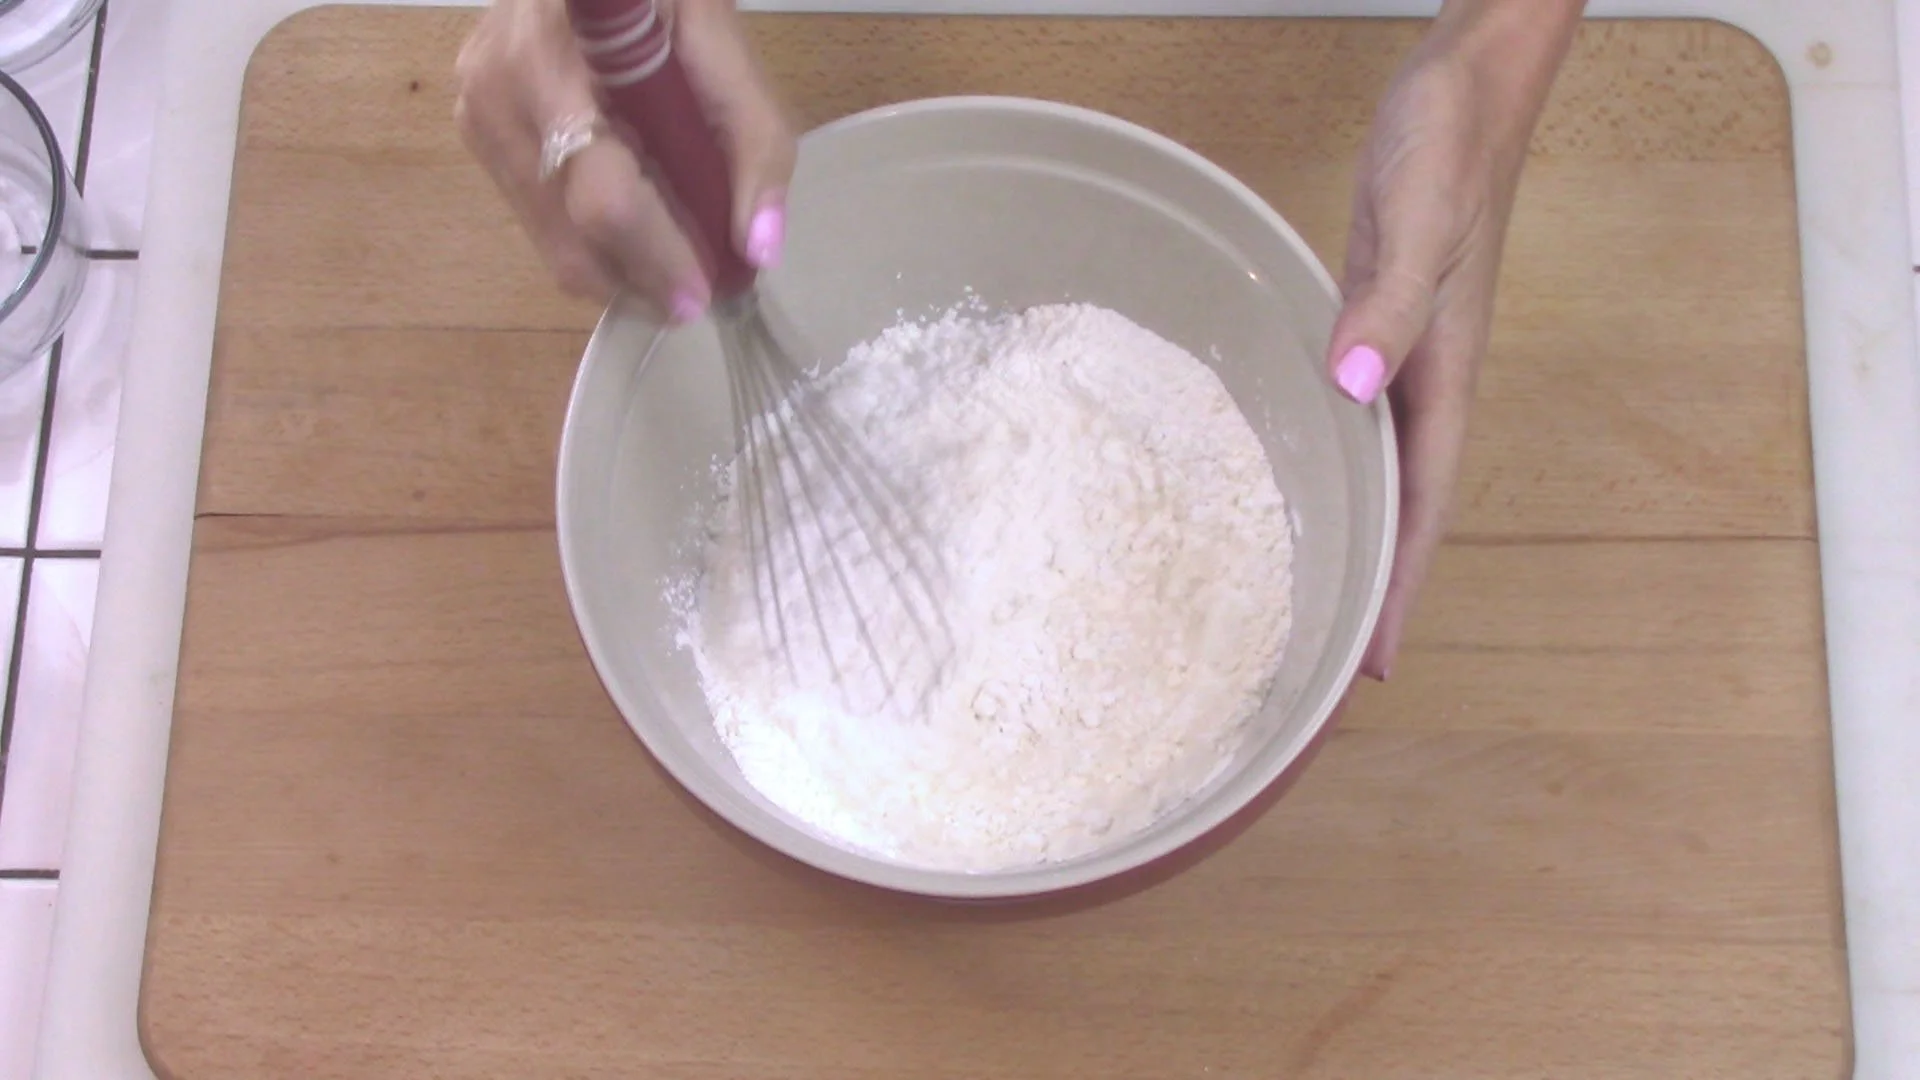
2
Combine dry ingredients including brown rice flour, corn starch, tapioca flour, xanthan gum, salt, and baking powder. Whisk together and set aside.
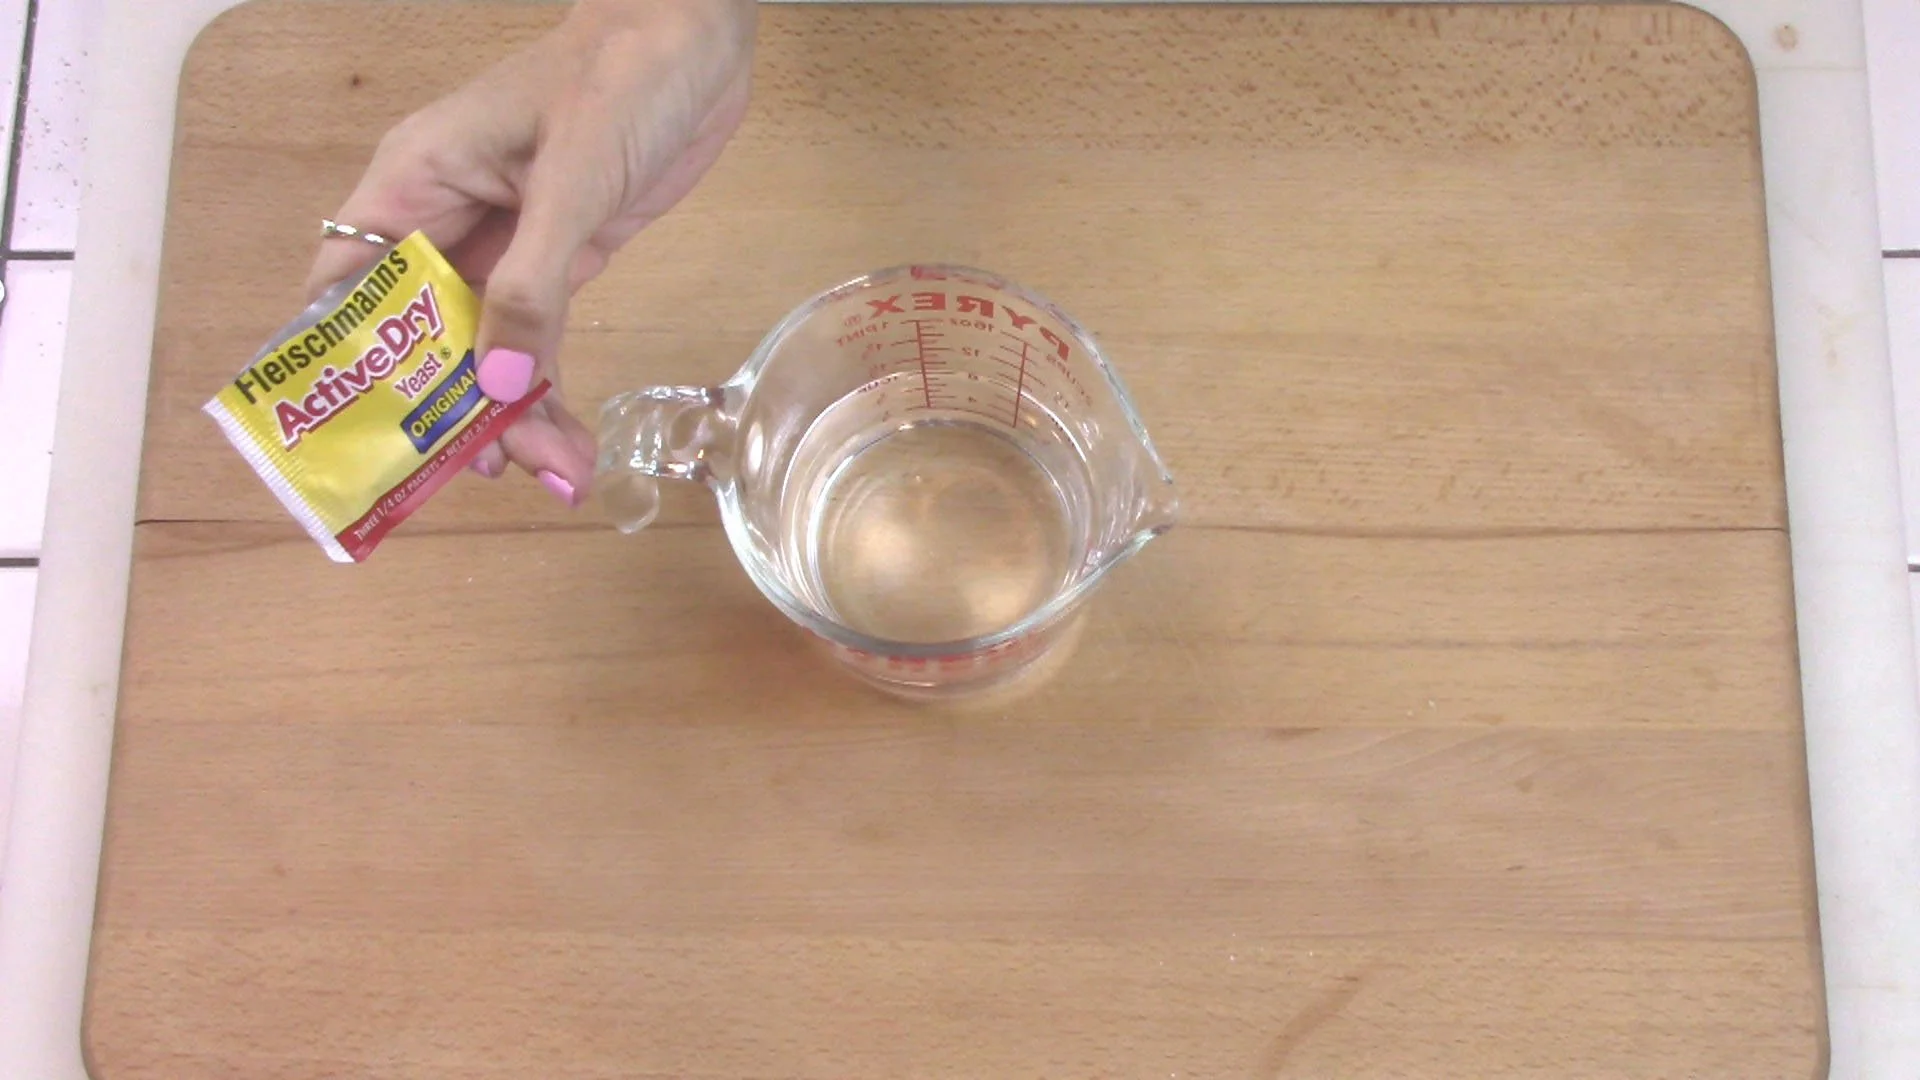
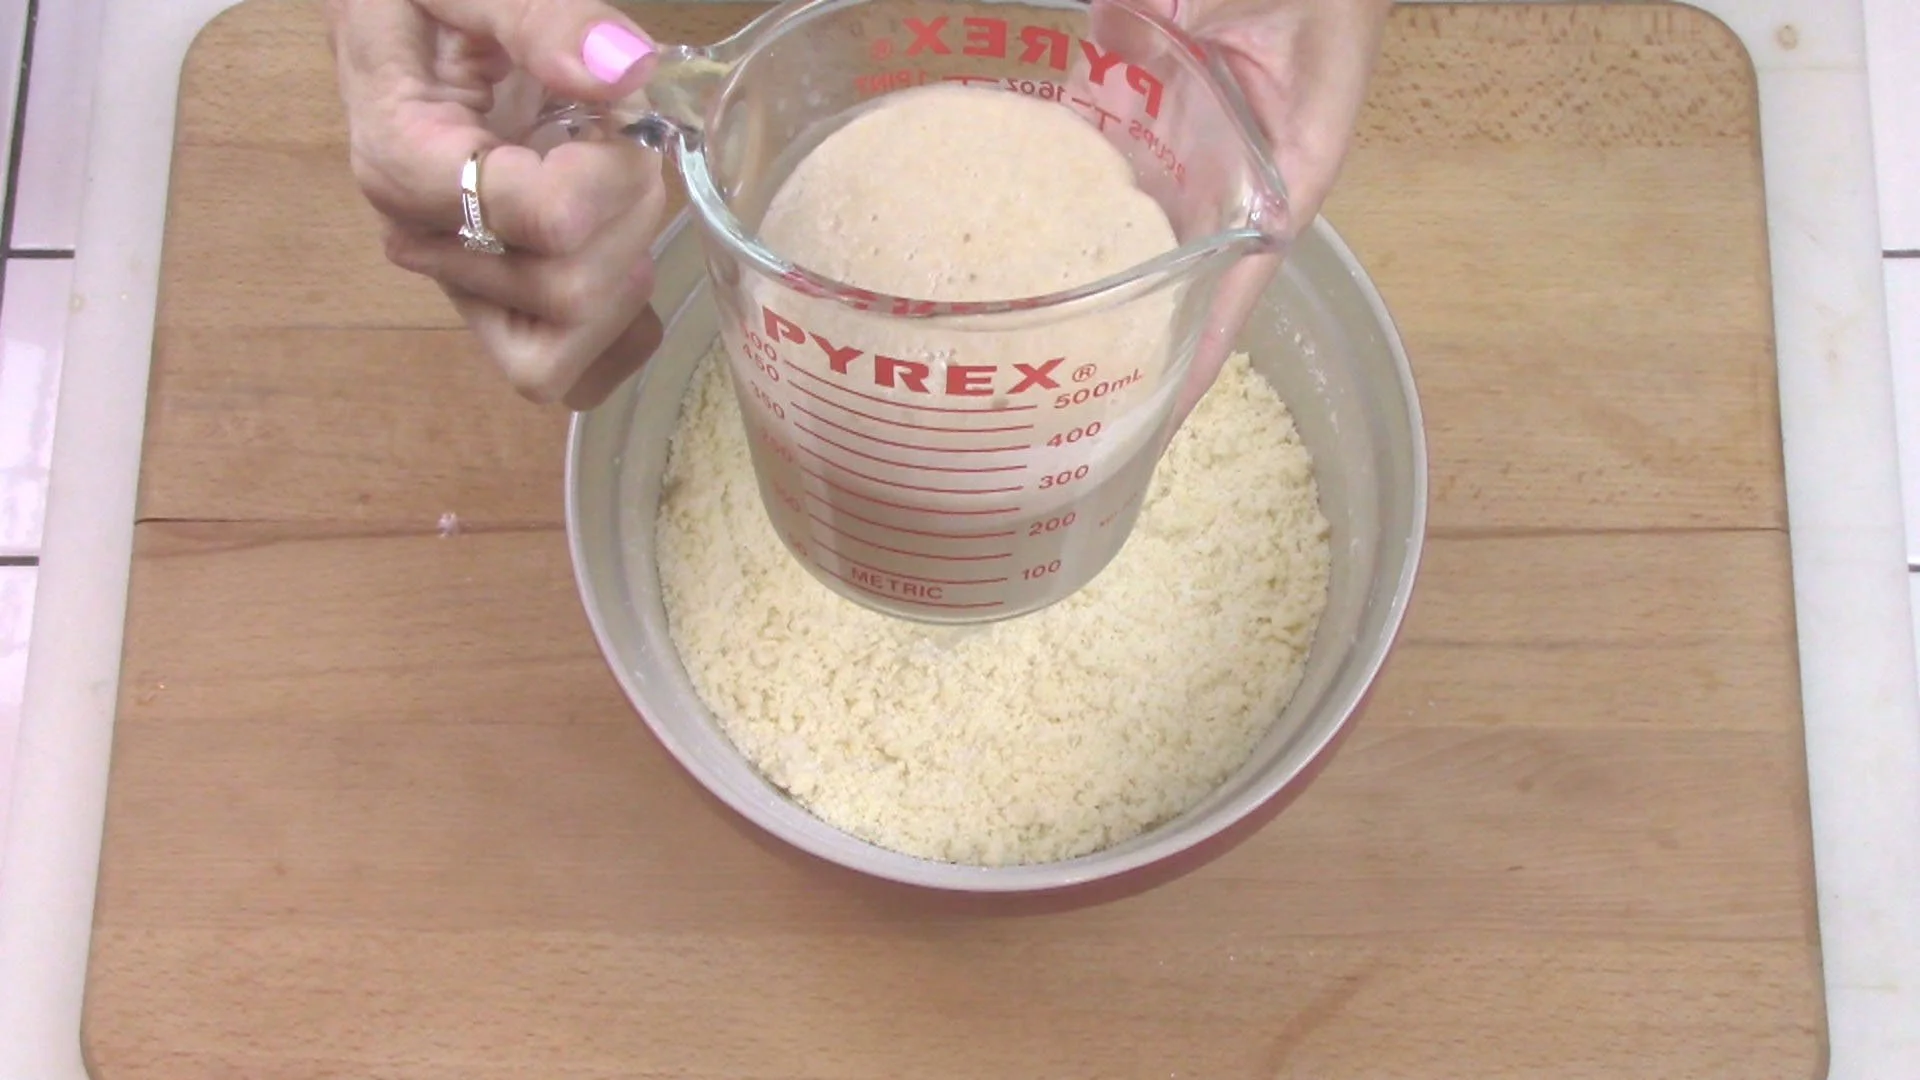
3
Proof the yeast: Heat the water to about 100 degrees (microwave or hot tap) and add in a package of active dry yeast.
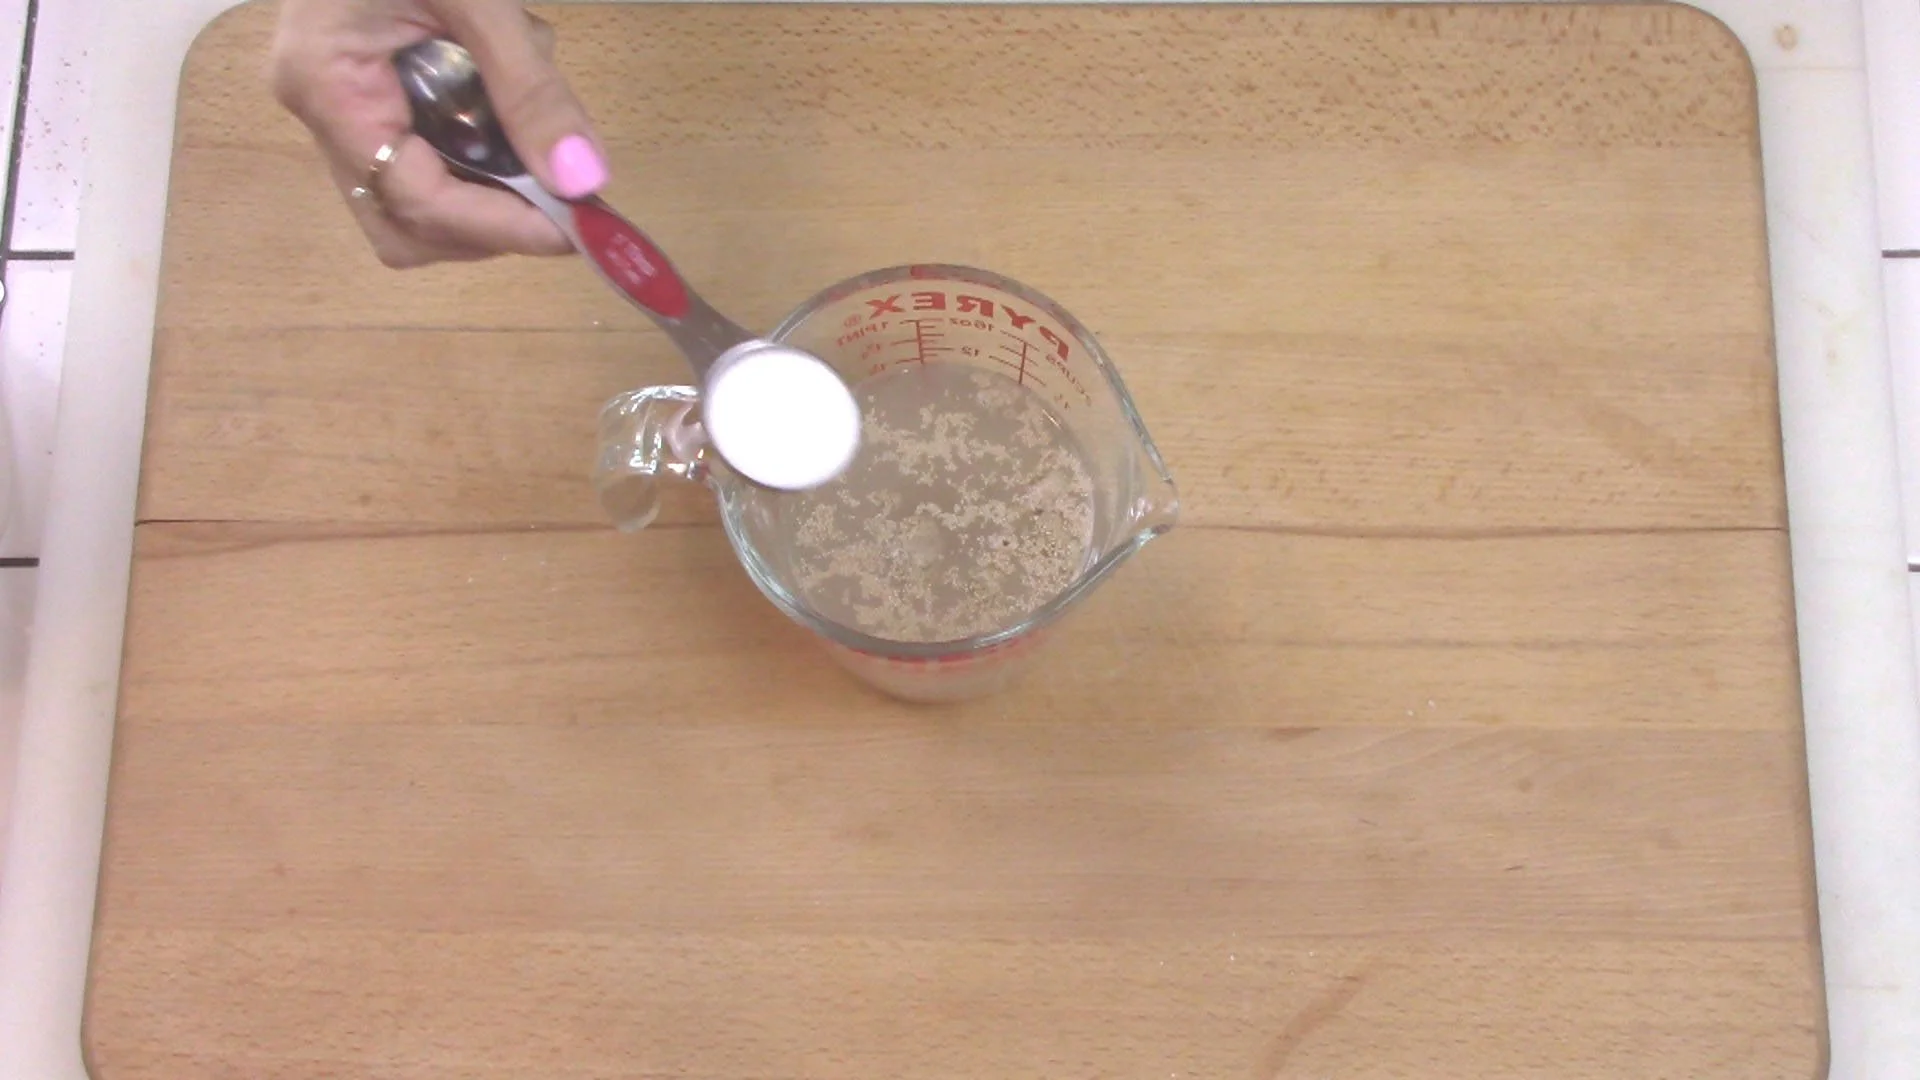
4
Add in the sugar and stir. Set aside for 5 minutes.
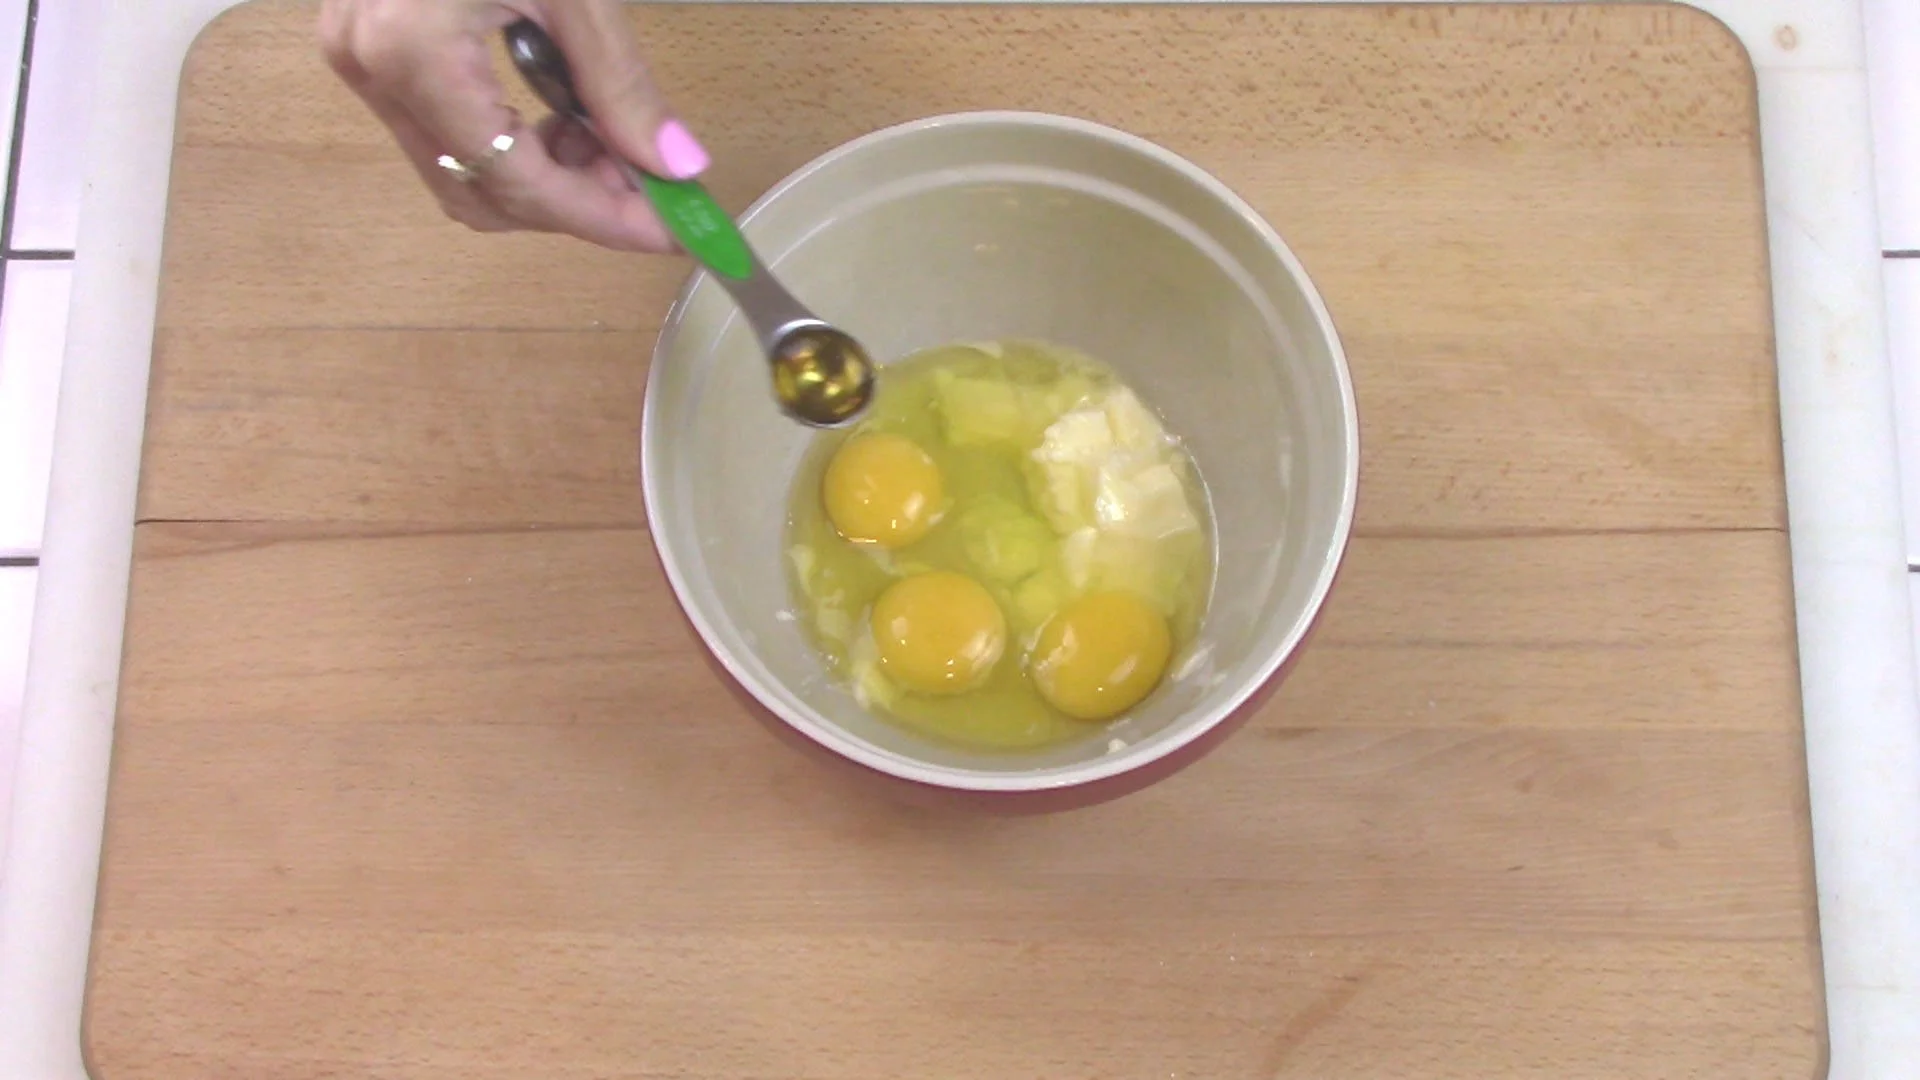
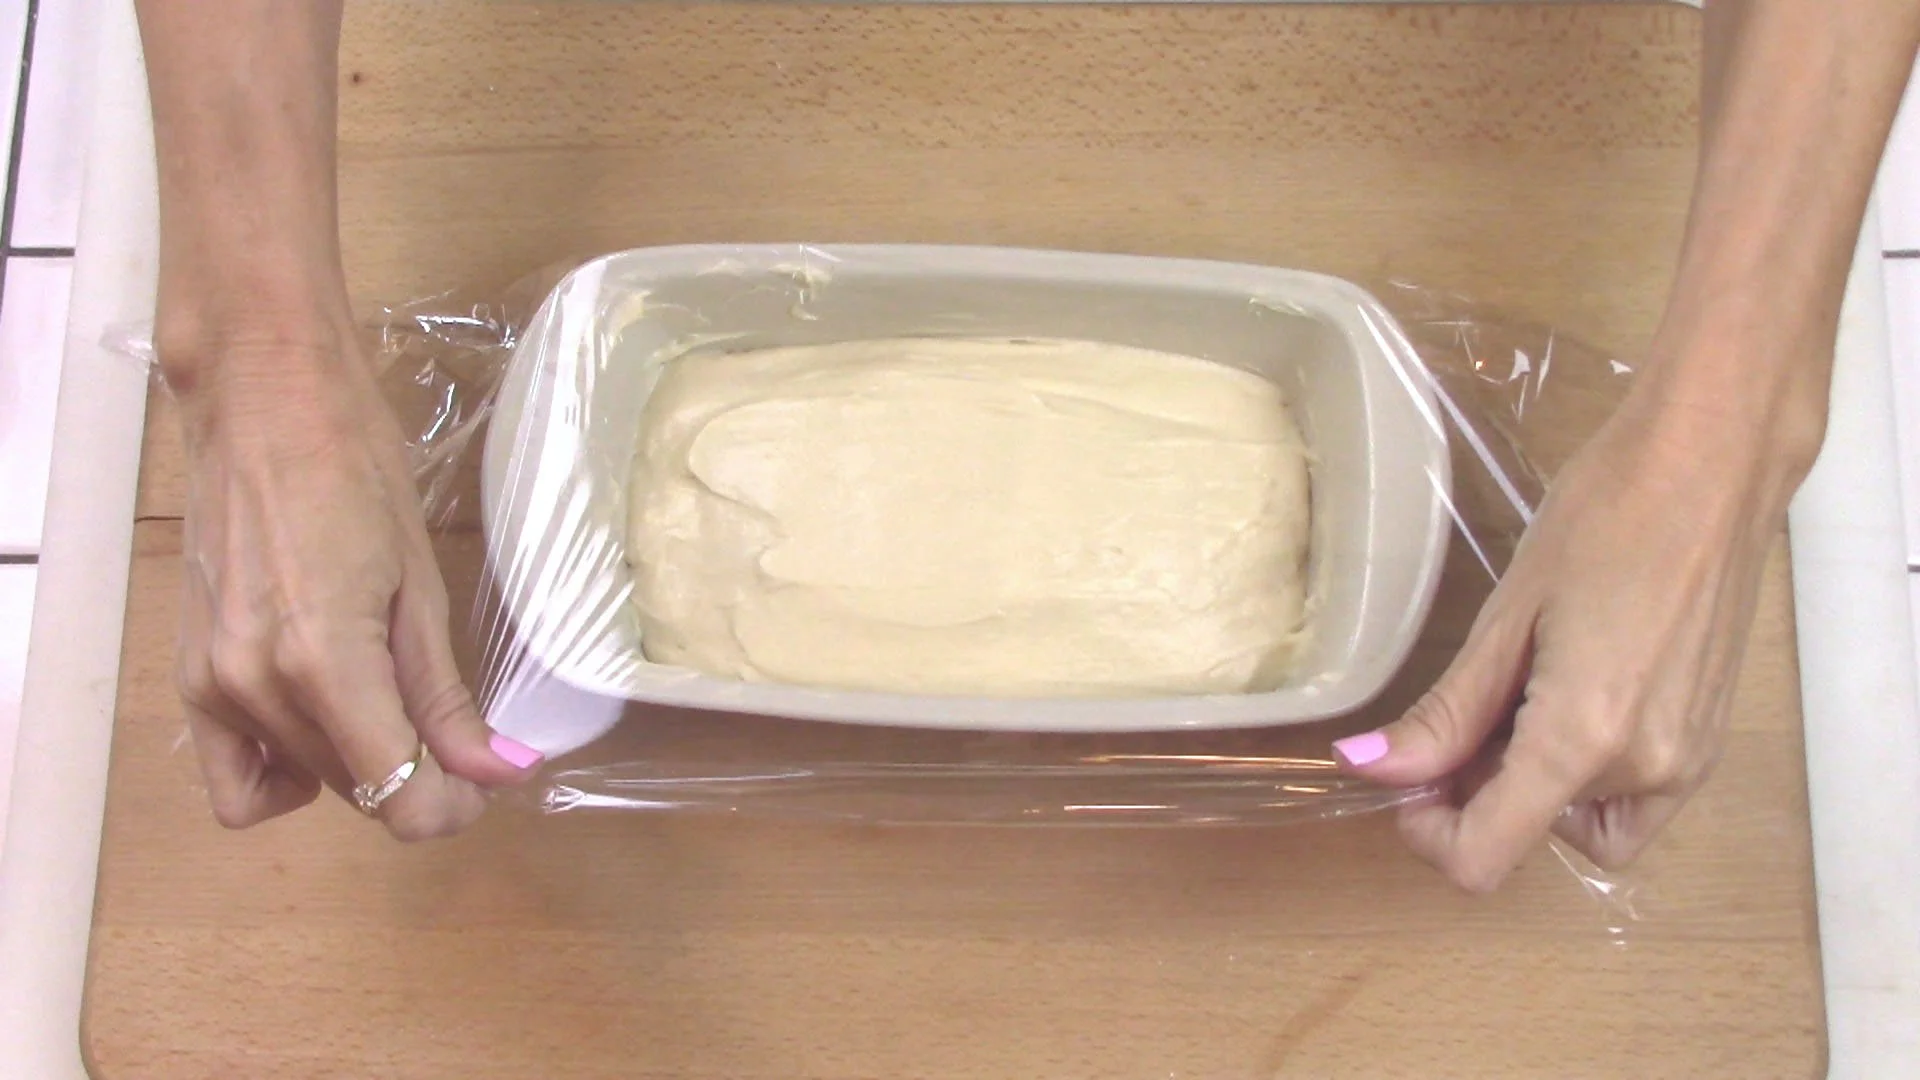
5
While yeast is proofing, in a medium mixing bowl, combine wet ingredients: butter, eggs, and apple cider vinegar.
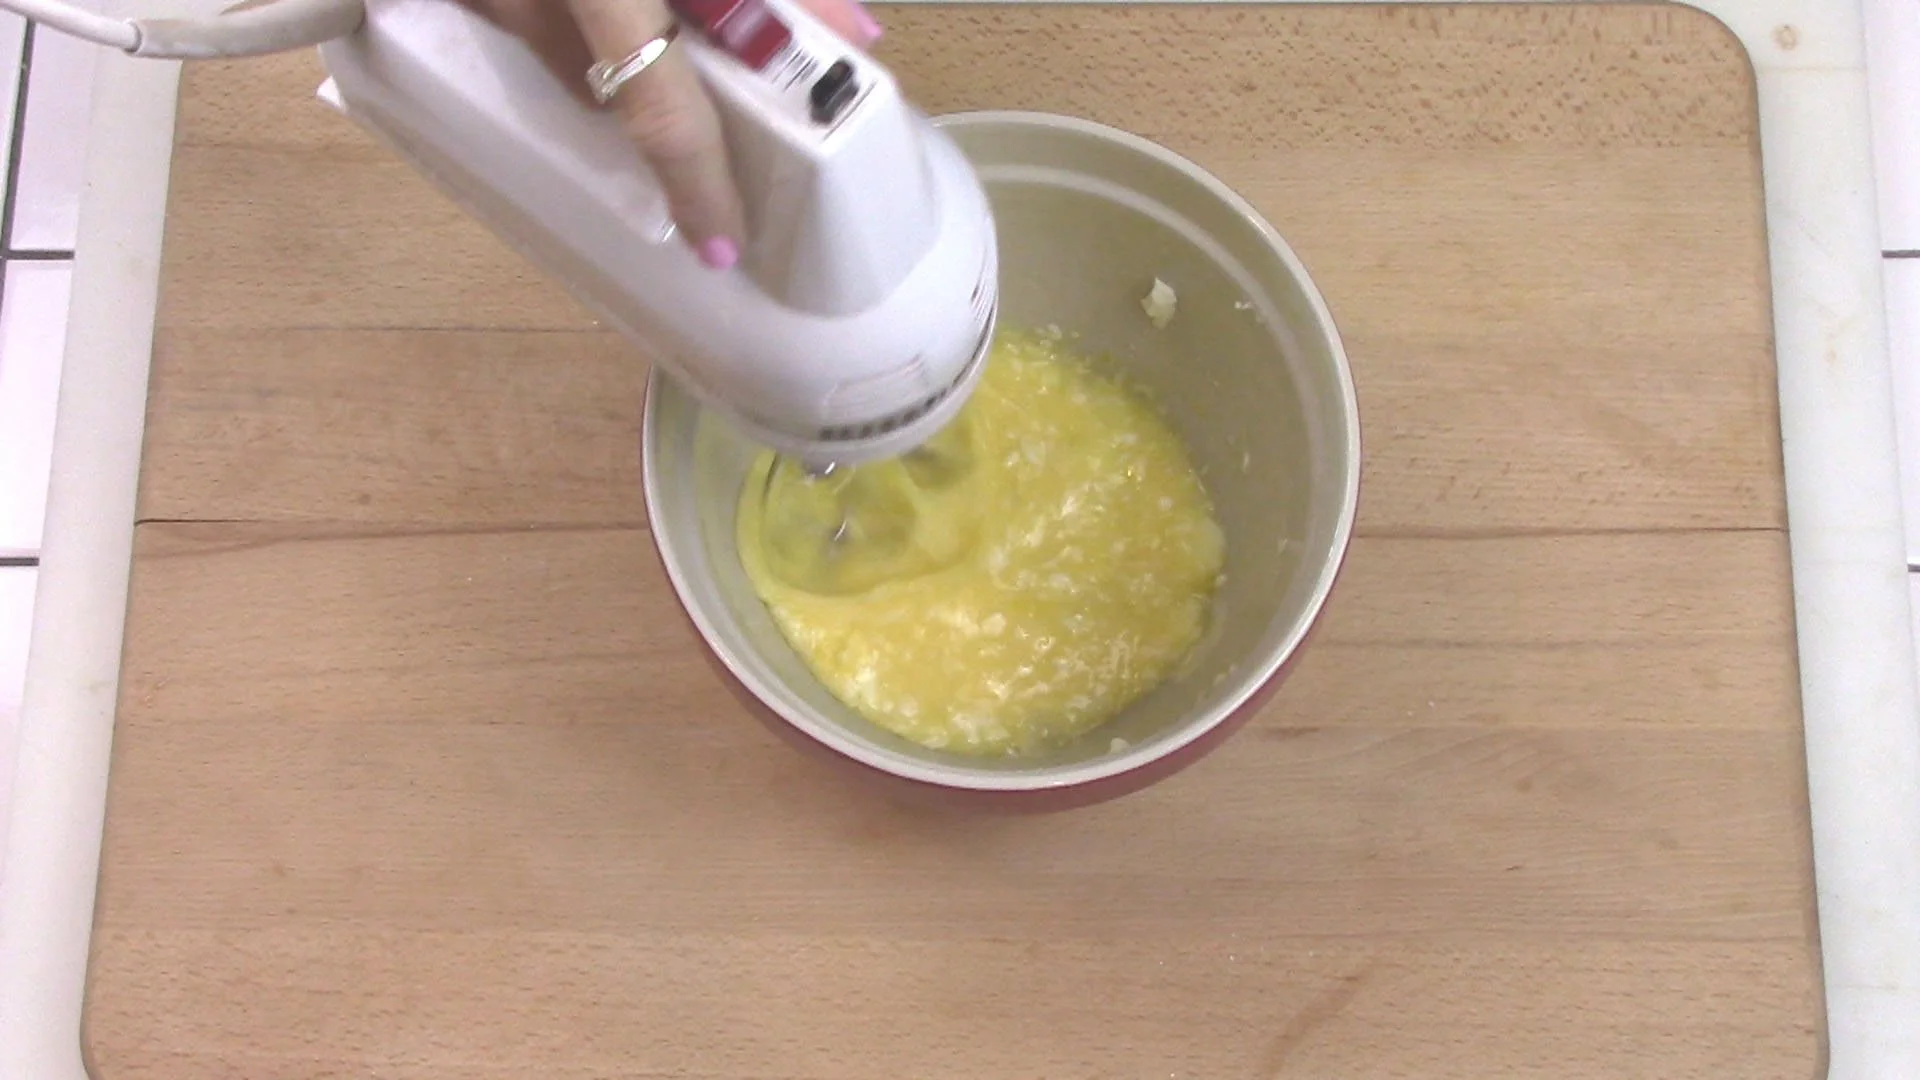
6
Mix well.
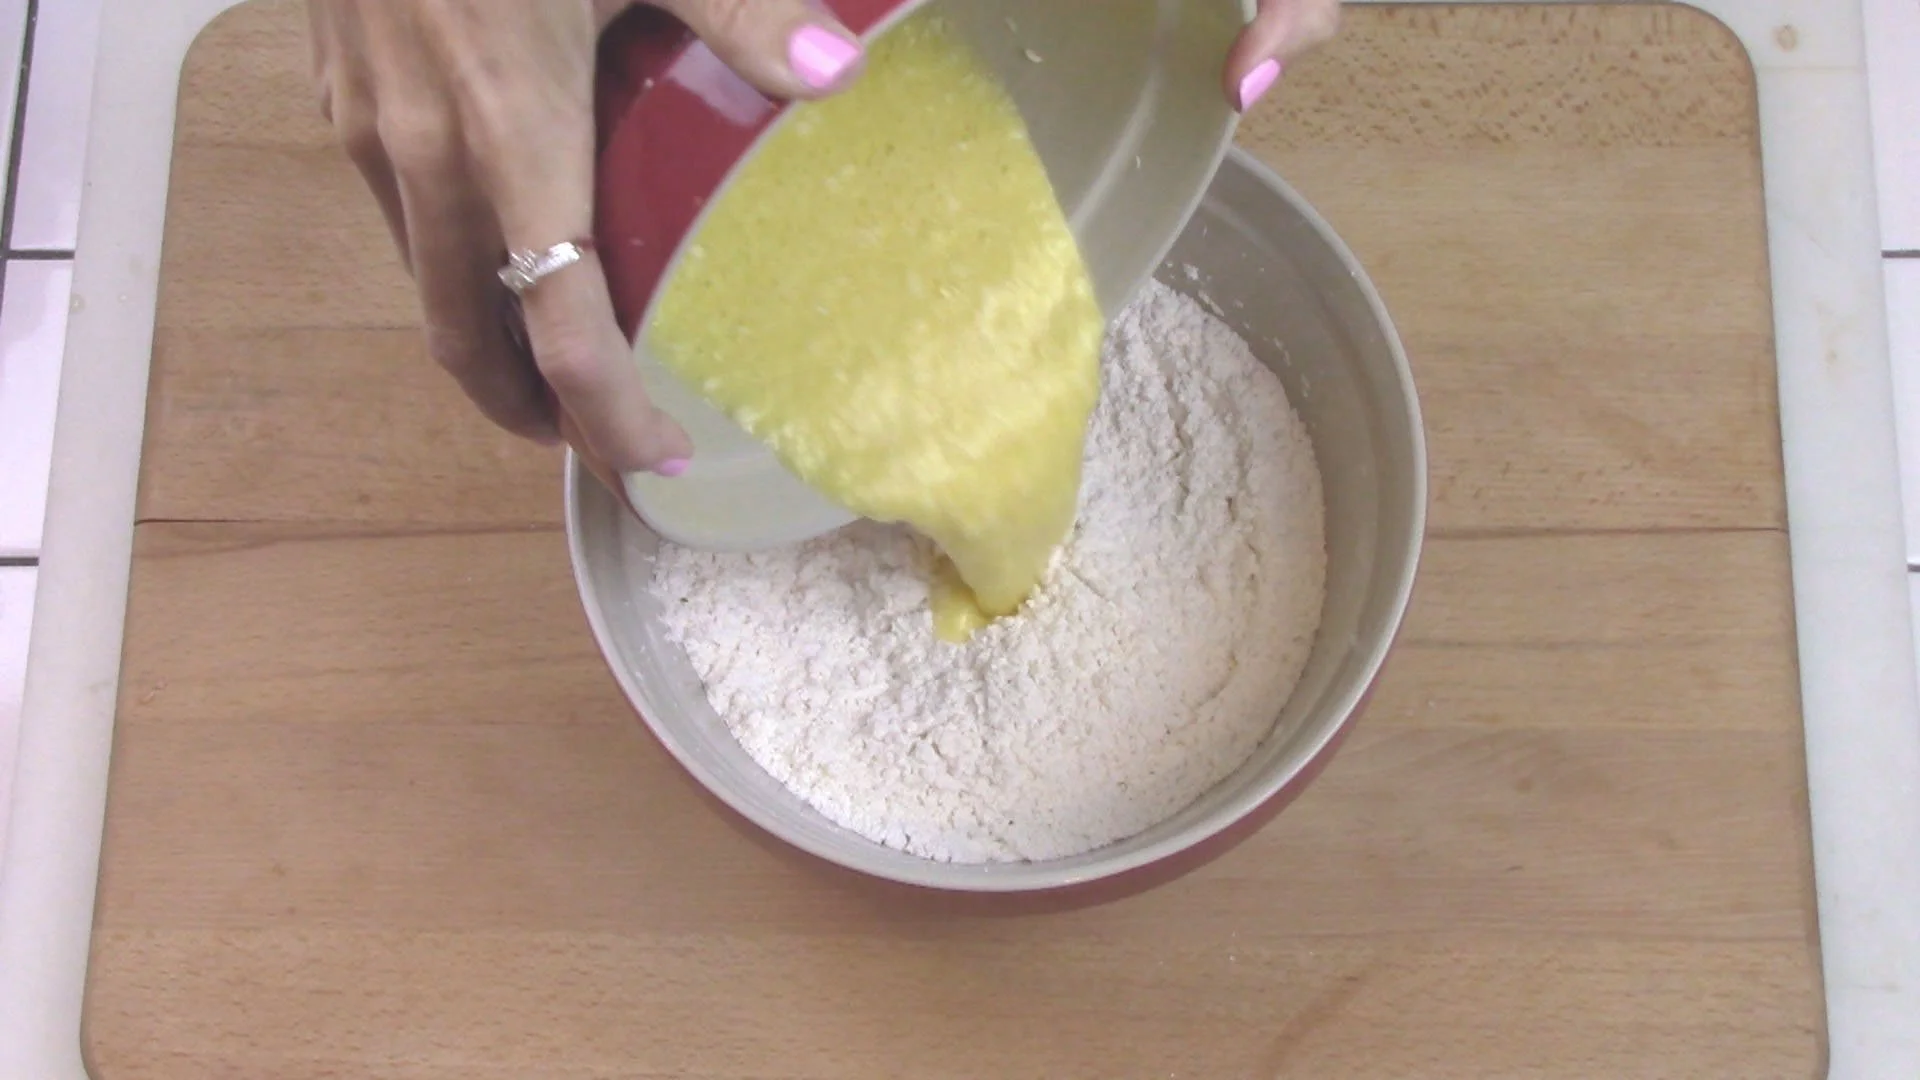
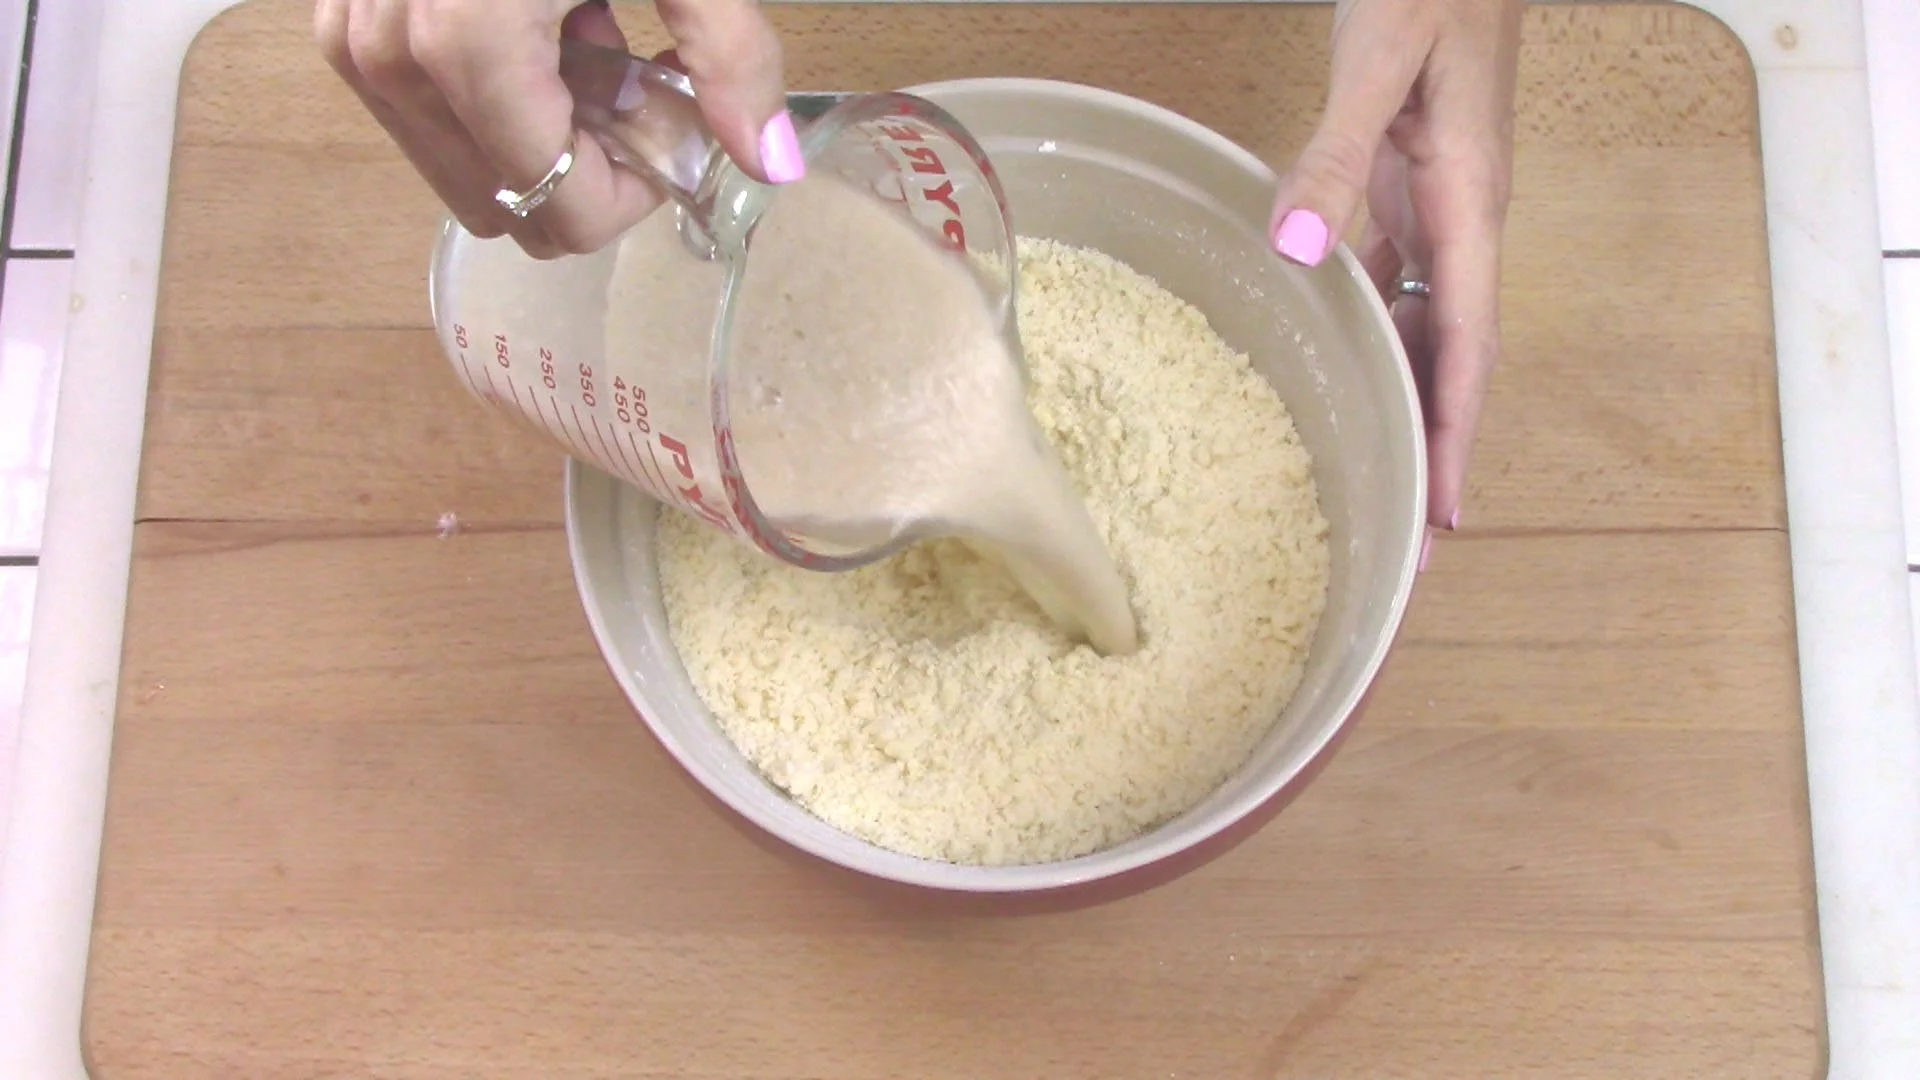
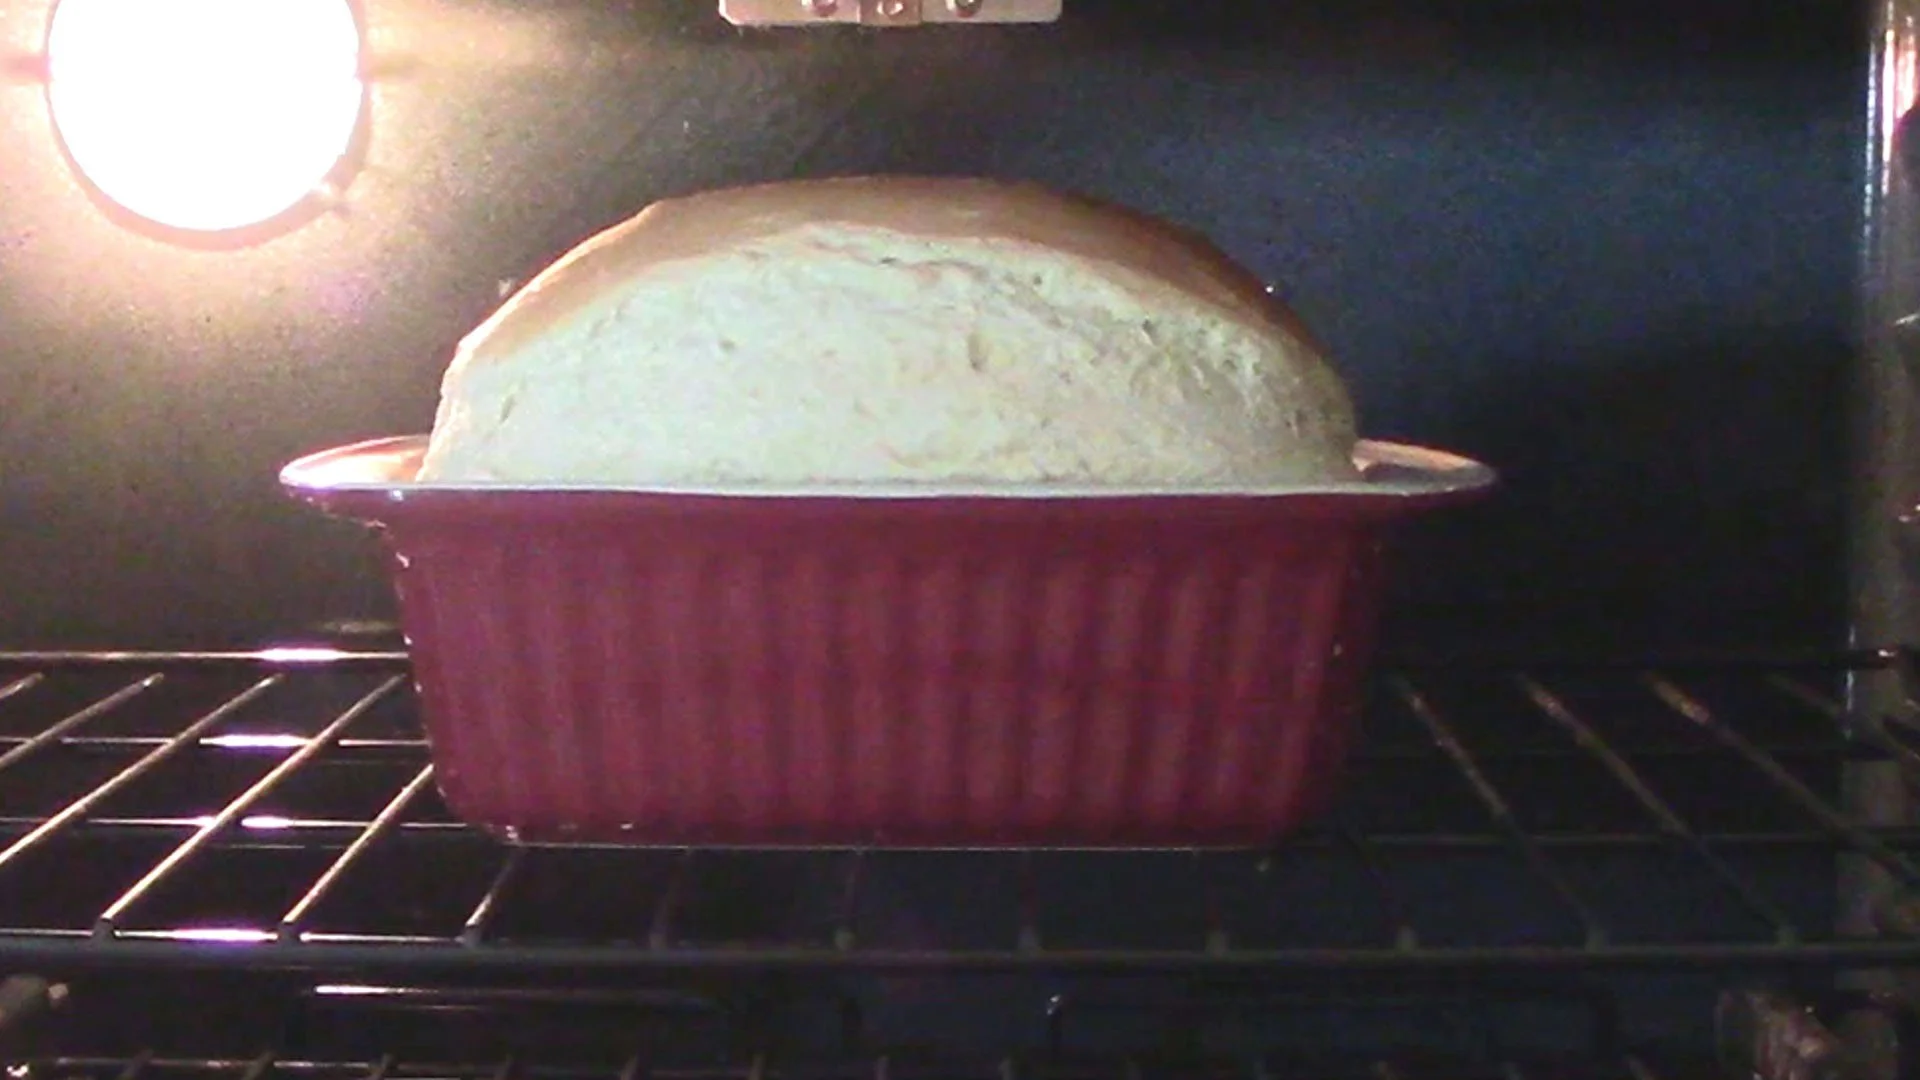
7
Add this wet ingredients mixture into your dry ingredients.

8
Mix on low until everything is combined. It will be crumbly.
9
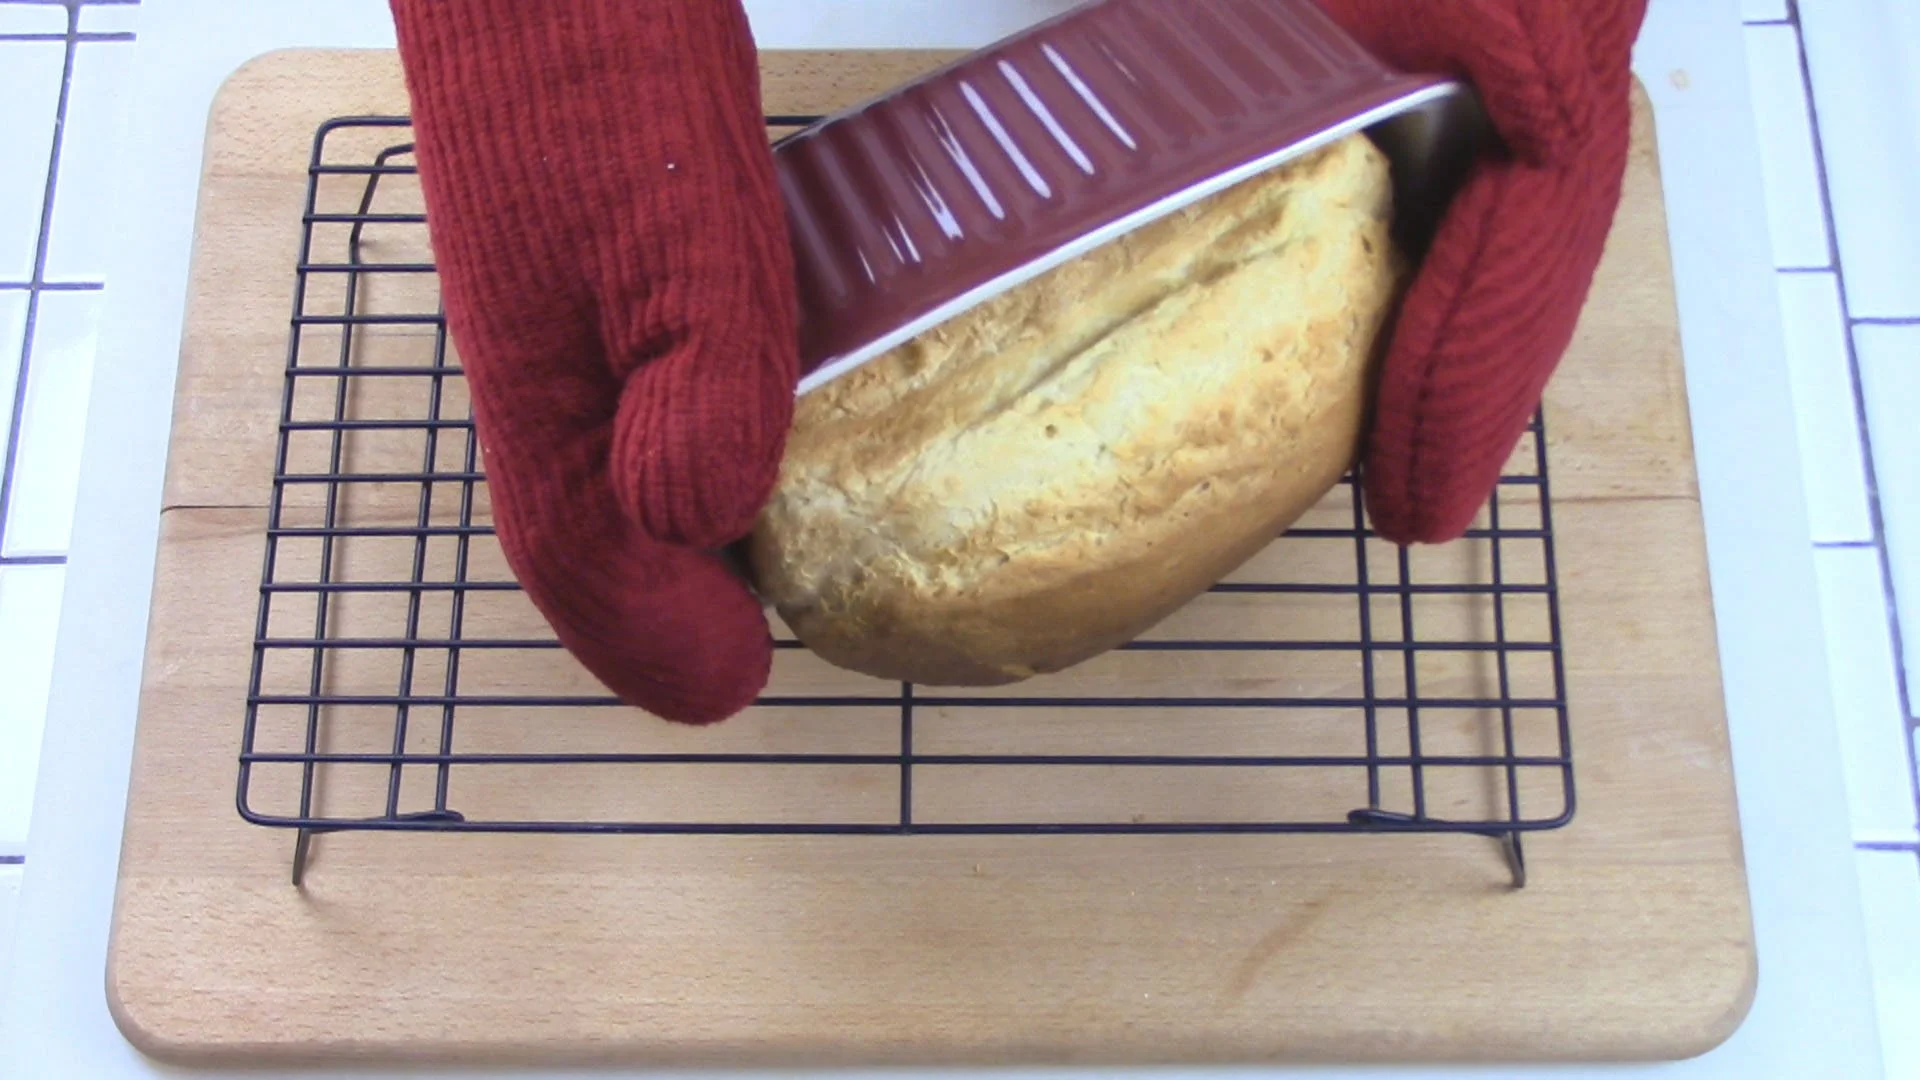
After 5 minutes have passed, check to see if the yeast mix is foamy. If it is, continue with the recipe. If not, stop here and proof another packet of yeast.
10
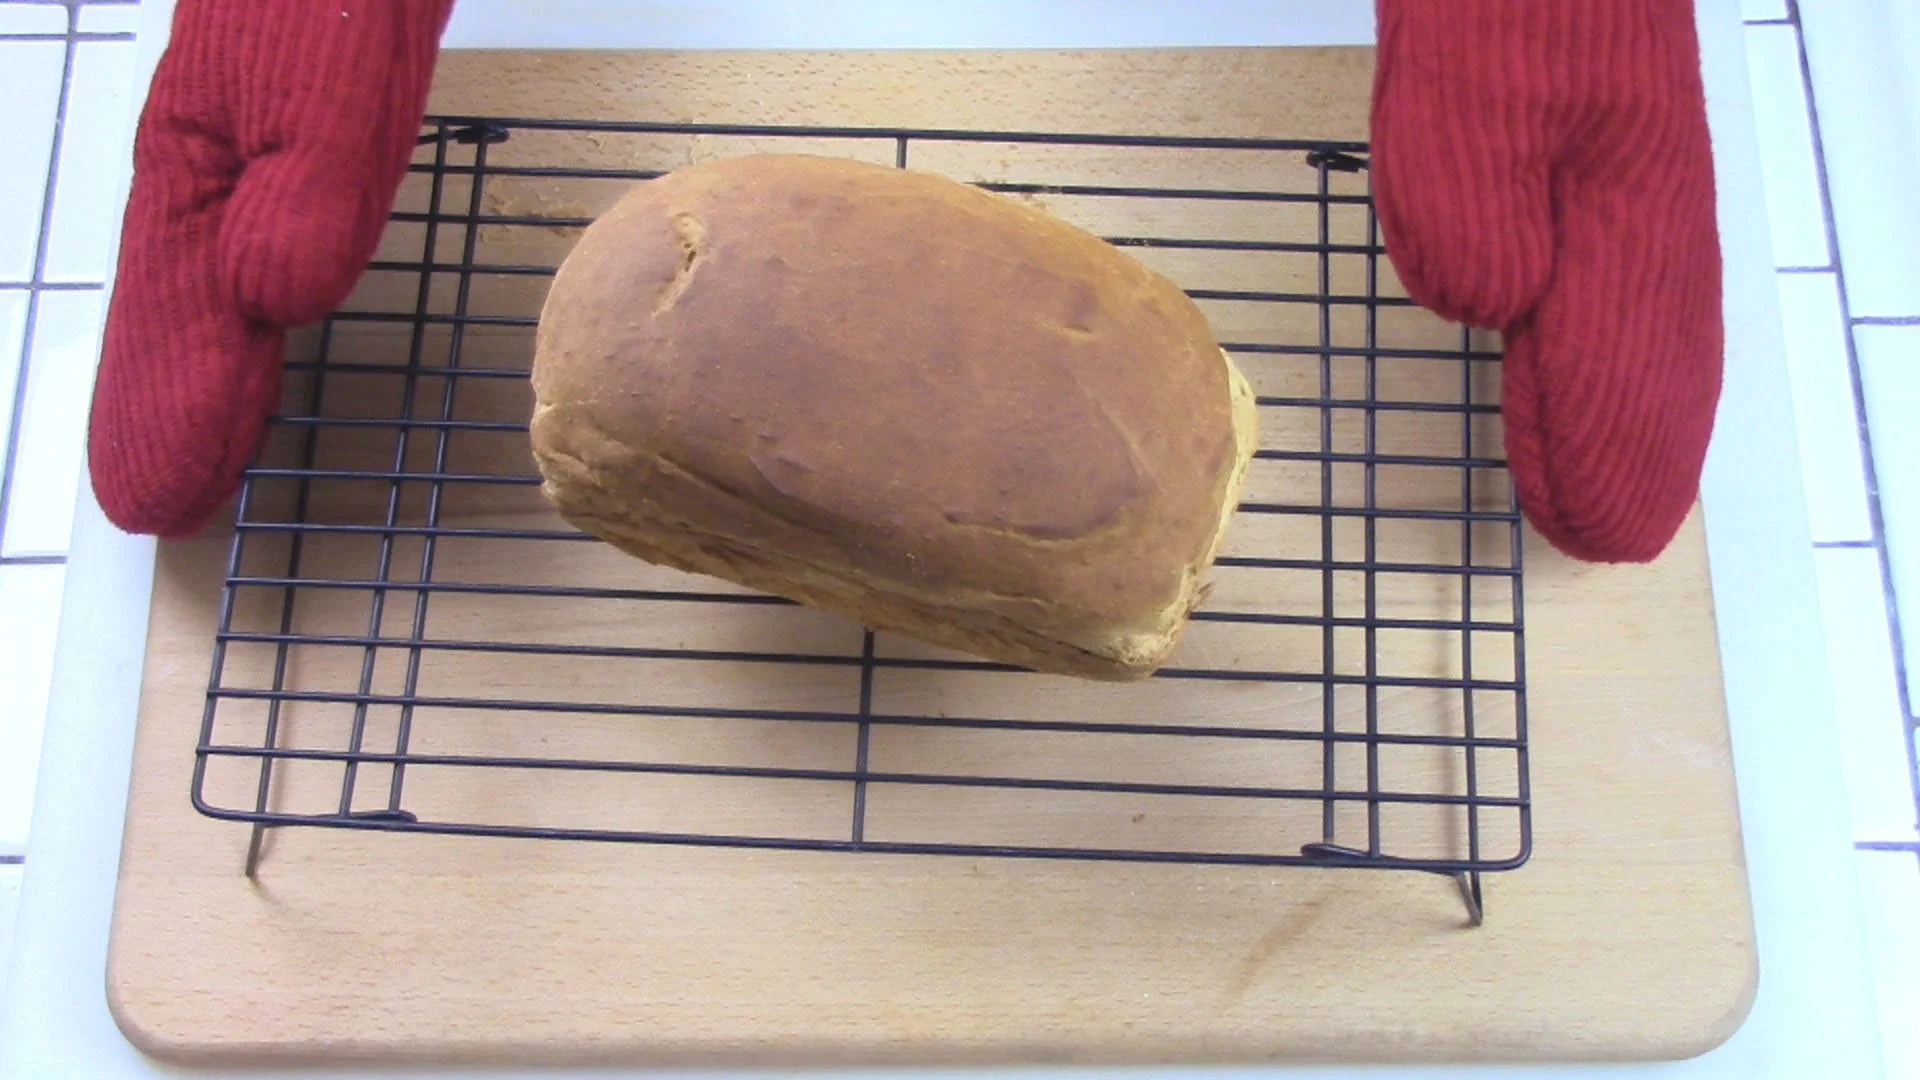
Pour your foaming yeast mixture into your batter.
11
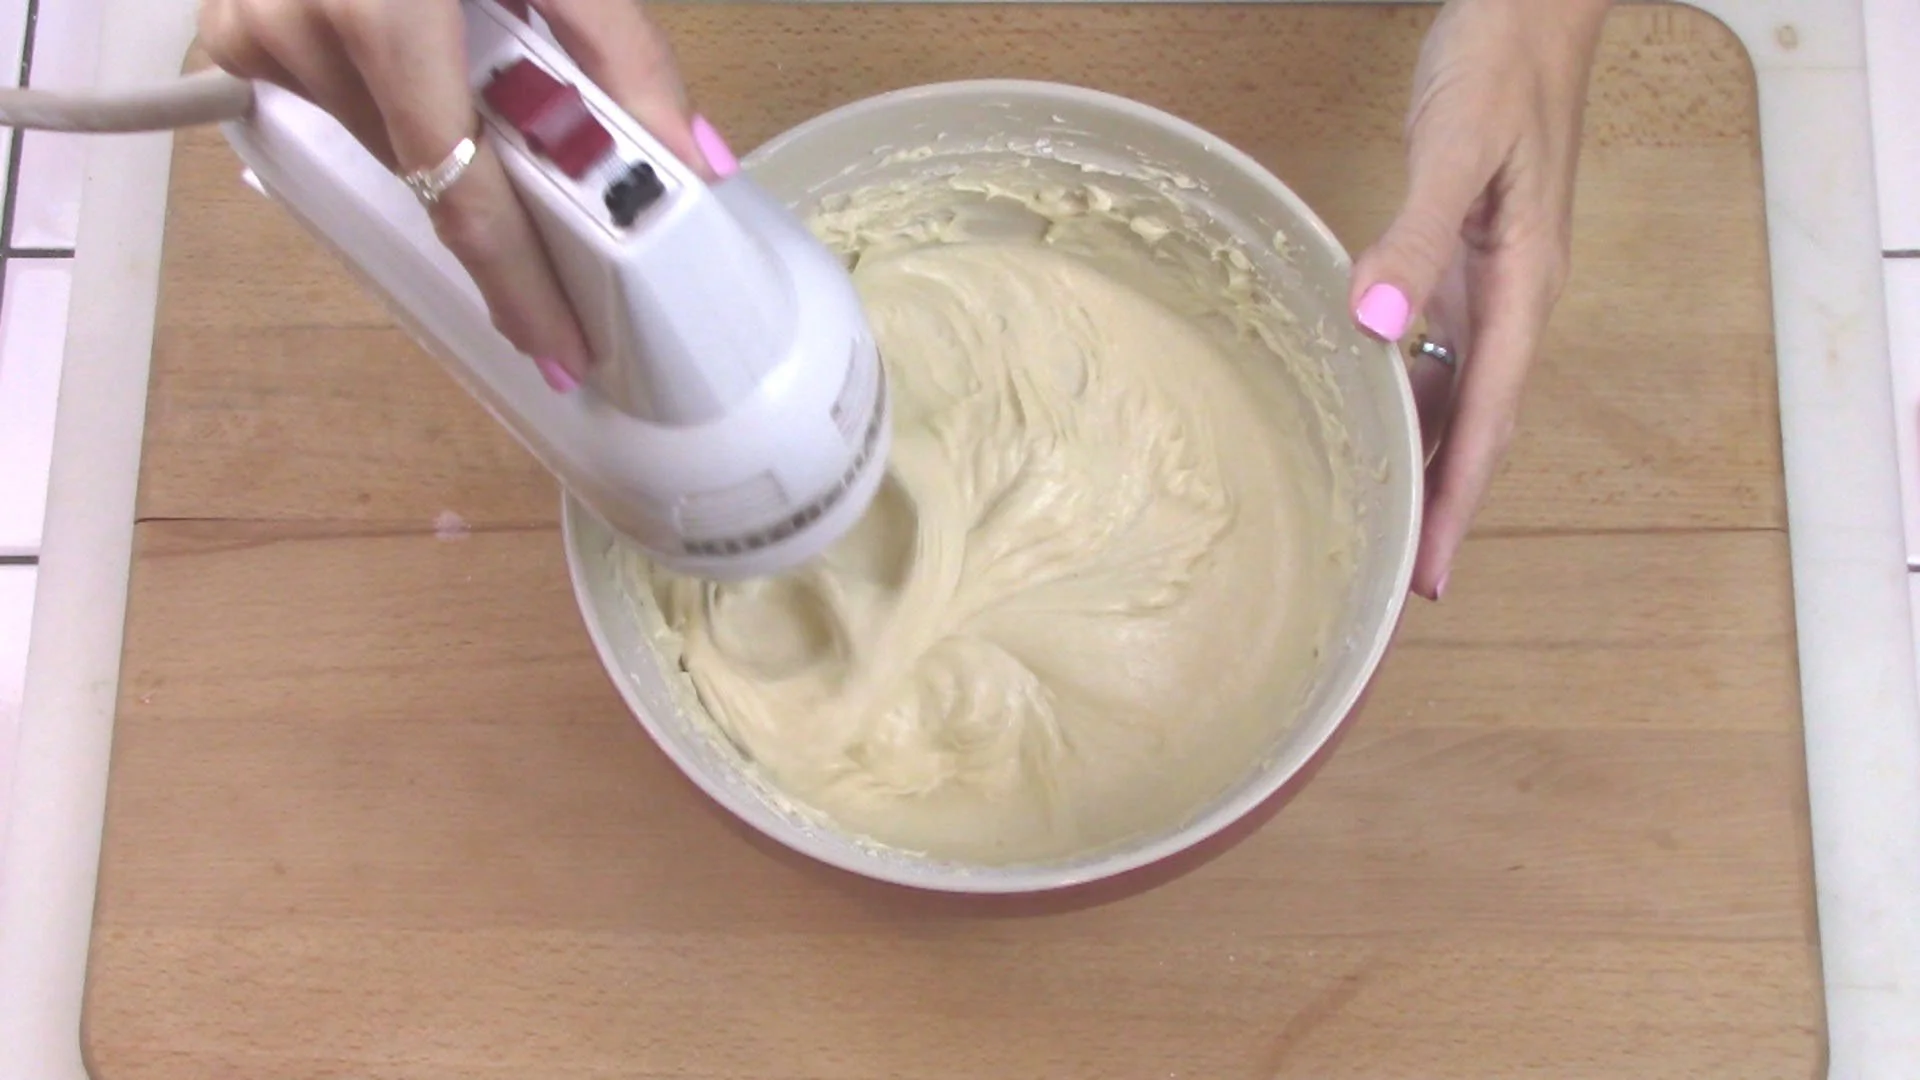
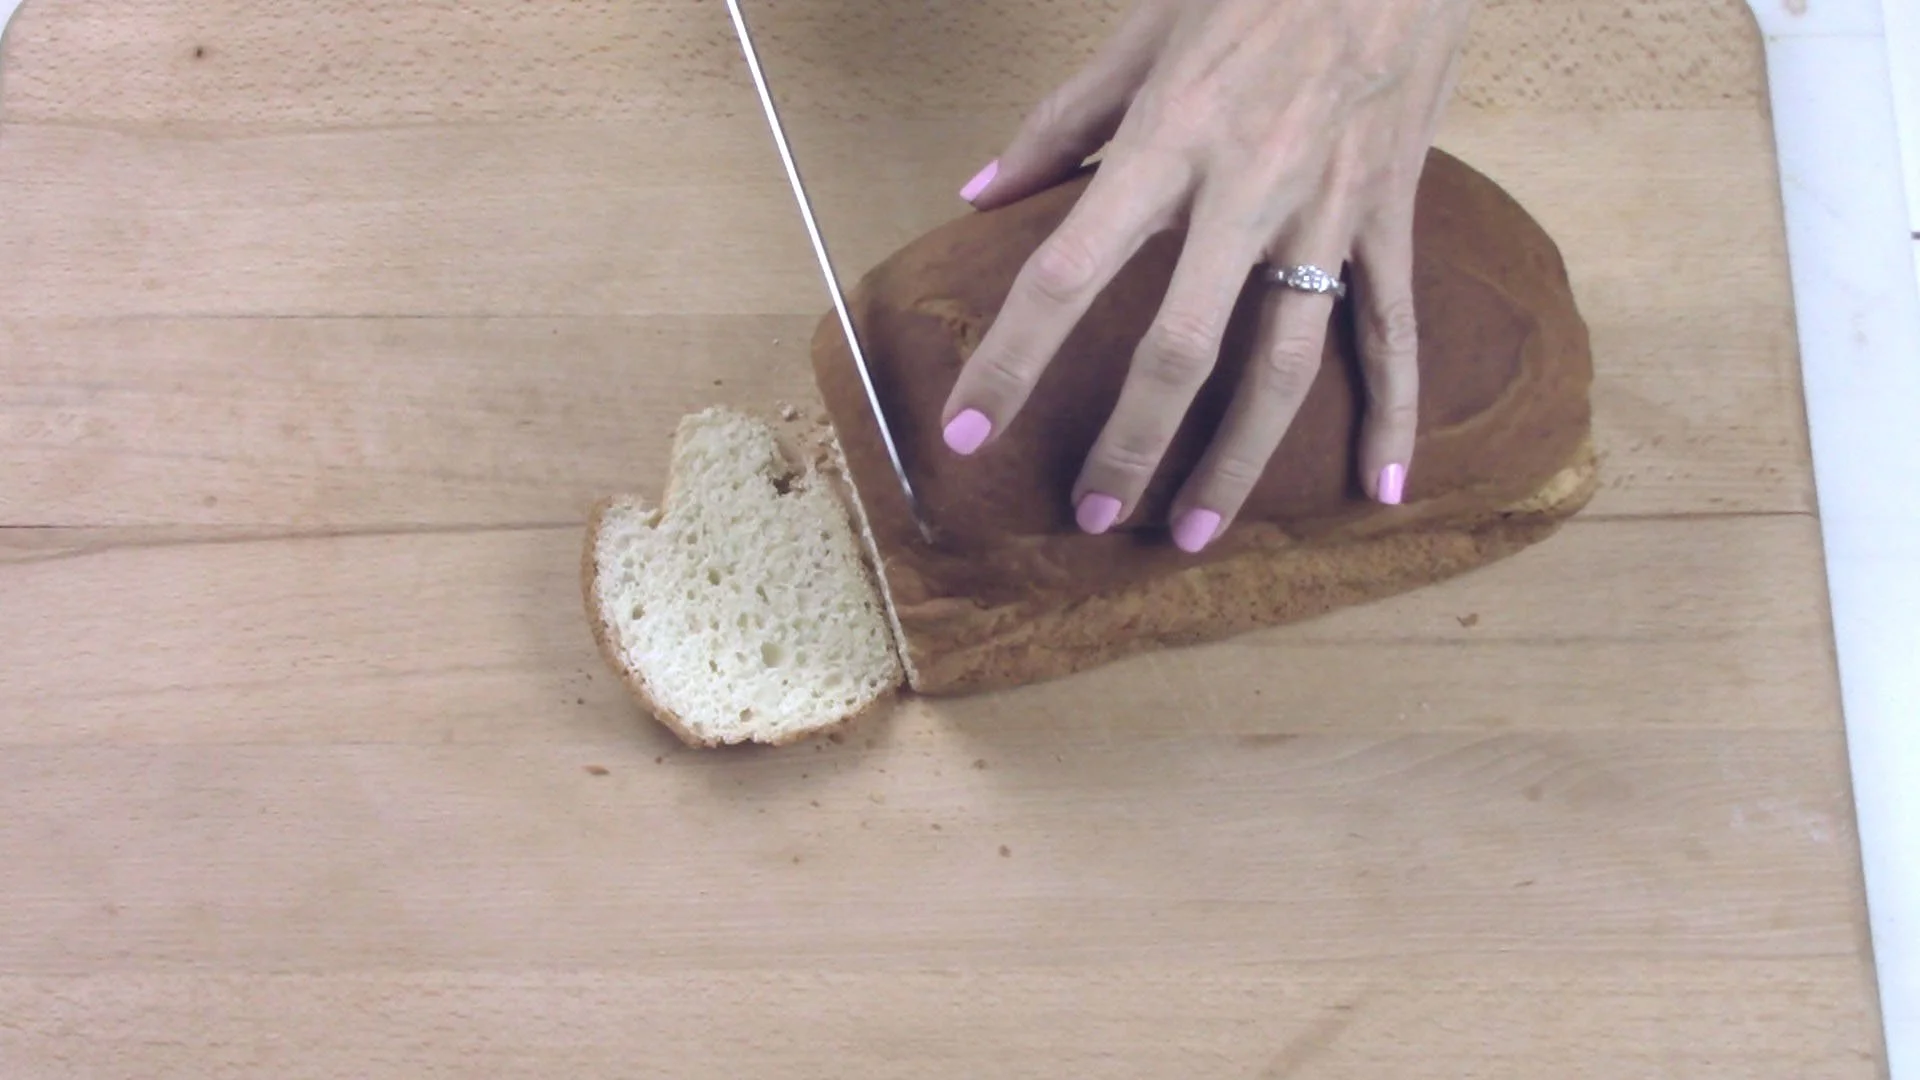
Beat on low until combined (about 30 seconds), then mix on medium/high for 7 minutes. Please don’t skip the mixing time…it’s important to the results!
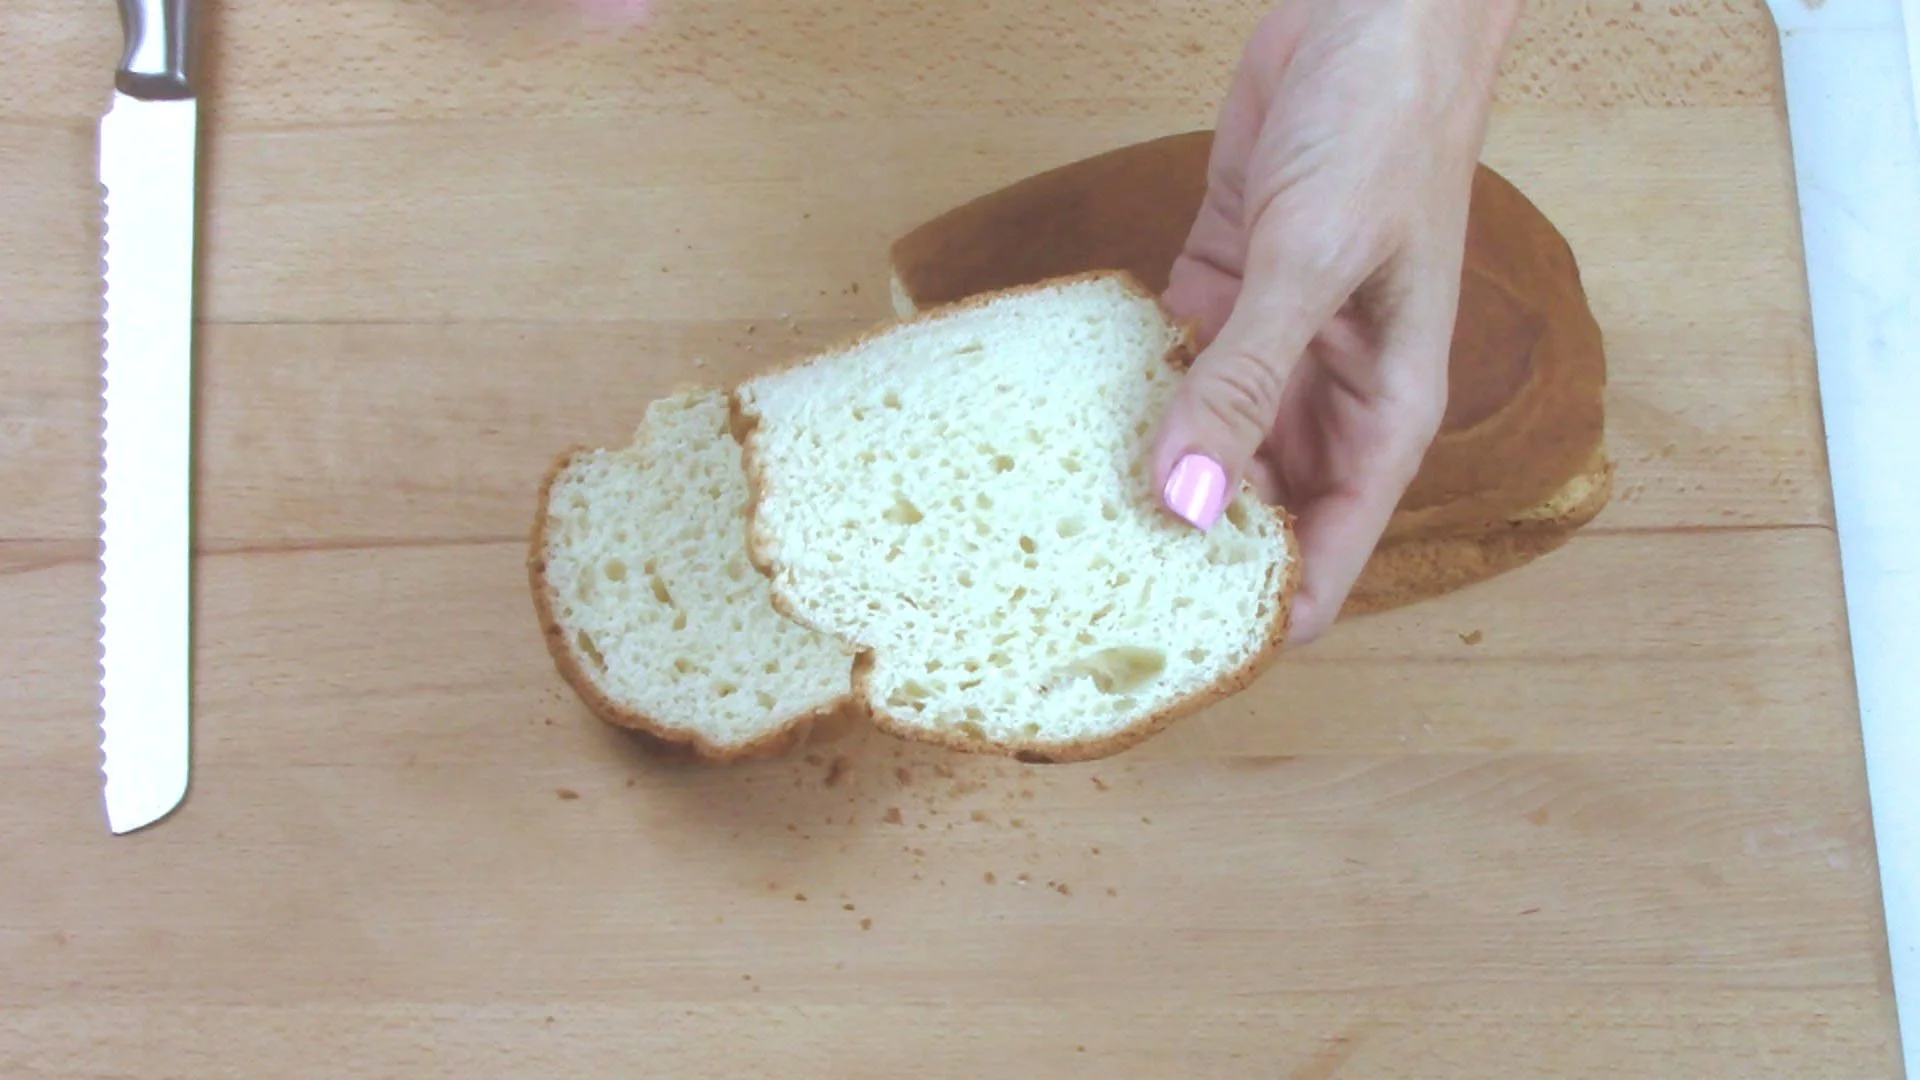
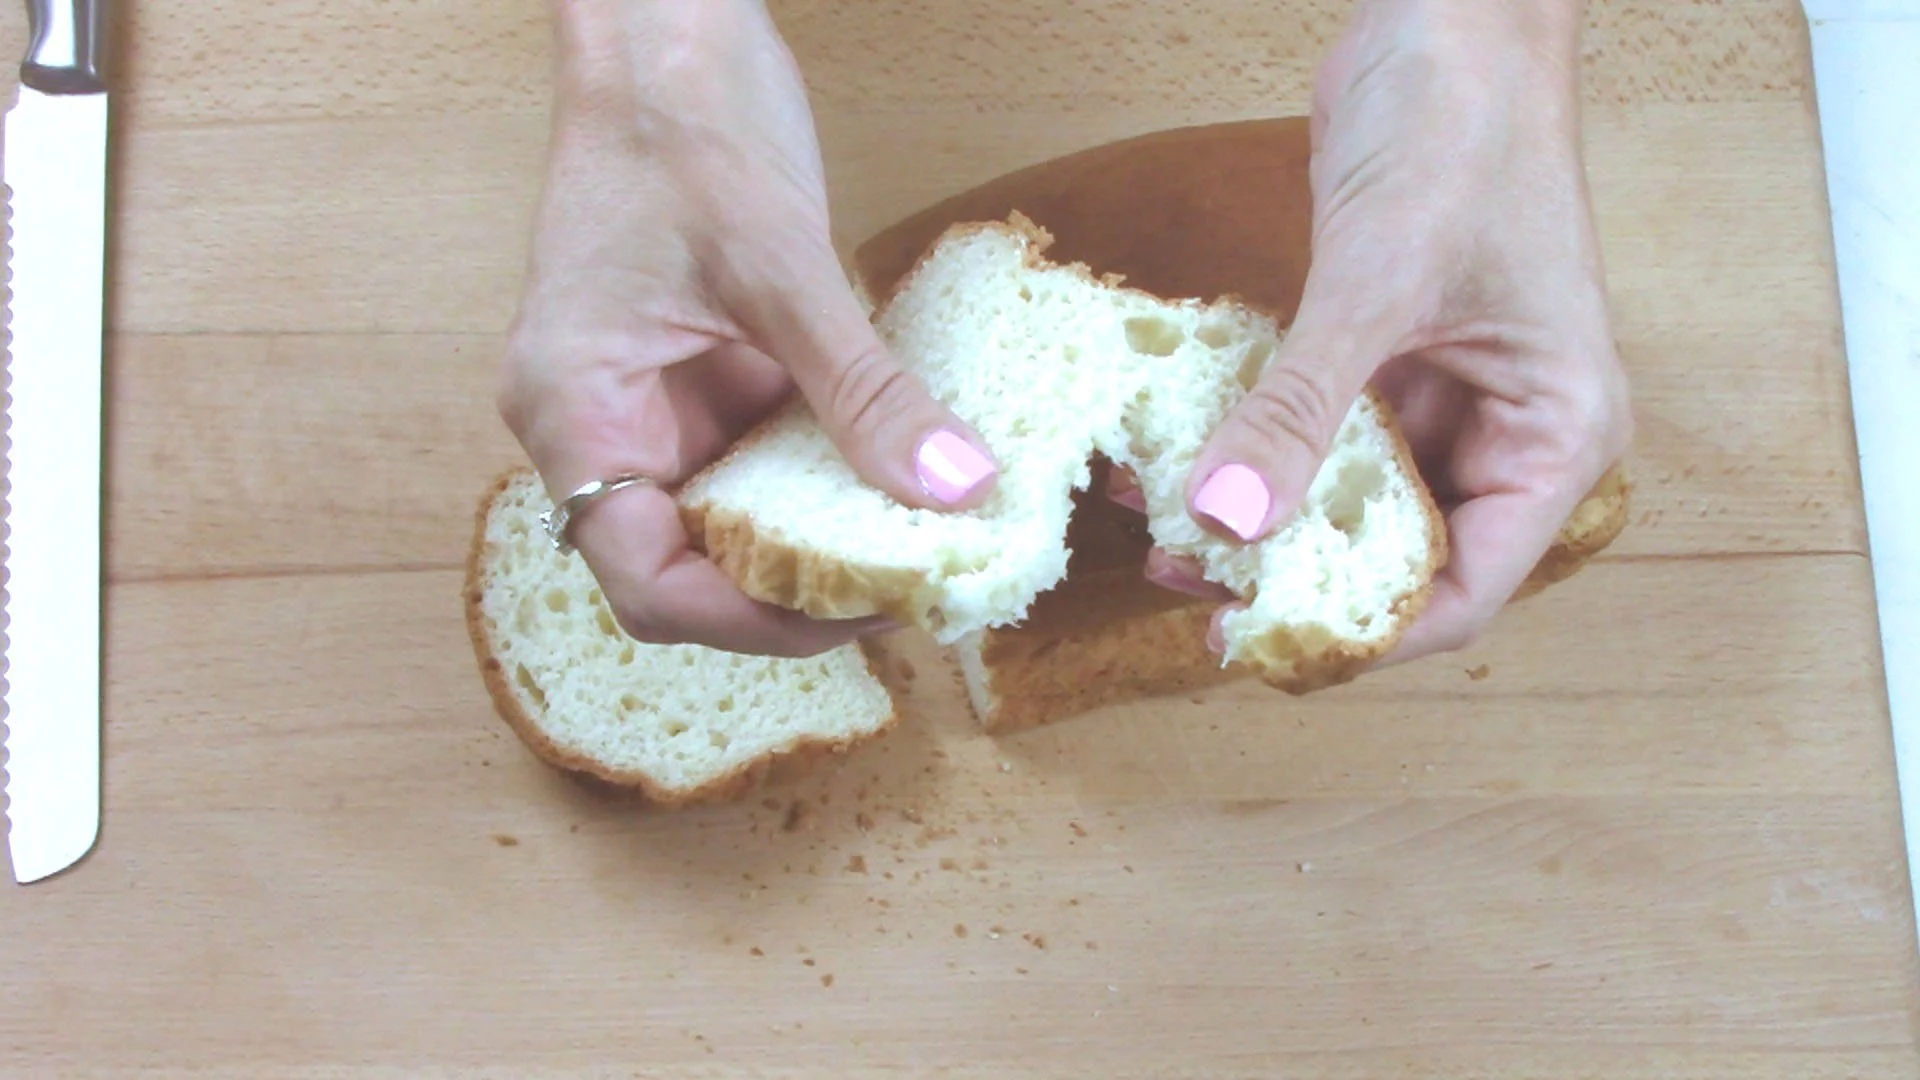
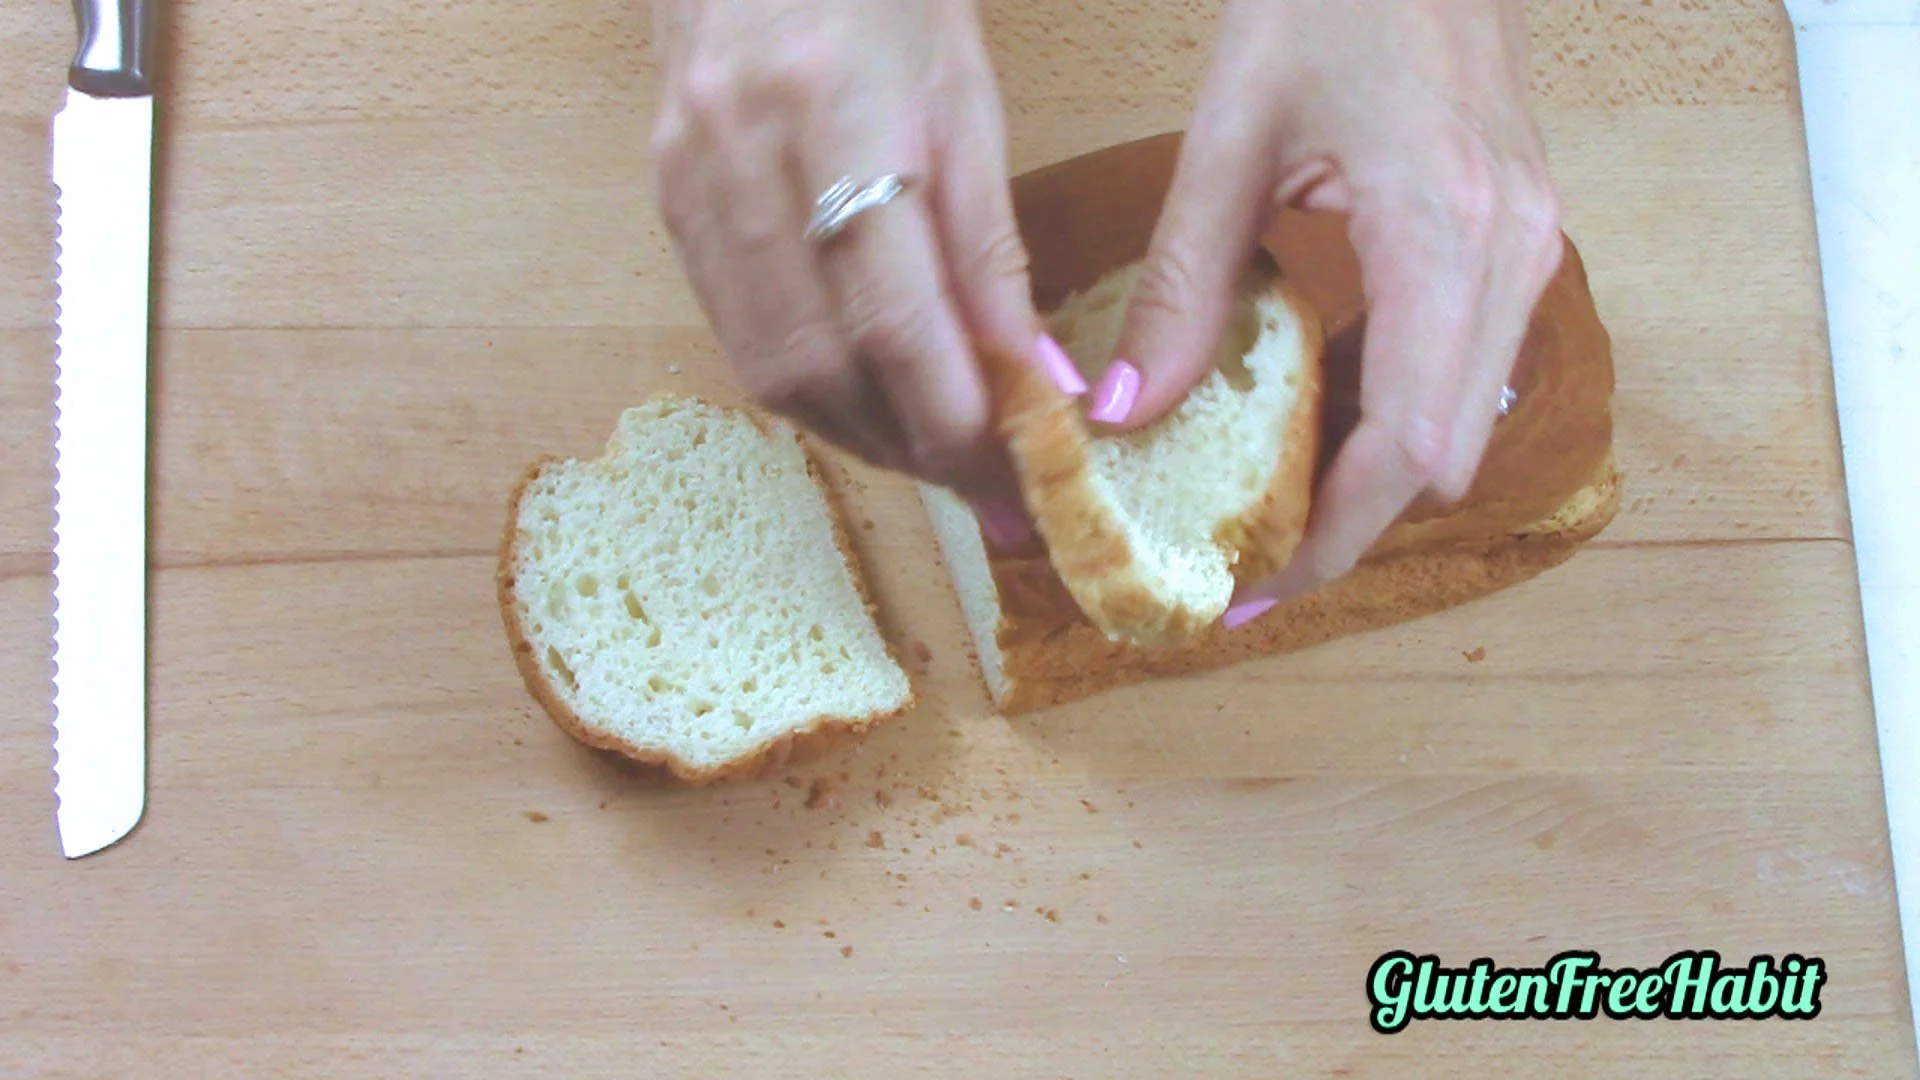
12
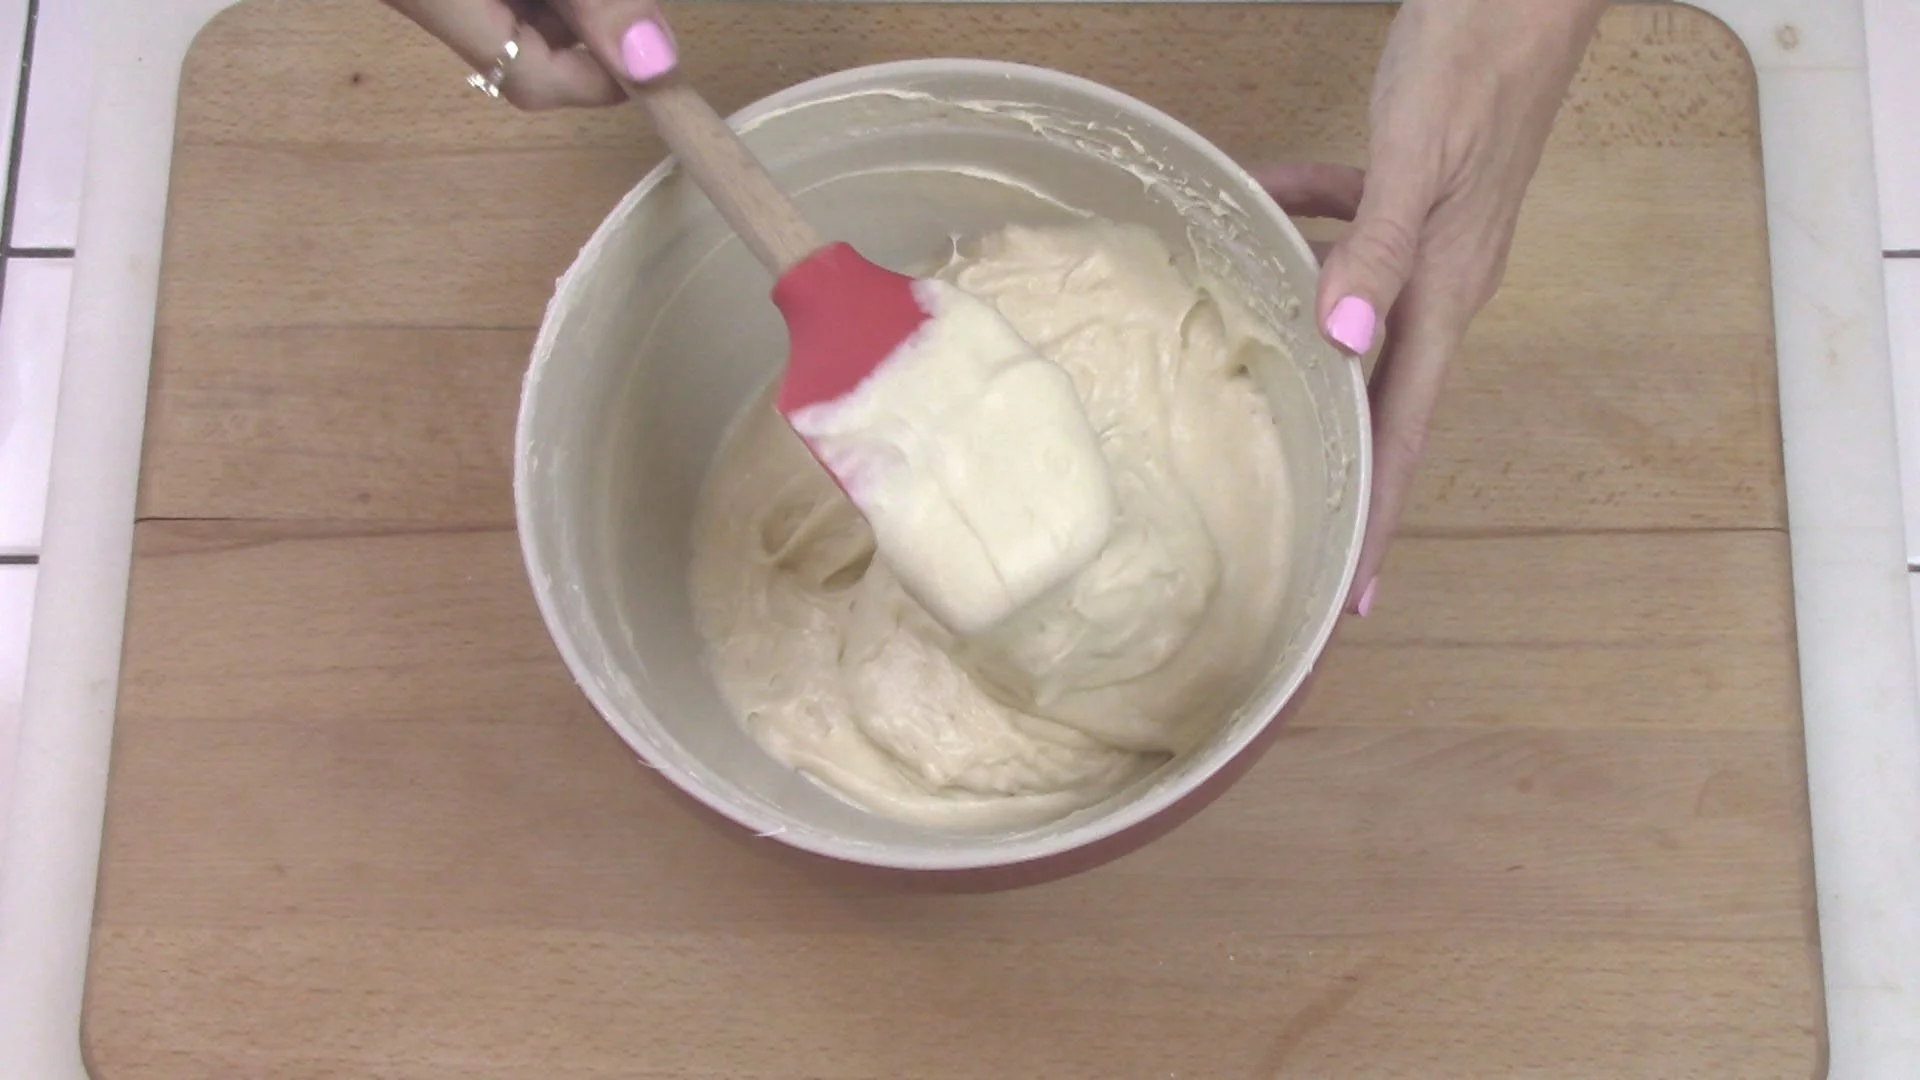
Your batter will resemble a thick cake batter. (Don't expect it to look like a gluten dough that you will knead...not even close!)
13
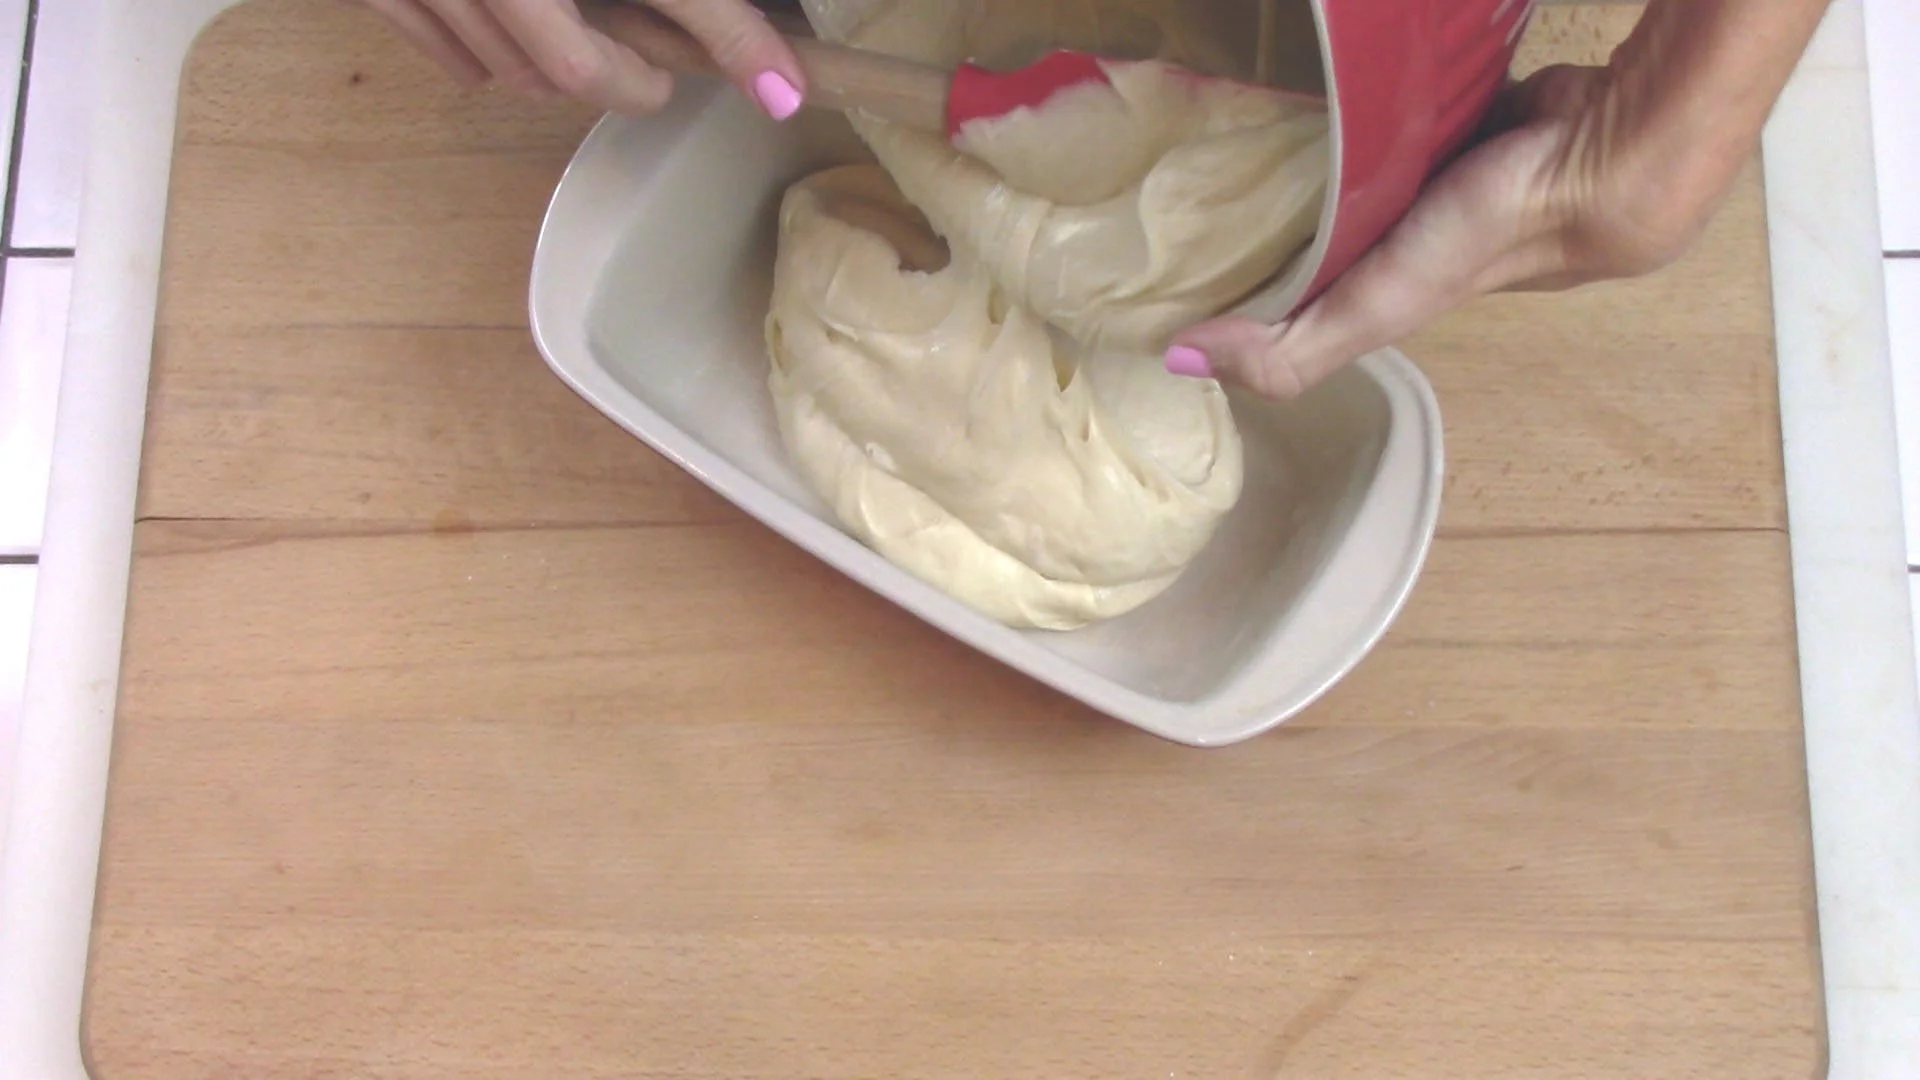
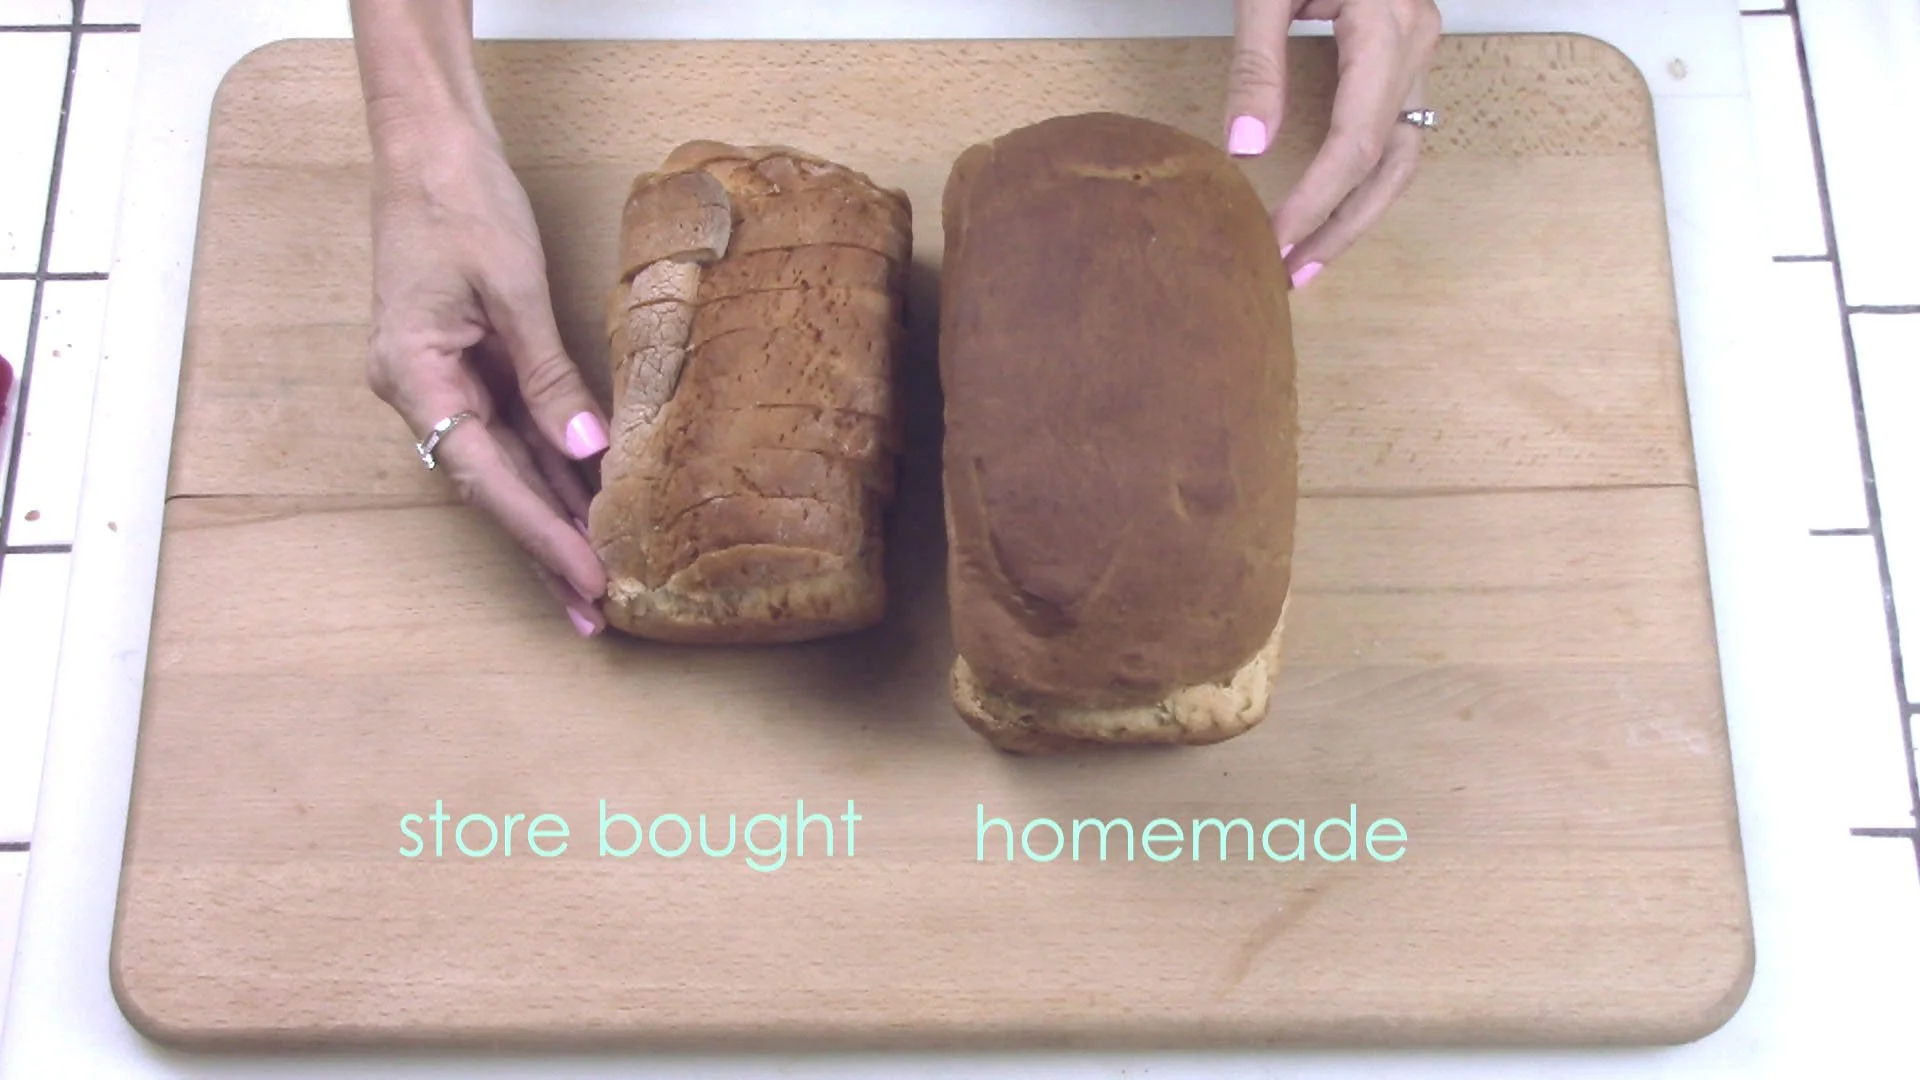
Pour into your prepared, greased loaf pan.

14
Smooth the top with the back of a spoon or spatula.
15
Cover with plastic wrap and set in warm place to rise until dough reaches top edge of pan (about 30-40 minutes). As the dough is rising, preheat your oven to 375°. Toward end of rising time, remove the plastic wrap just before dough touches it. Allow to continue rising as needed.
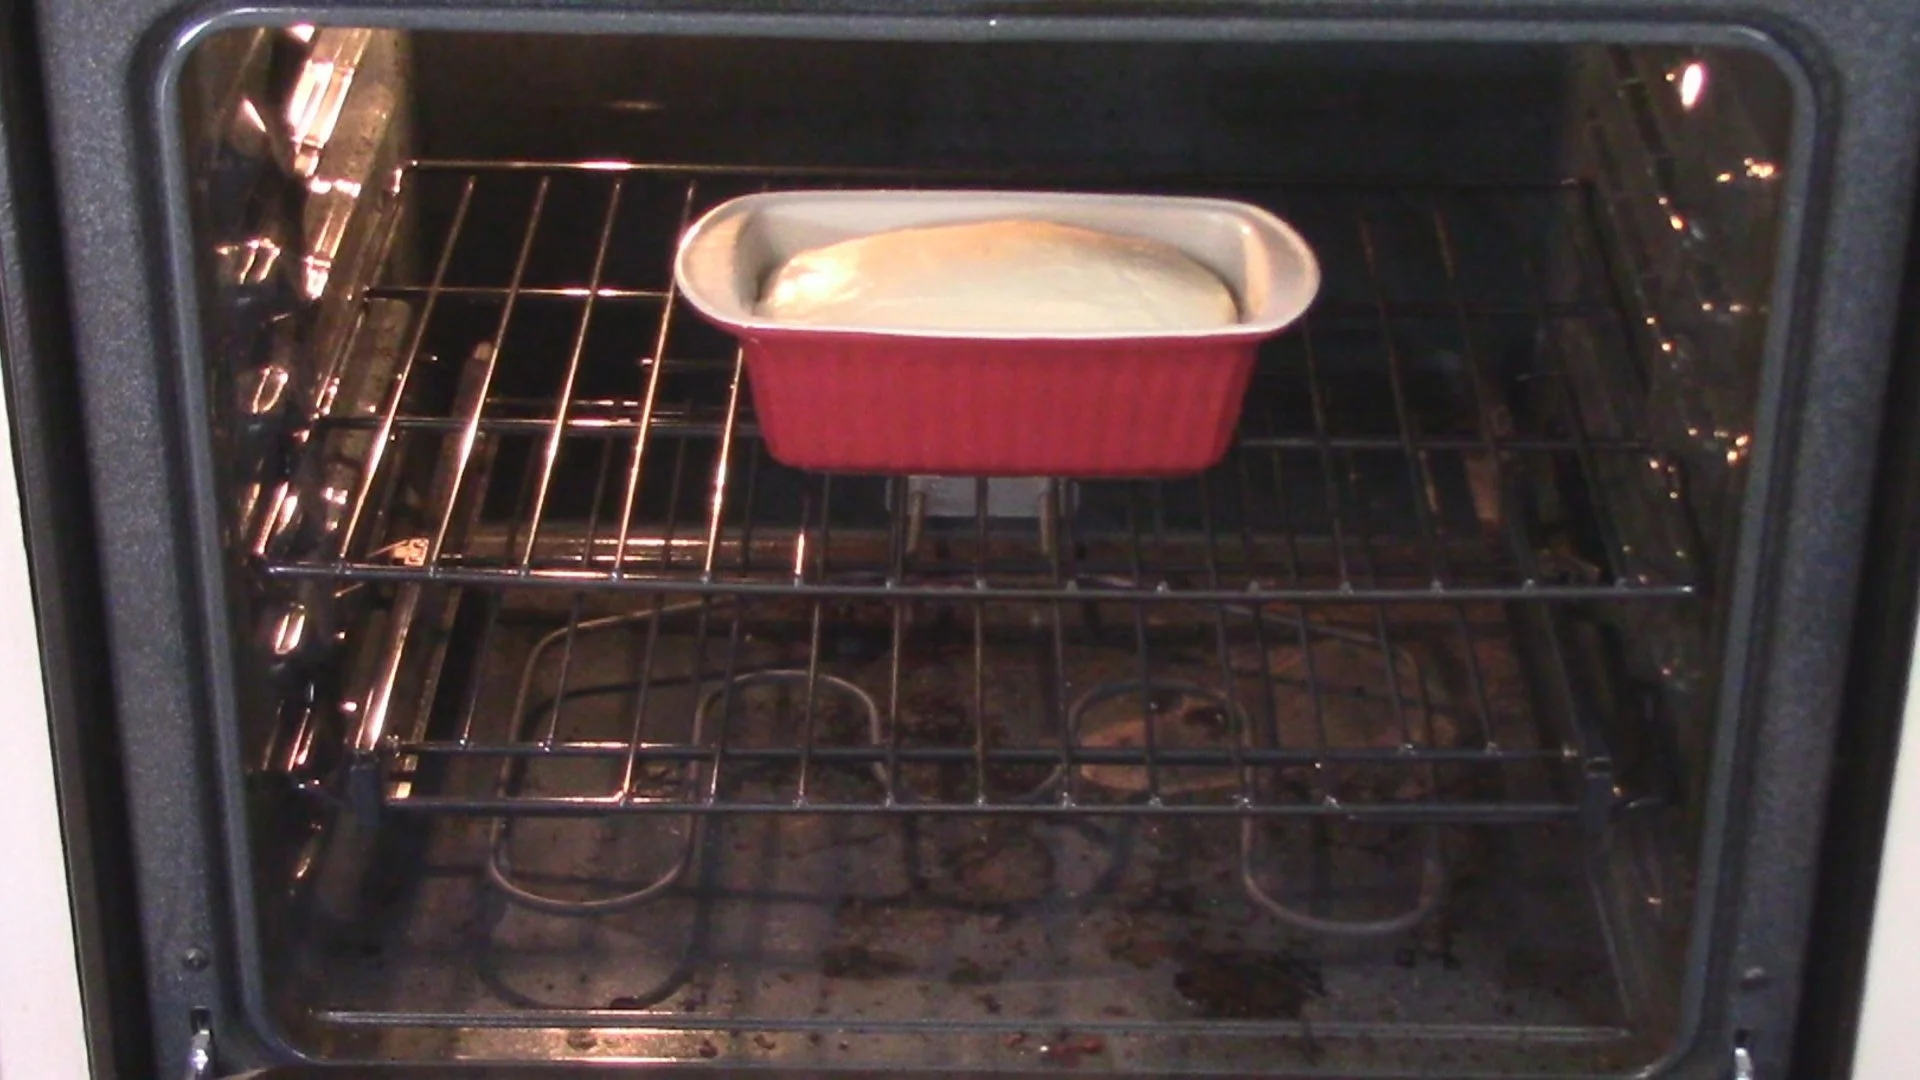
16
Bake in preheated 375 degree oven.
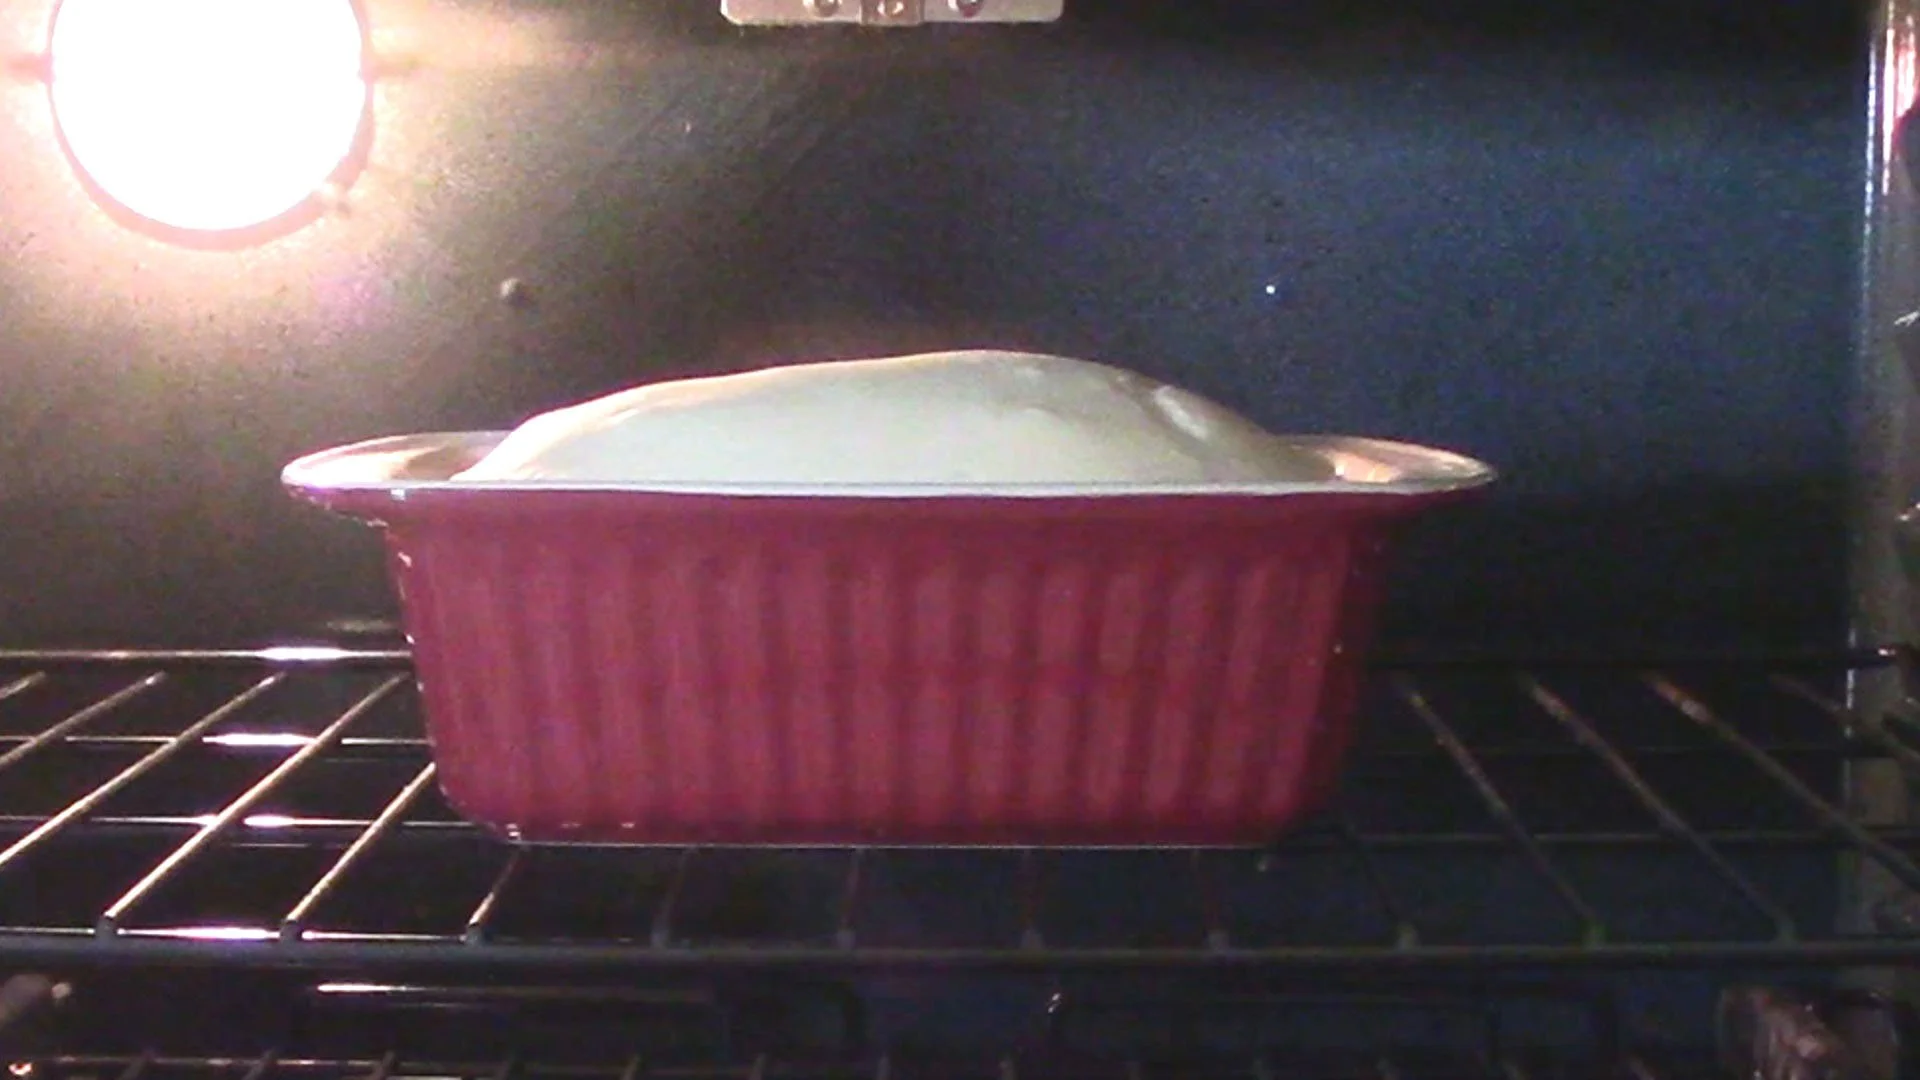
17
Your bread will rise...
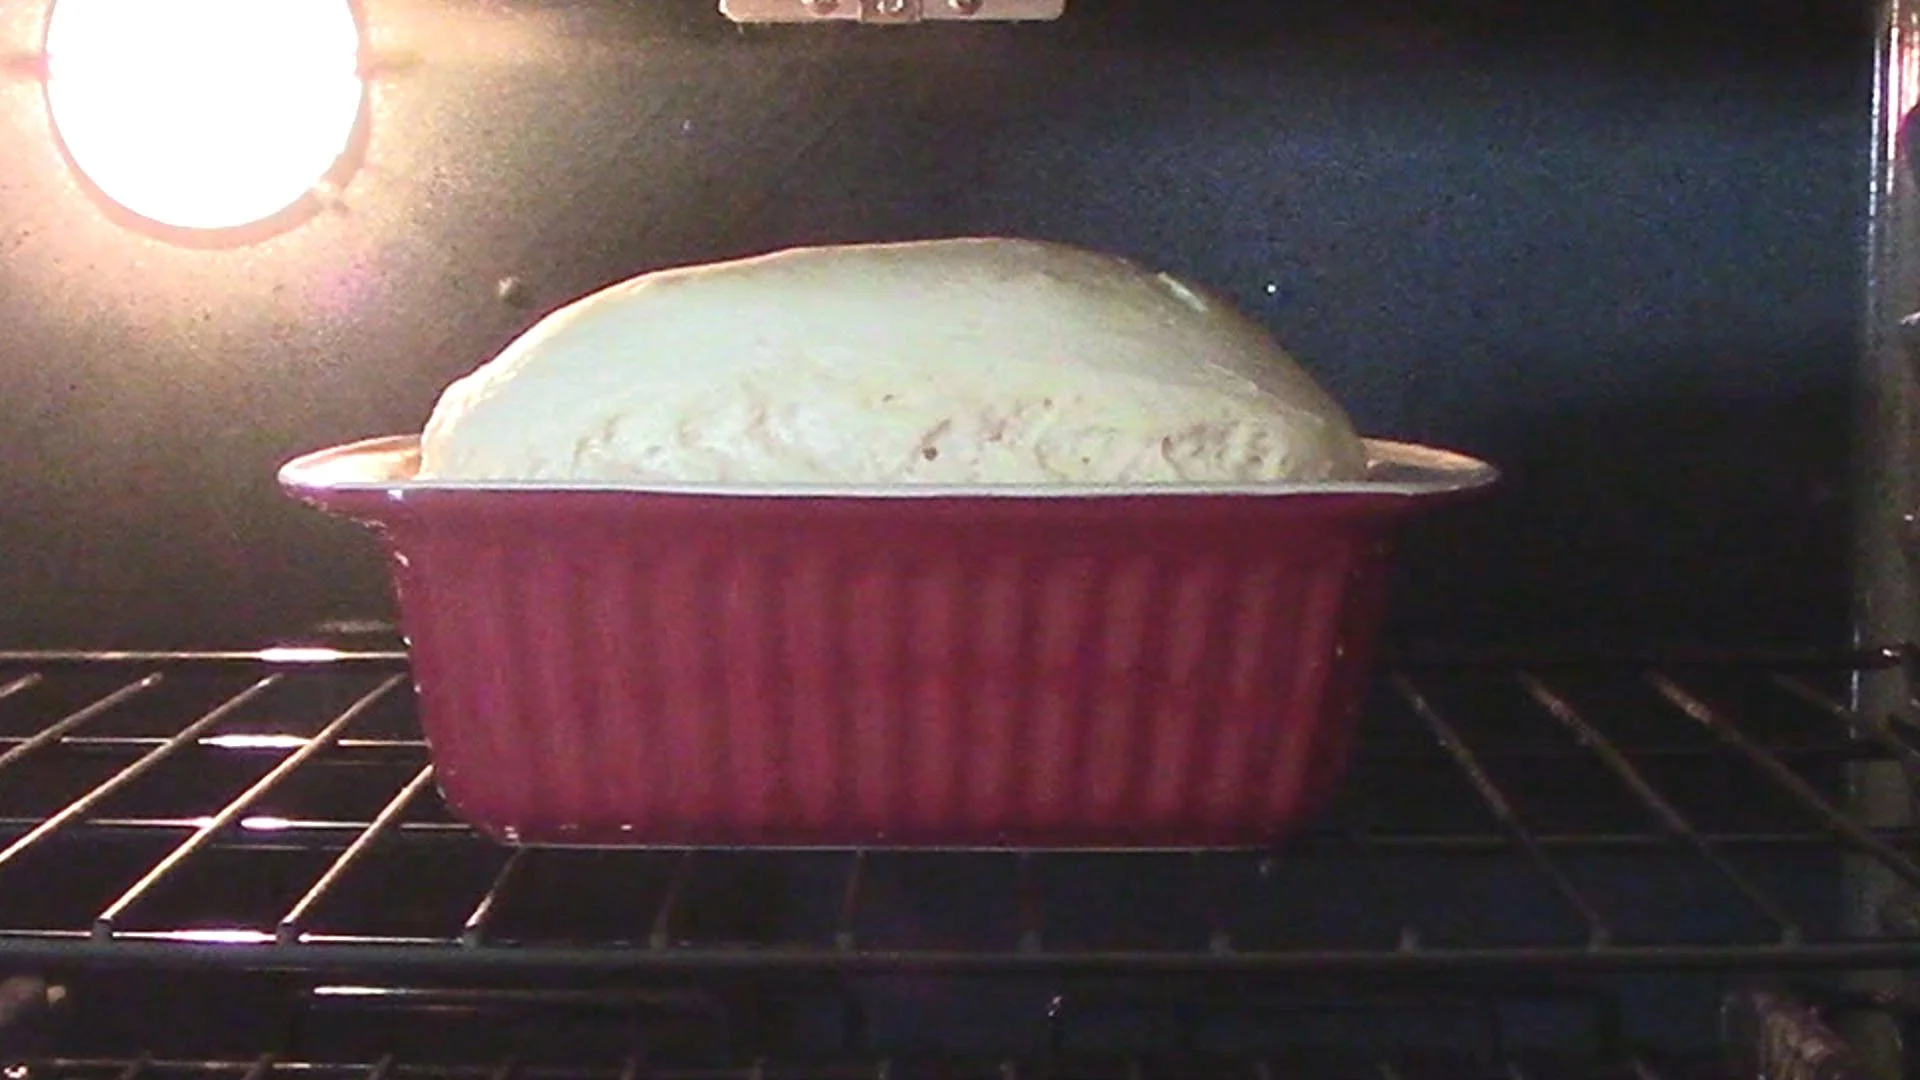
18
rise...
19
RISE!!!
20
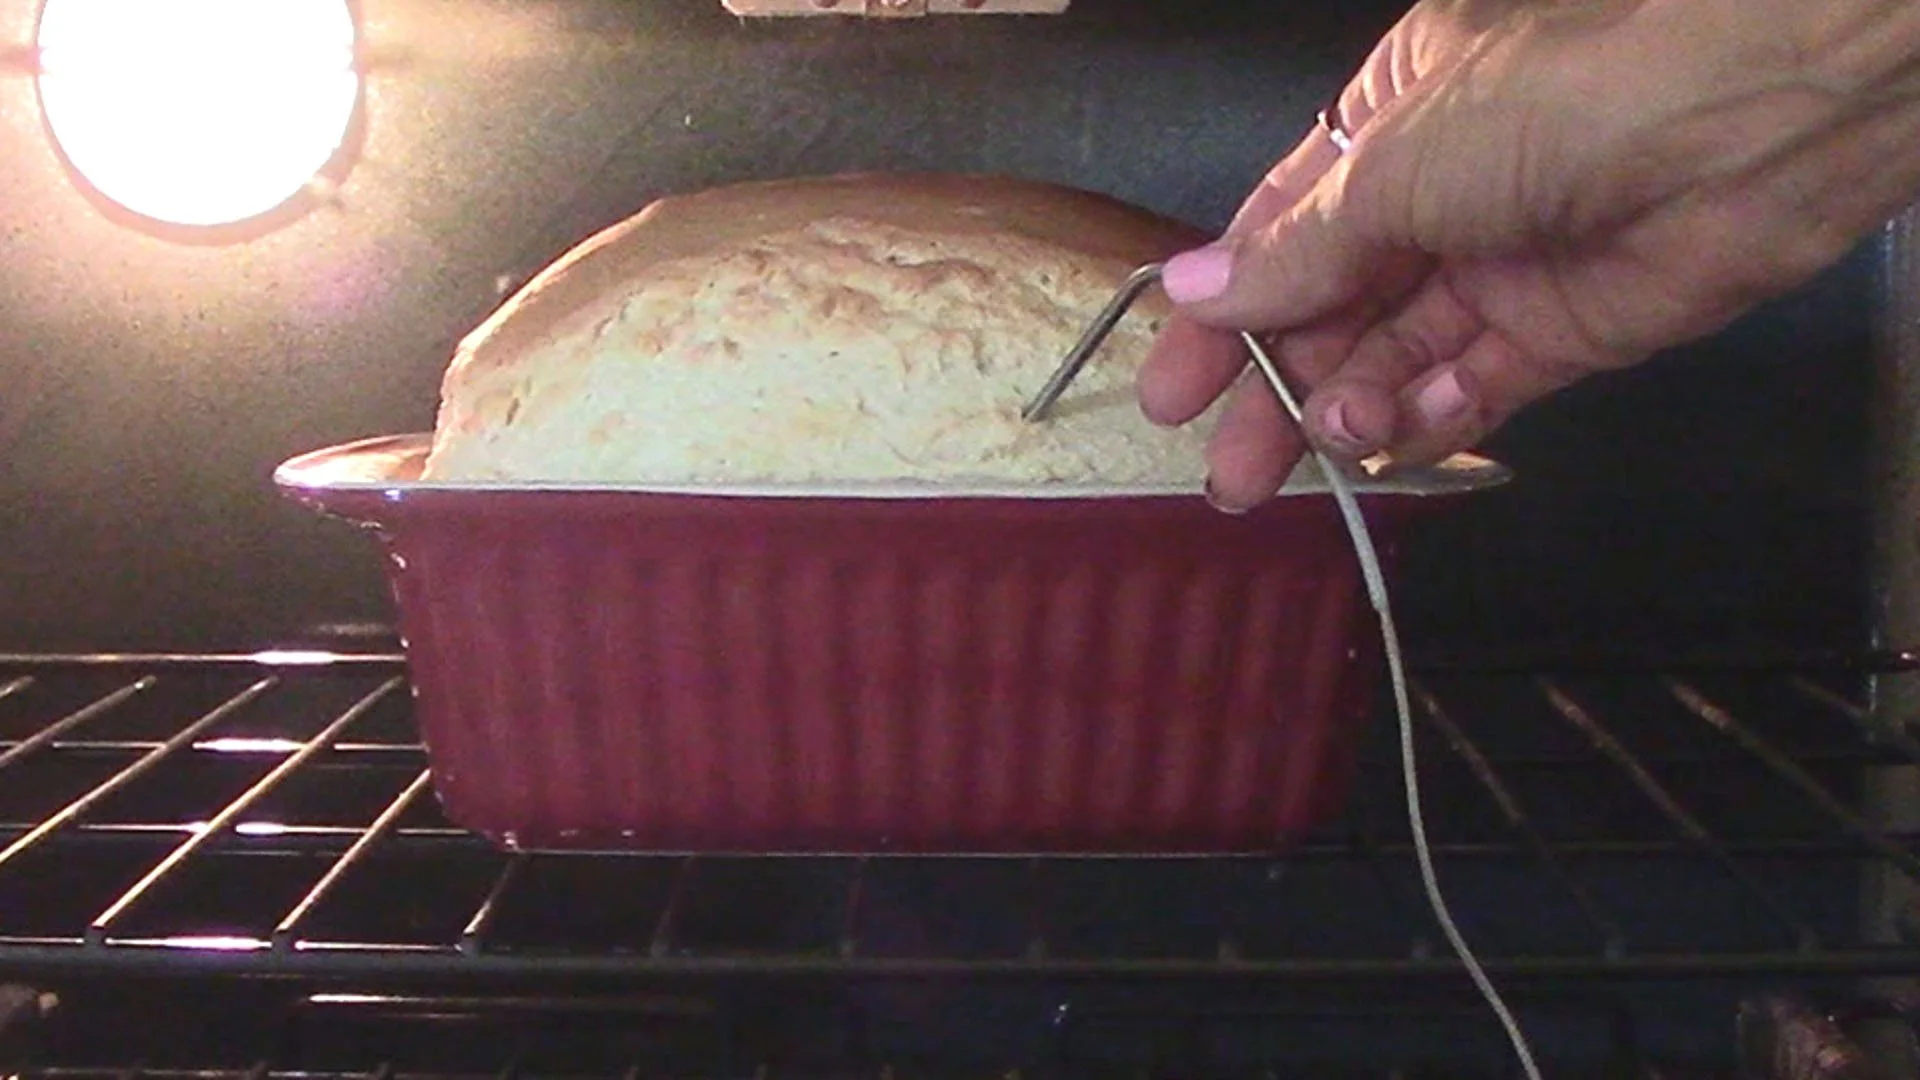
Bake until internal temperature reaches 207-208 degrees. Use thermometer for best results. If you don't have one, a guideline is 40 minutes, but each oven bakes so differently you may need to adjust with each subsequent baking to find the perfect time. (But please buy a thermometer!)

21
Look how beautiful!
22
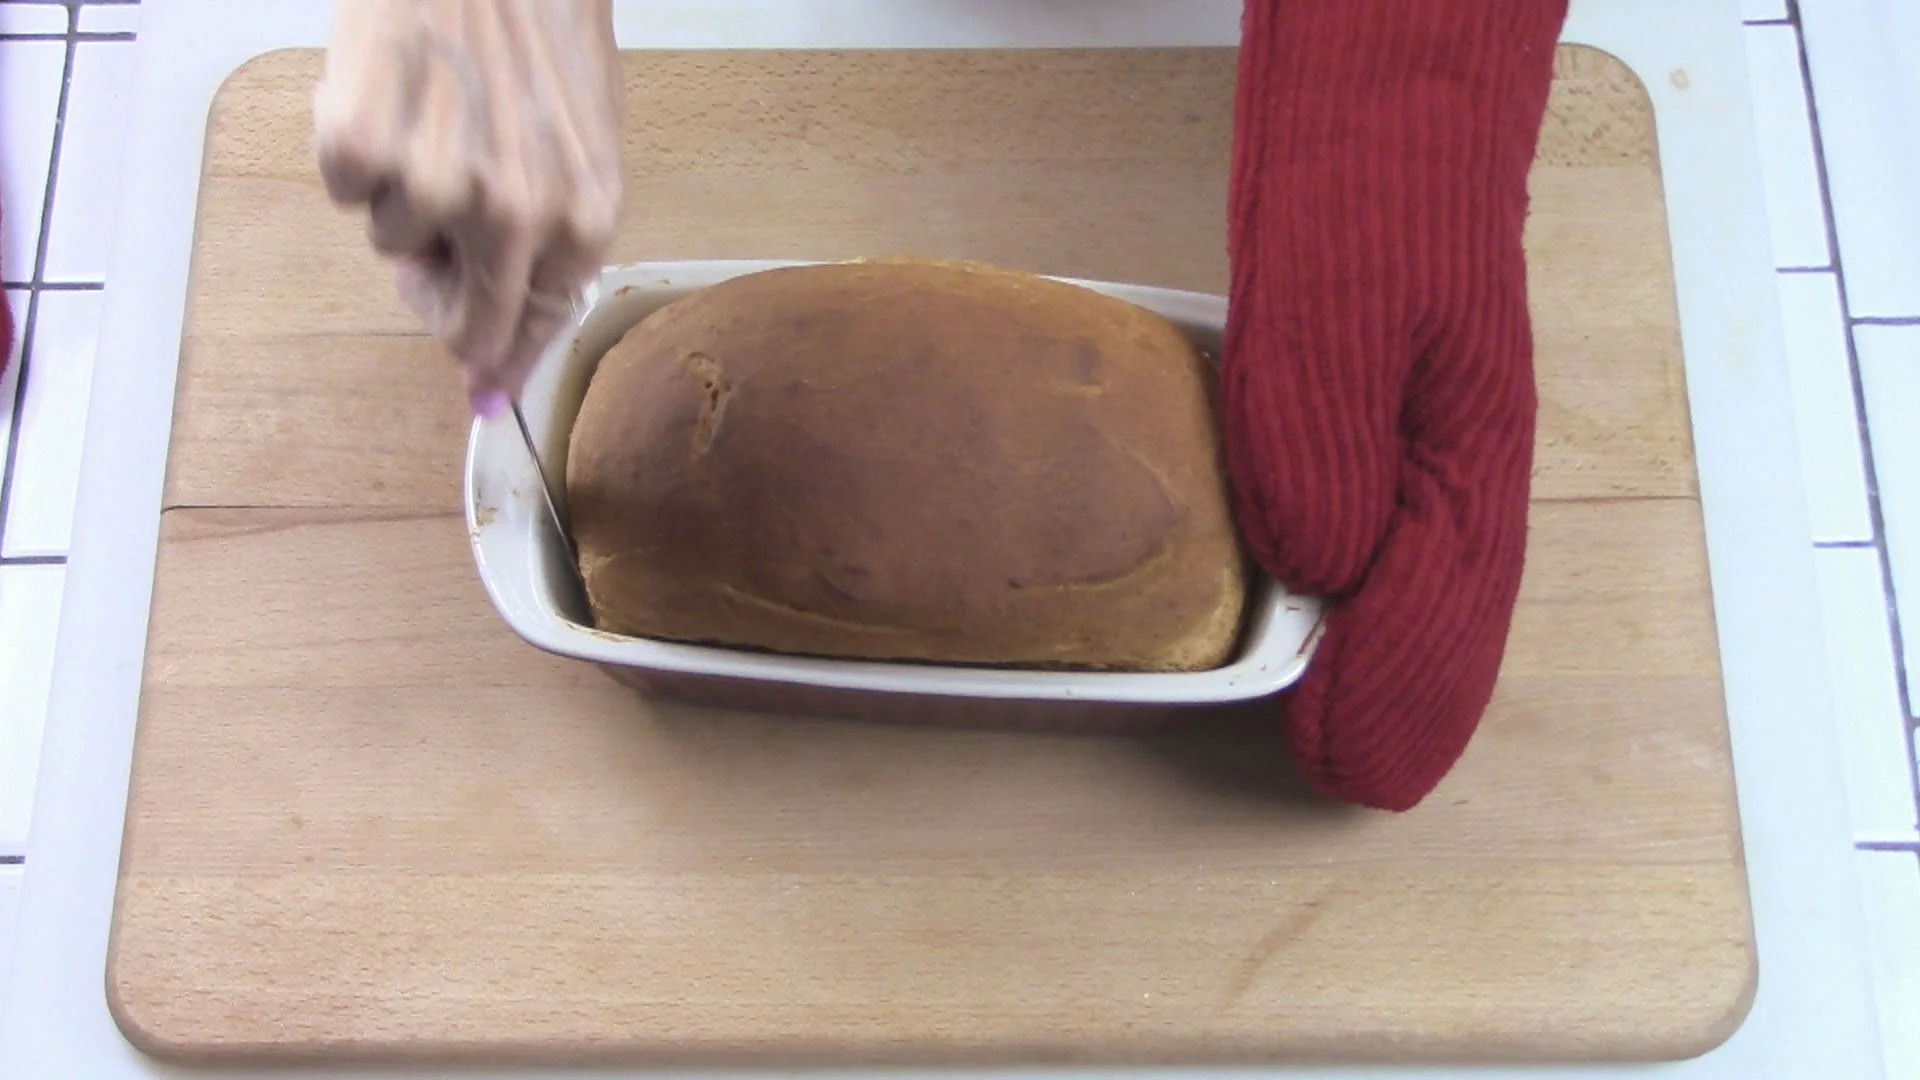
Run a butter knife around the outer edge to loosen the bread.
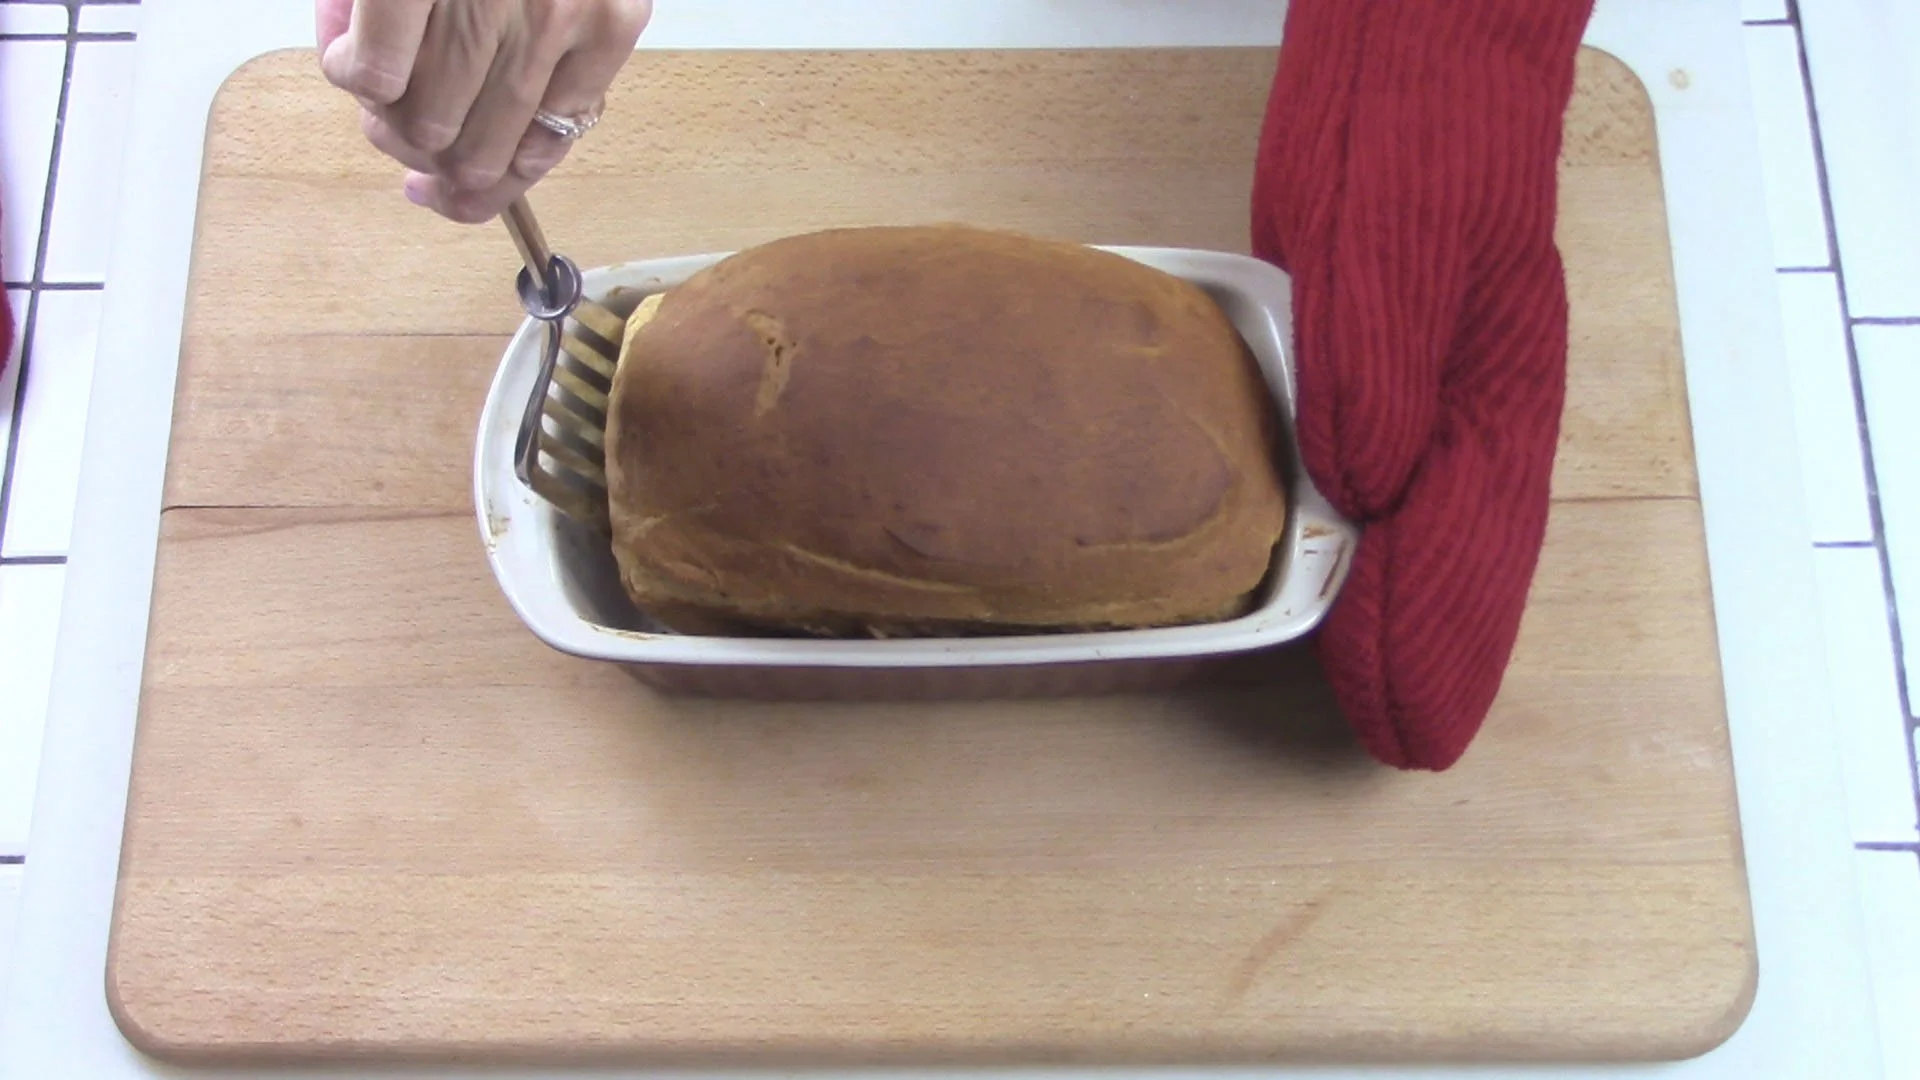
23
Gently lift with spatula on all sides to make sure bread is loosened all around.
24
Carefully turn out bread onto a wire cooling rack. Top with a little butter if you would like to.
25
Let your bread cool before slicing. Let me say this again. LET YOUR BREAD COOL!!! I know it's hard, but letting it cool completely helps the texture and structure of the loaf. Roughly 3+ hours.
26
Use a serrated knife to slice, allowing the knife to do all the work. (Don't press - just saw.)
27
This gluten free bread has a beautiful texture.
28
Look, it tears rather than crumbles!
29
It even bends!!
30
Comparison time!
Yay! Time to eat!
Now go have a sandwich with your soft gluten free sandwich bread !!
Ready to Make Some Gluten Free Sandwich Bread?
Make sure to start with all the right tools! Shop for cutting boards, serving dishes, and cookware in my Amazon shop!

The Recipe:
GLUTEN FREE SANDWICH BREAD
INGREDIENTS
Dry Mix:
1 cup brown rice flour (4.0 oz.)
1 cup corn starch (4.6 oz.)
1 cup tapioca flour (4.0 oz.)
2 ½ tsp. xanthan gum
1 ½ tsp. salt
1 Tablespoon baking powder
Wet Mix:
3 large eggs, room temperature
1 tsp. apple cider vinegar
1/4 cup butter, softened
Yeast Mix:
1 cup water
3 Tablespoons sugar
1 packet active dry yeast
DIRECTIONS
GETTING READY:
Set out eggs and butter to bring them to room temperature
Prepare your bread pan: Grease bottom and corners only…not sides.
LET’S GET STARTED:
In large mixing bowl, whisk together dry ingredients (brown rice flour, corn starch, tapioca flour, xanthan gum, salt, and baking powder). Set aside.
Proof the yeast as follows: In microwavable measuring cup, heat the water to about 100° (in my microwave that takes 25 seconds)
To the hot water, add the yeast packet and the sugar. Give a quick stir and set aside to proof for 5 minutes. This will show that your yeast is alive.
While you are waiting for yeast to proof, in a medium mixing bowl, mix together your wet ingredients (eggs, apple cider vinegar, and butter).
Add this wet ingredients mix into your dry ingredients. Mix on low until everything is combined (it will be crumbly).
After 5 minutes have passed, take a look at your yeast mix. It should be starting to foam to let you know it’s alive. If it is foamy, continue to step 7. If your yeast is not foaming, it may indicate that it is not alive. Check your package for expiration date, and if needed, try a different package. **If the yeast is not alive, do not continue with the recipe, as you will just be wasting your ingredients!** Get a fresh package and proof again.
Once the yeast is foaming, pour it into your batter. Beat on low until combined (about 30 seconds), then mix on medium/high for about 7 minutes more. (Please don’t skip the mixing time…it’s important to the results) Your batter should resemble a thick cake batter. (Don’t expect it to look like a gluten dough that you will knead because it won’t!).
Pour into prepared loaf pan and smooth the top with the back of a spoon or a spatula.
Cover with plastic wrap and set in a warm place to rise until dough reaches the top edge of the pan (roughly 35-40 minutes).
As the dough is rising, preheat your oven to 375°.
Toward end of rising time, remove the plastic wrap just before dough touches it. Allow to continue rising as needed.
When dough is done rising, bake on center rack until internal temperature reaches 207°-208°. A thermometer is by far the best way to get success with bread, as every oven varies. However, if you don’t have one, as a guideline bake for 40 minutes. (Sometimes I cover mine loosely with tinfoil during the last 10-15 minutes of baking to prevent over-browning.)
Remove from oven and top with a little butter if you would like to.
Let cool COMPLETELY on wire rack before cutting. This will usually be at least 3 hours. It is normal for bread to sink slightly when cooling. To help keep top rounded you can cool bread on its side, rotating once in a while between sides and upright position.
When slicing bread, be sure to use a serrated knife to gently saw back and forth…don’t press or you will squish your beautiful loaf of bread.
Eat up!

Tip: Please follow all directions exactly!! If you skip steps or swap ingredients then you may or may not like the end result :)
Tip: As homemade breads tends to dry out faster than store-bought breads that are made with preservatives, I recommend that you store your gluten free bread as follows: After bread has cooled completely, and you have used what you like for the day, slice the entire loaf, store in ziplock sandwich bags (2 pieces per bag), gently press out air, zip shut, wrap in tinfoil, and store in freezer. To use, simply take out as many packets as you need, unwrap from tinfoil, and thaw on counter prior to use. This will extend the life of your bread.
Looking for Comments?
Please leave and read comments in the "Comments" section of the YouTube video above.
I can’t wait to hear from you!