The Best Gluten Free Pizza Crust in The World! & Pizza Margherita

One of life’s great pleasures is a really great slice of pizza (or three)! This gluten free pizza crust has all the qualities that a pizza should have…it’s slightly crispy on the bottom, and soft and chewy everywhere else! Customize with your own toppings or try this Gluten Free Pizza Margherita!
Makes: One 11-inch pizza

Show Me How

Walk Me Through It
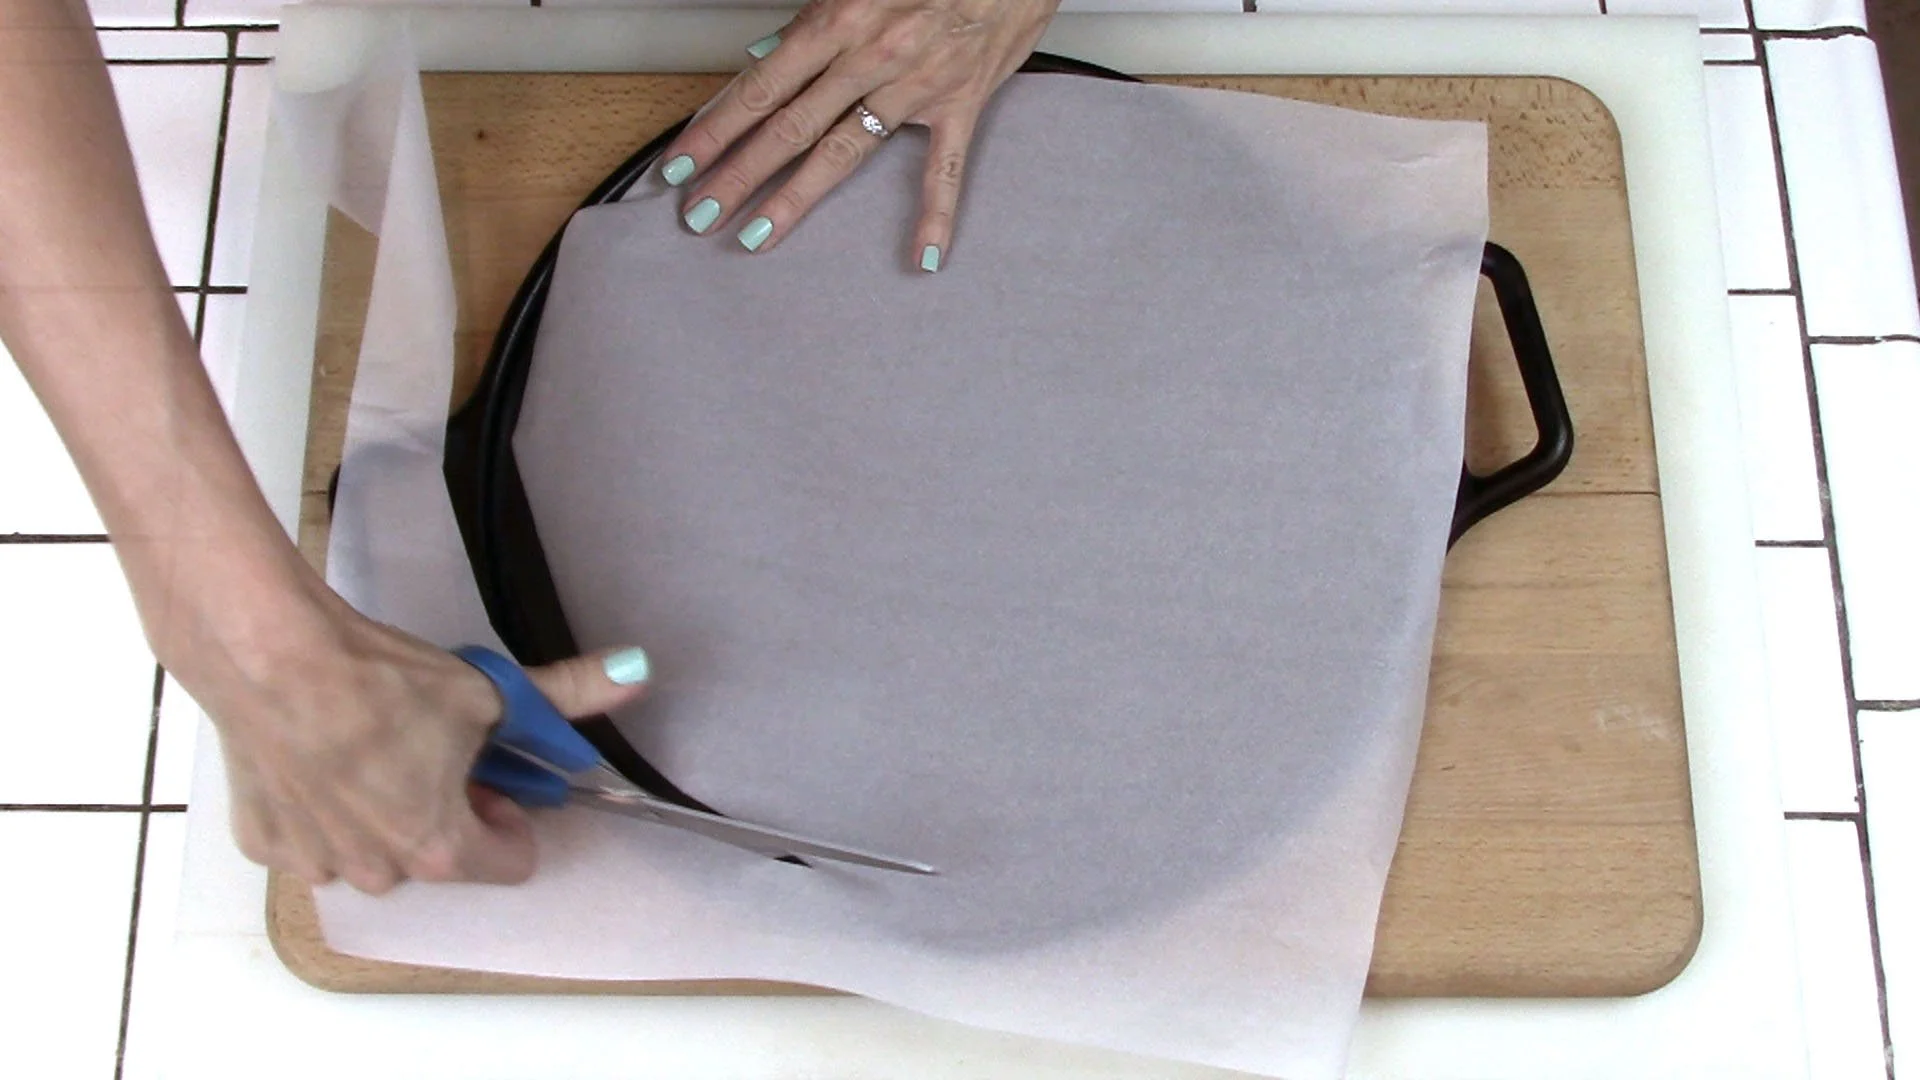
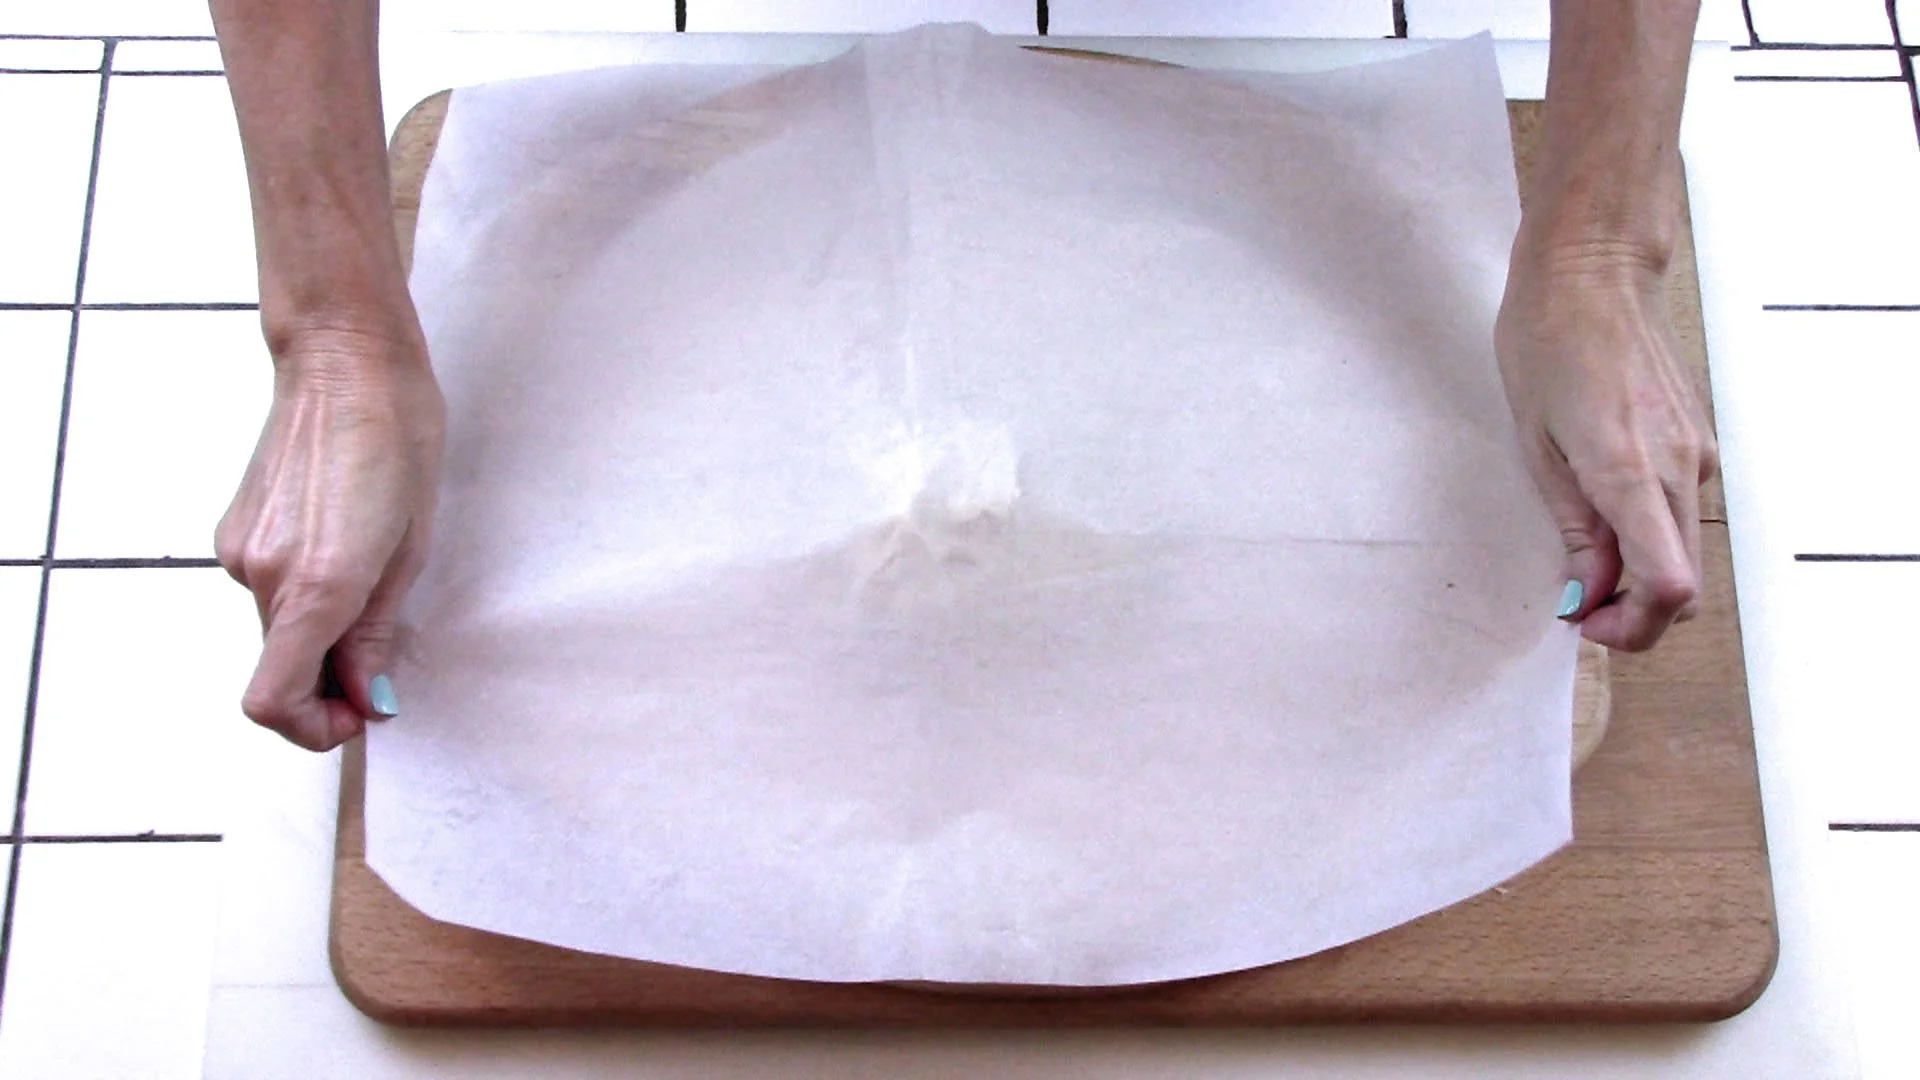
1
Cut a piece of parchment paper to fit the size of your pan
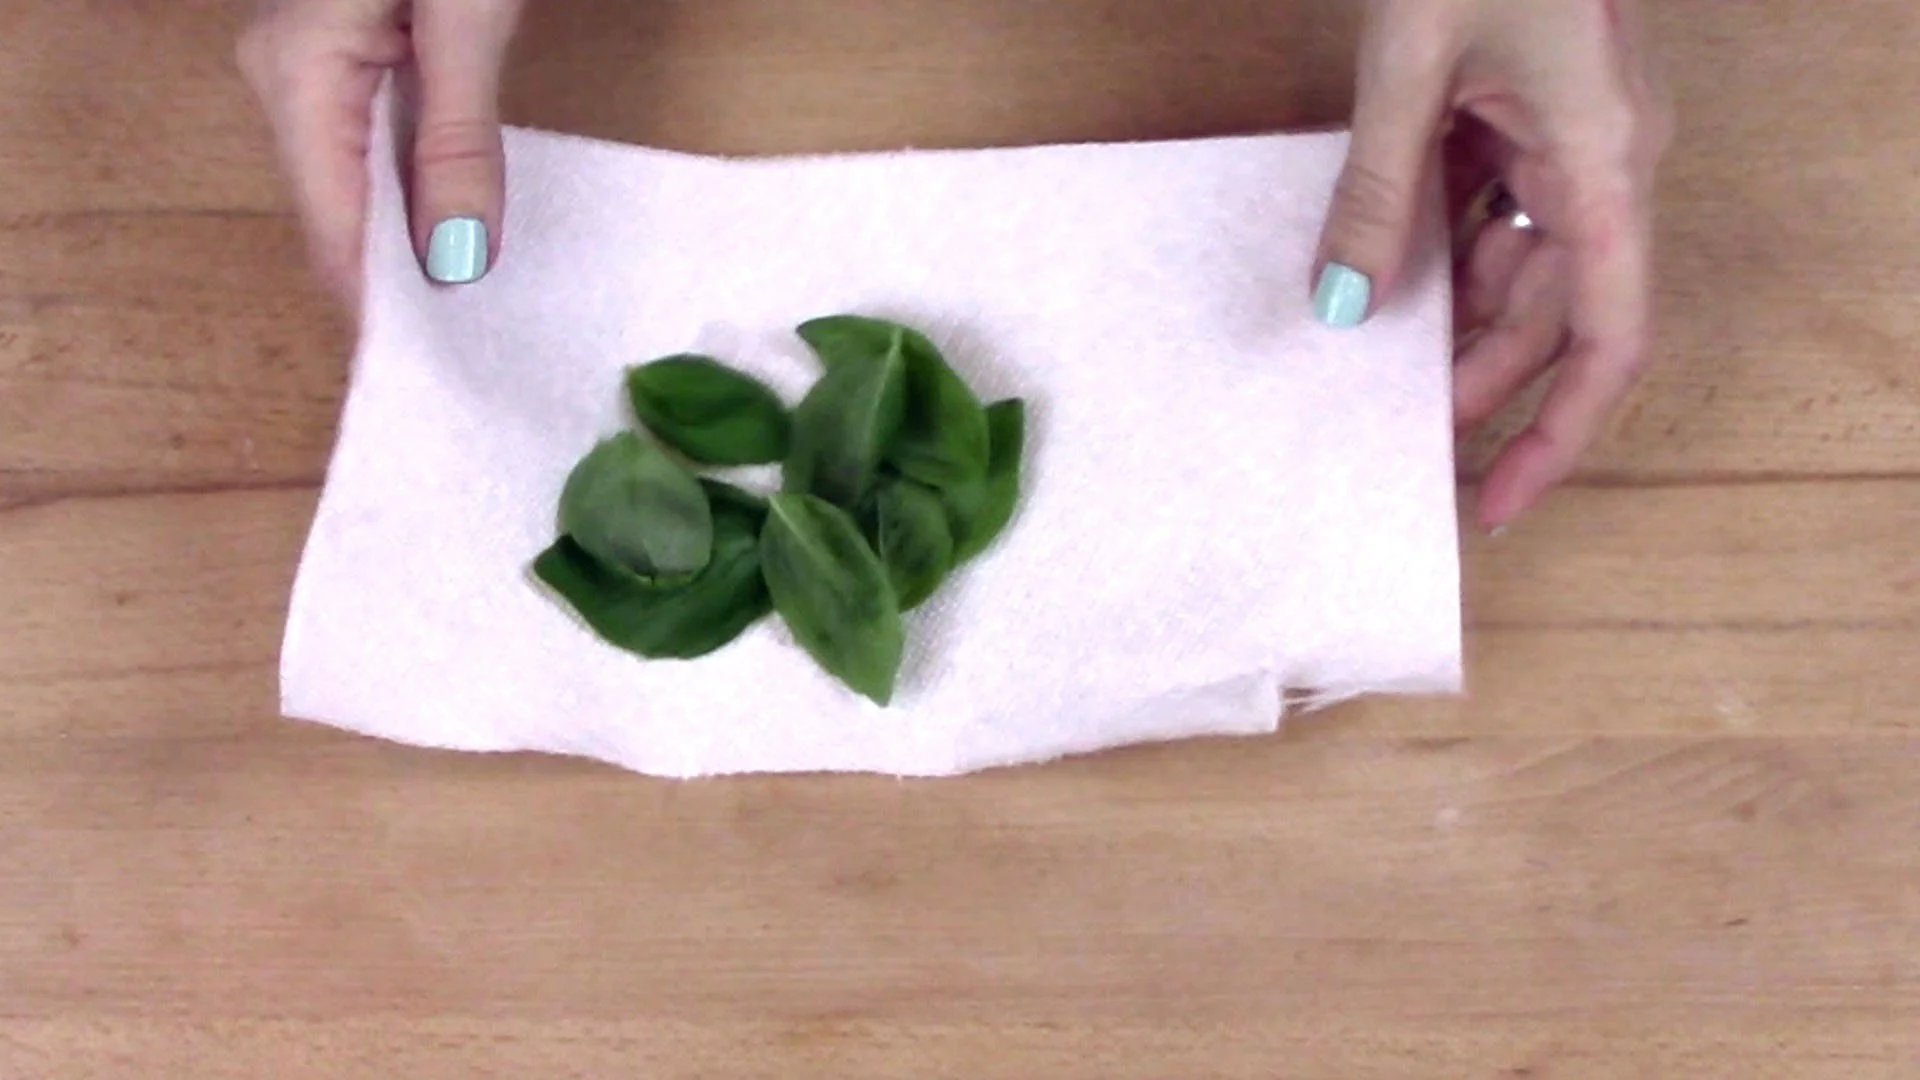
2
Wash and pat dry basil leaves, and tear into desired size.
Save three whole leaves to garnish.
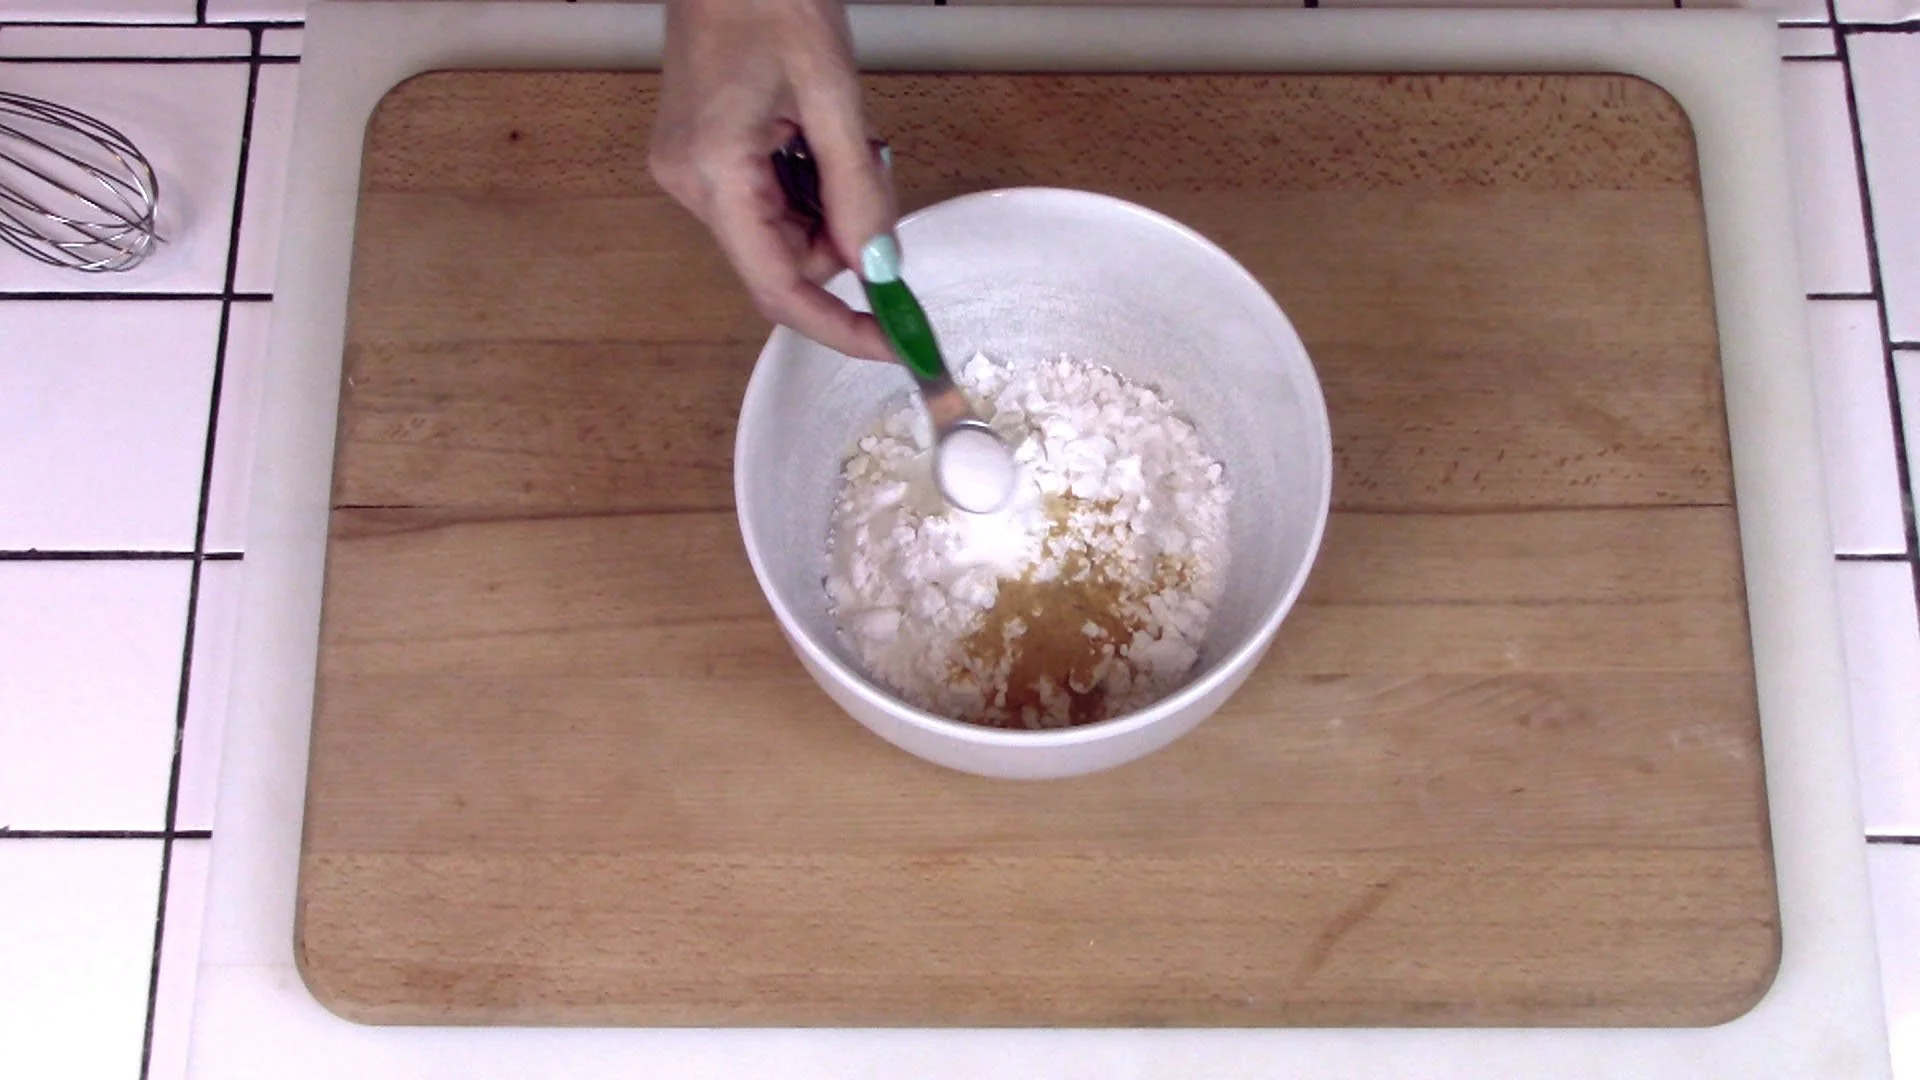
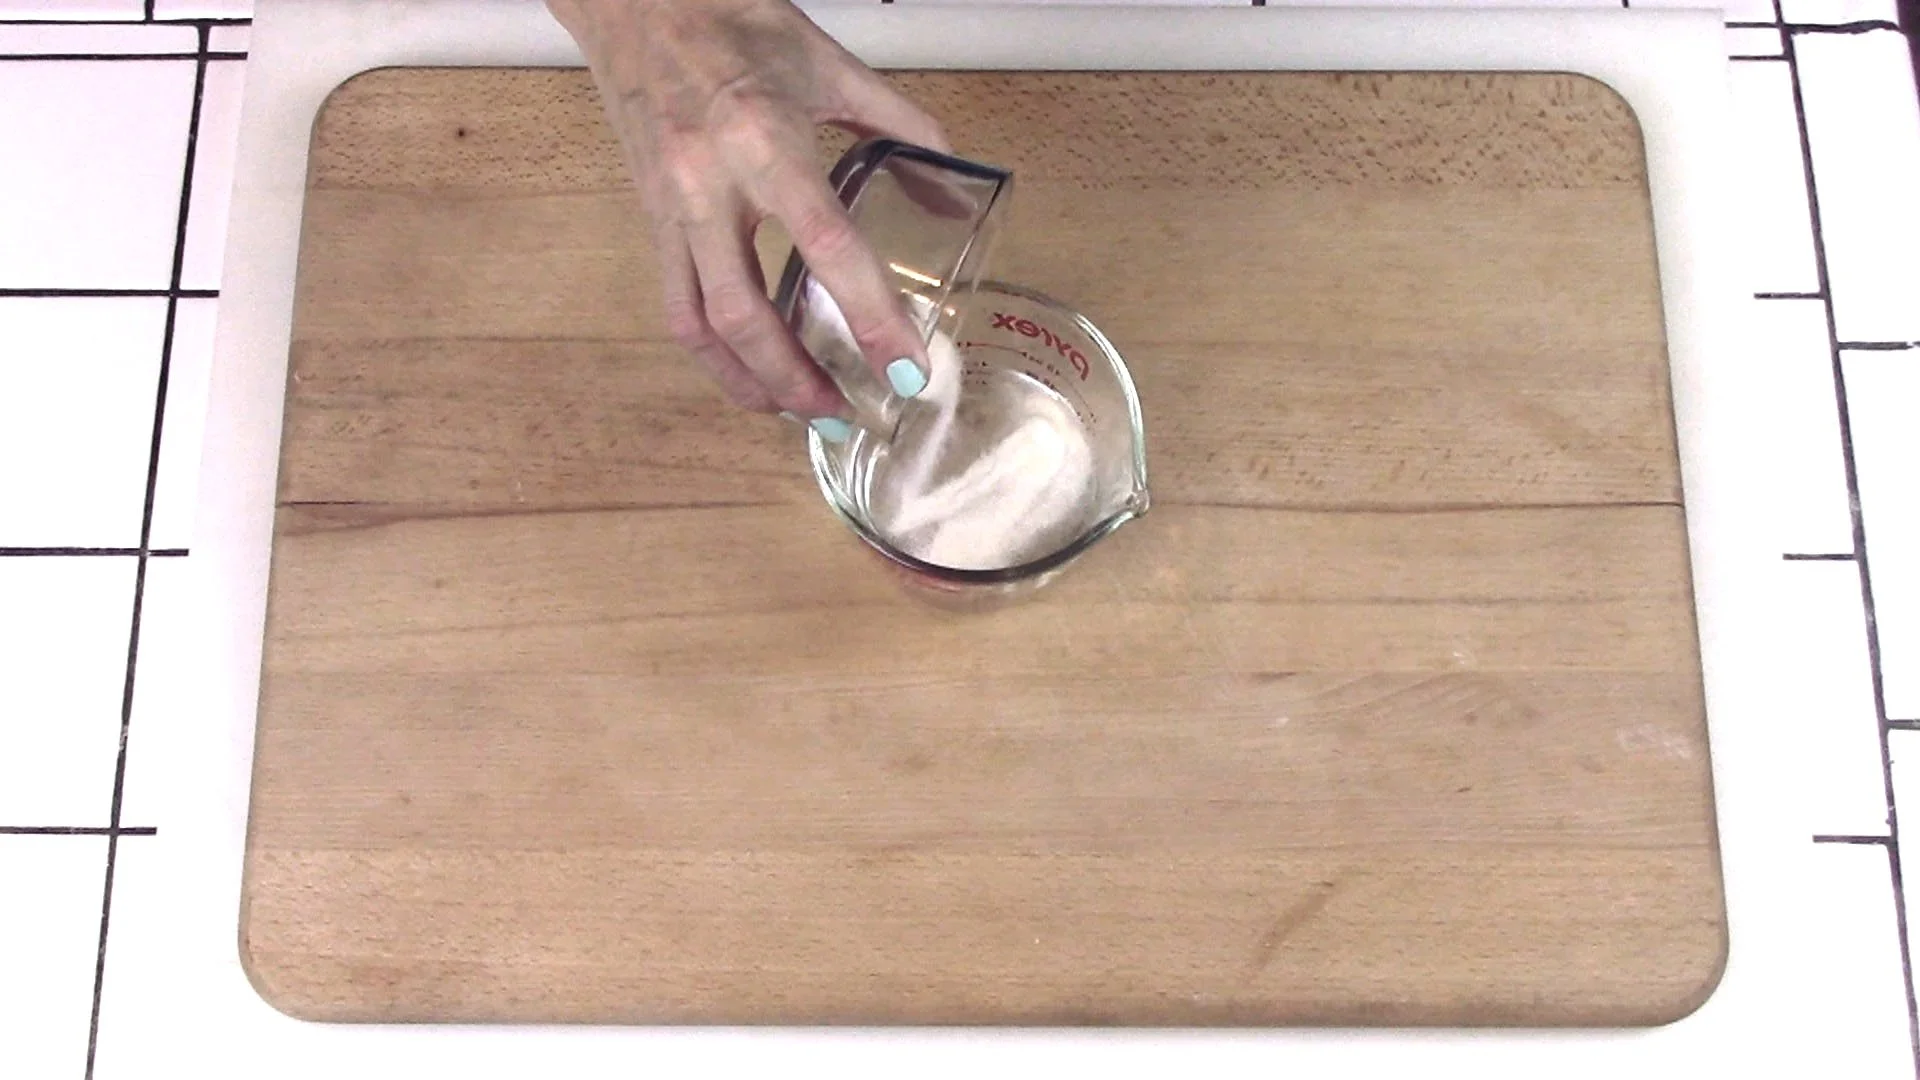
3
To a large mixing bowl, add your brown rice flour, white rice flour, potato starch, salt, xanthan gum, garlic powder, yeast, baking powder, and sugar.
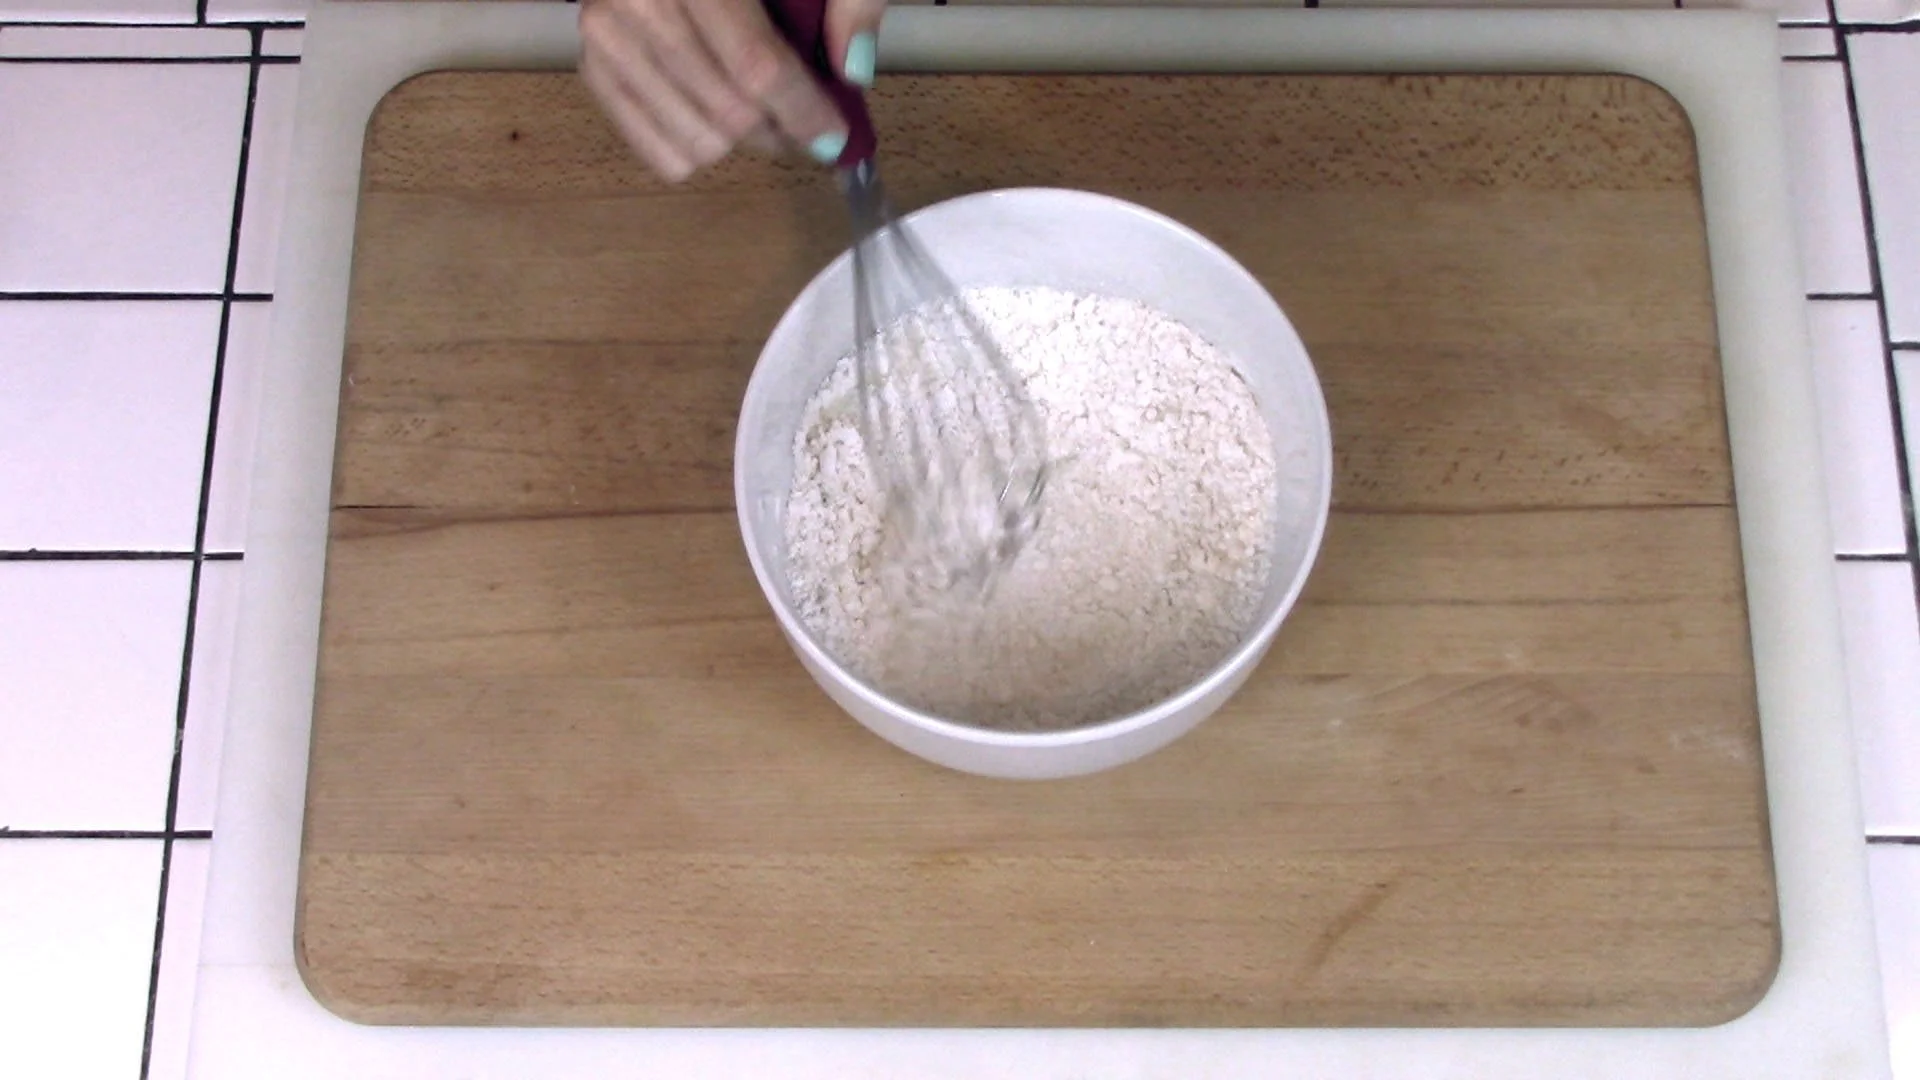
4
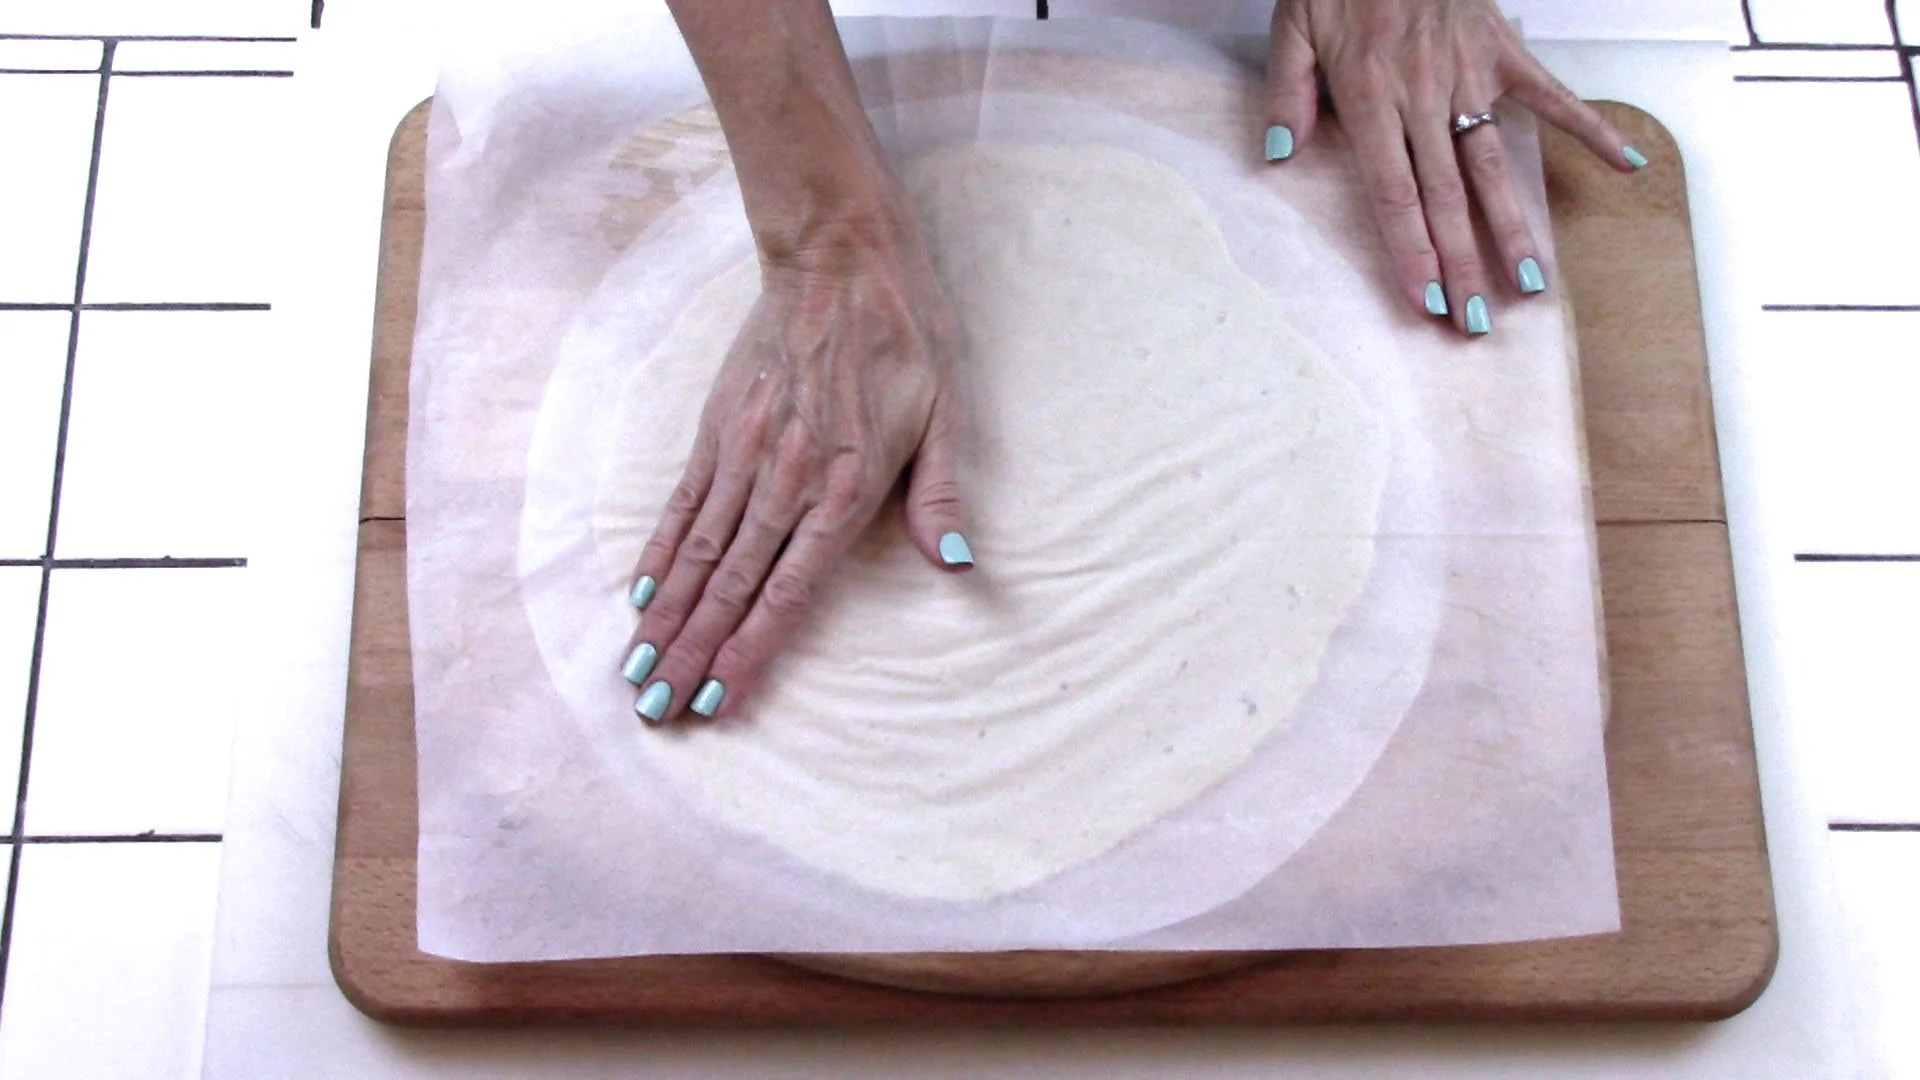
Whisk well and set aside.
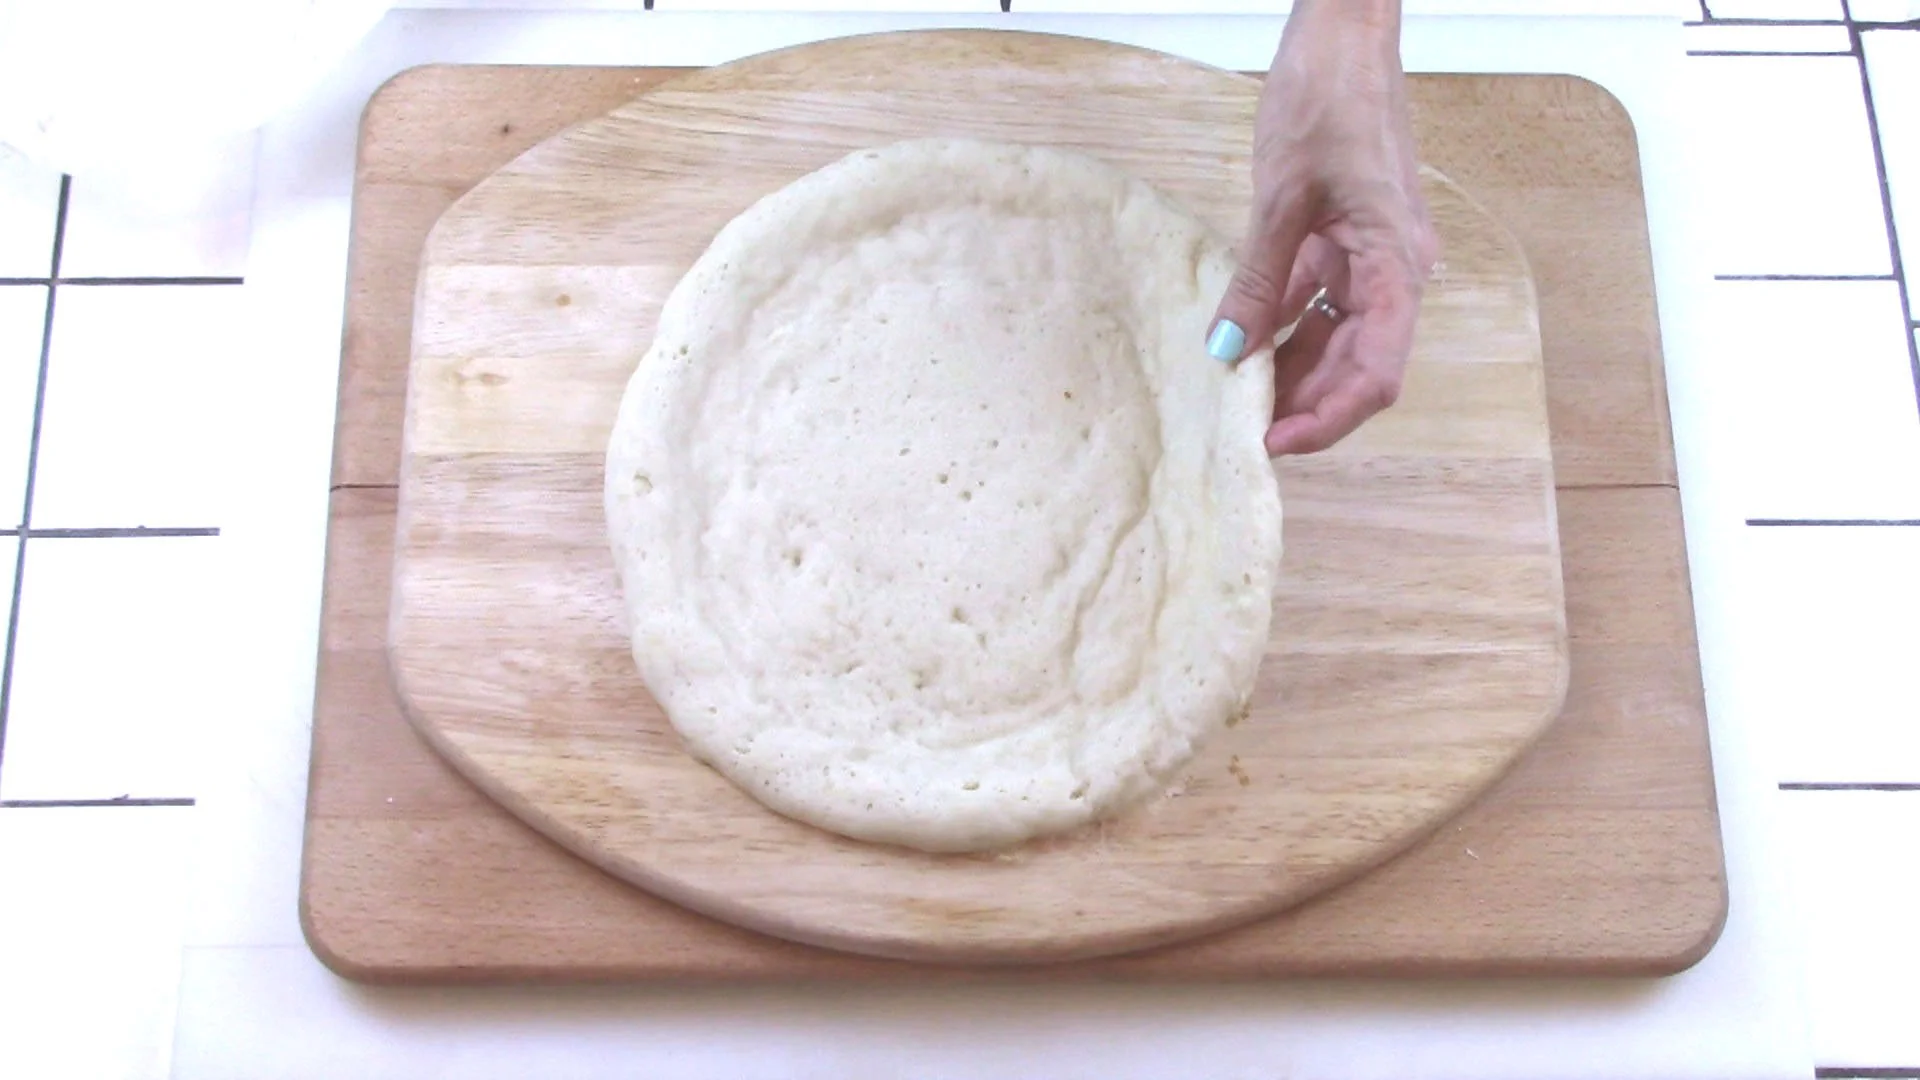
5
Now, put ¾ cup hot tap water into a measuring cup and sprinkle in the gelatin. Give it a stir and let it dissolve.
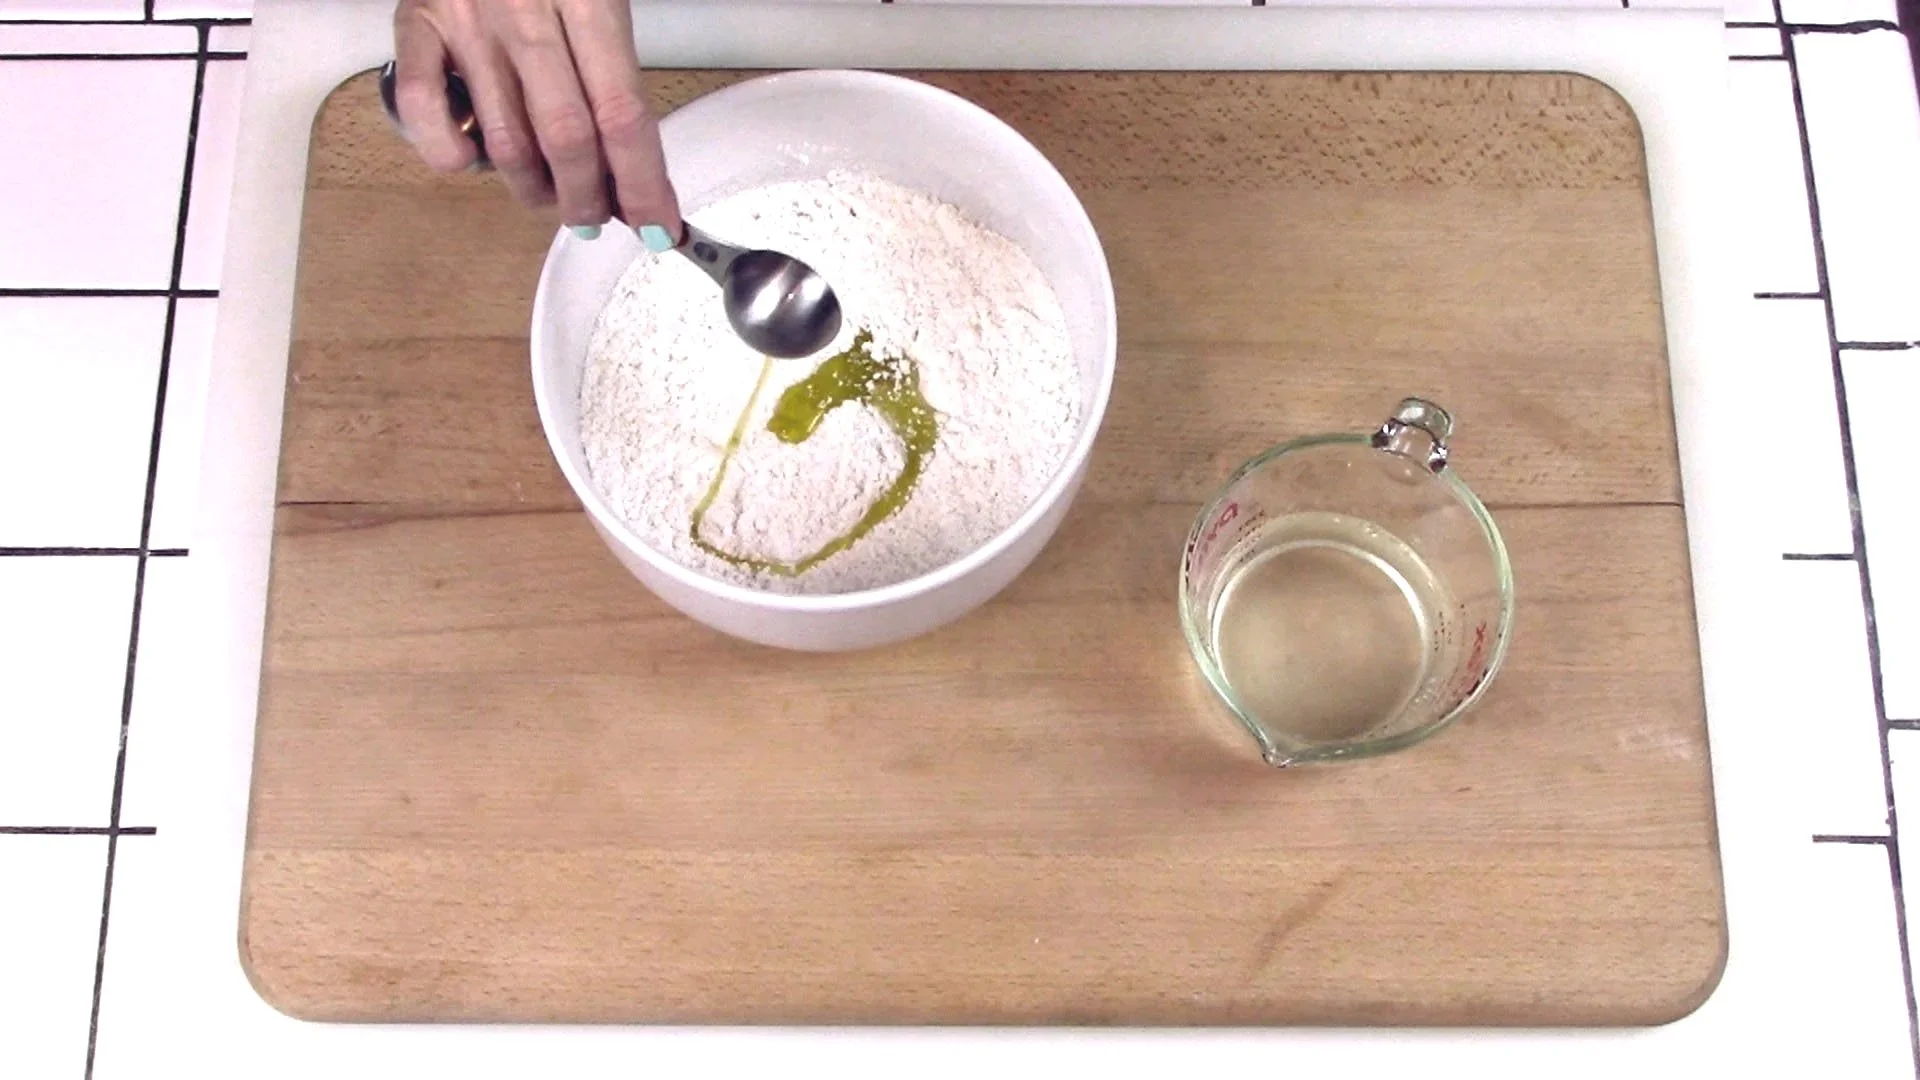
6
To your flour mix, add the olive oil,
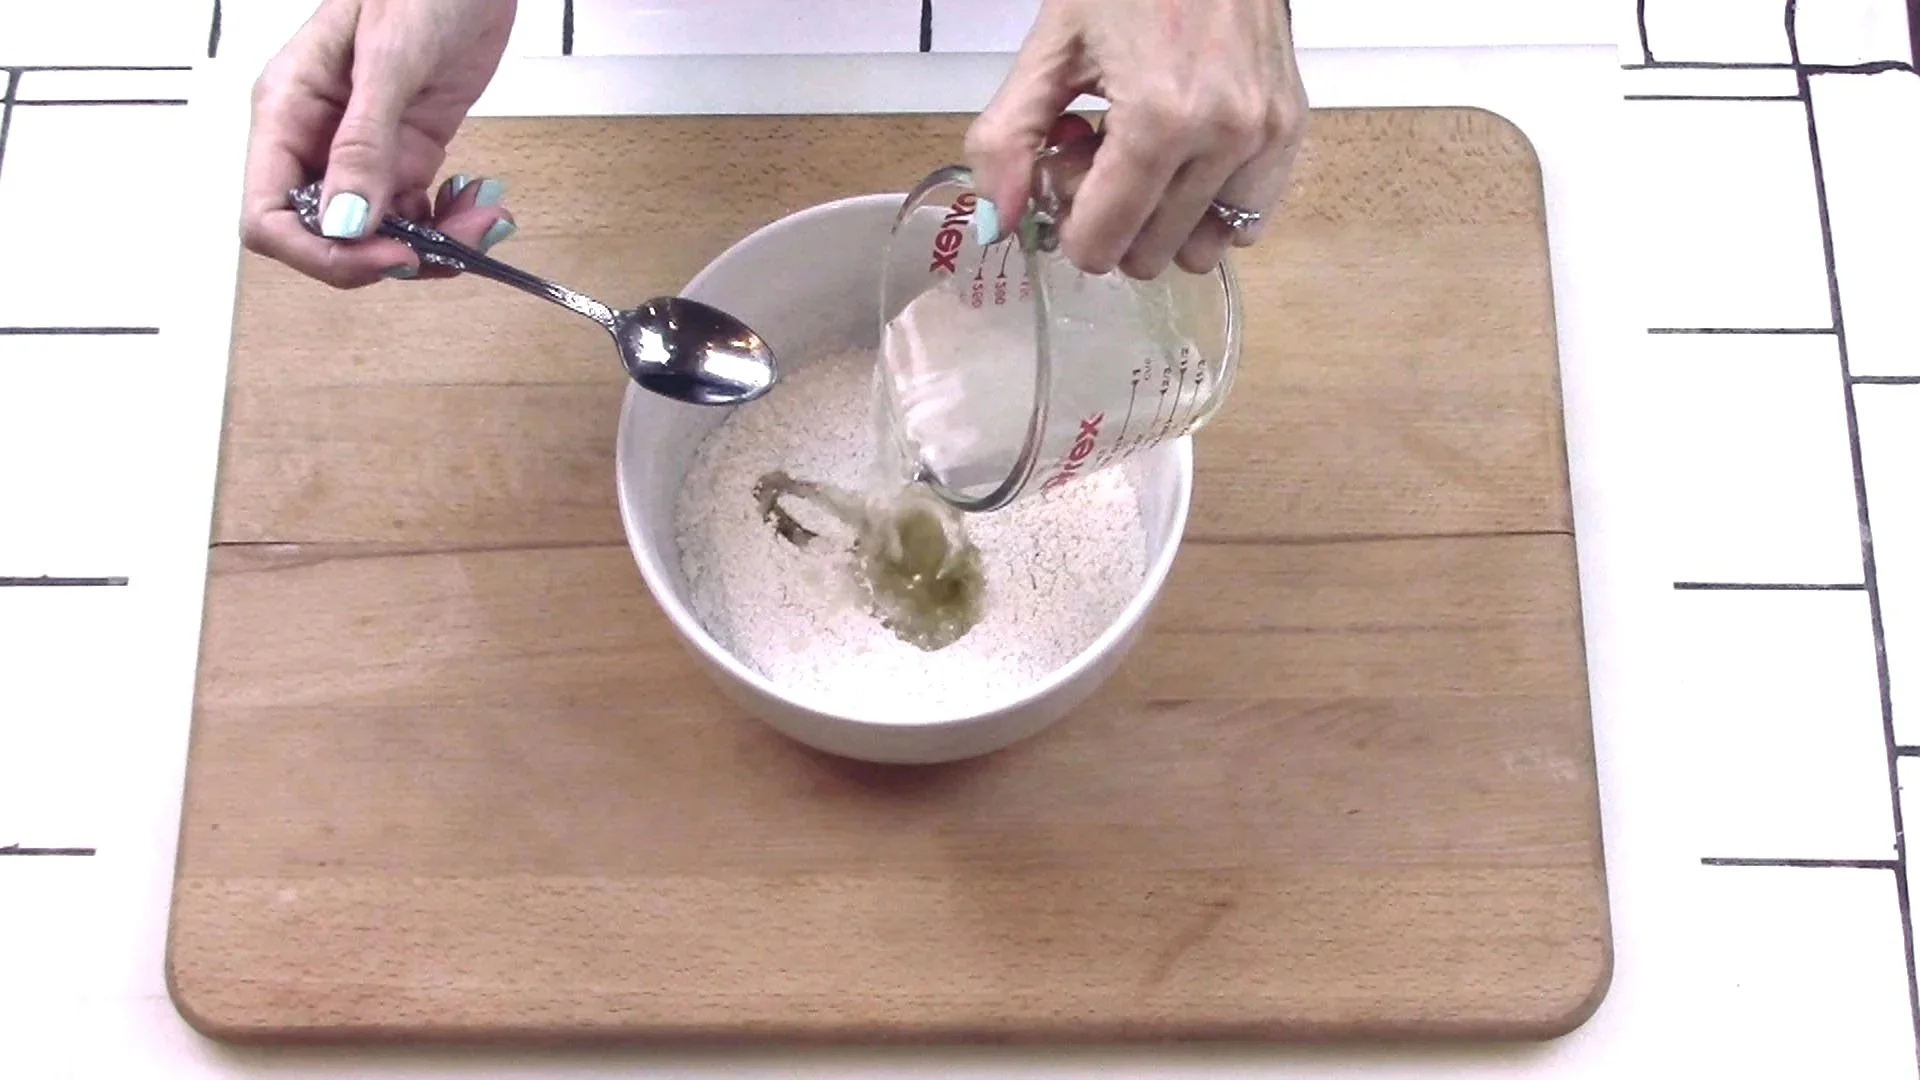
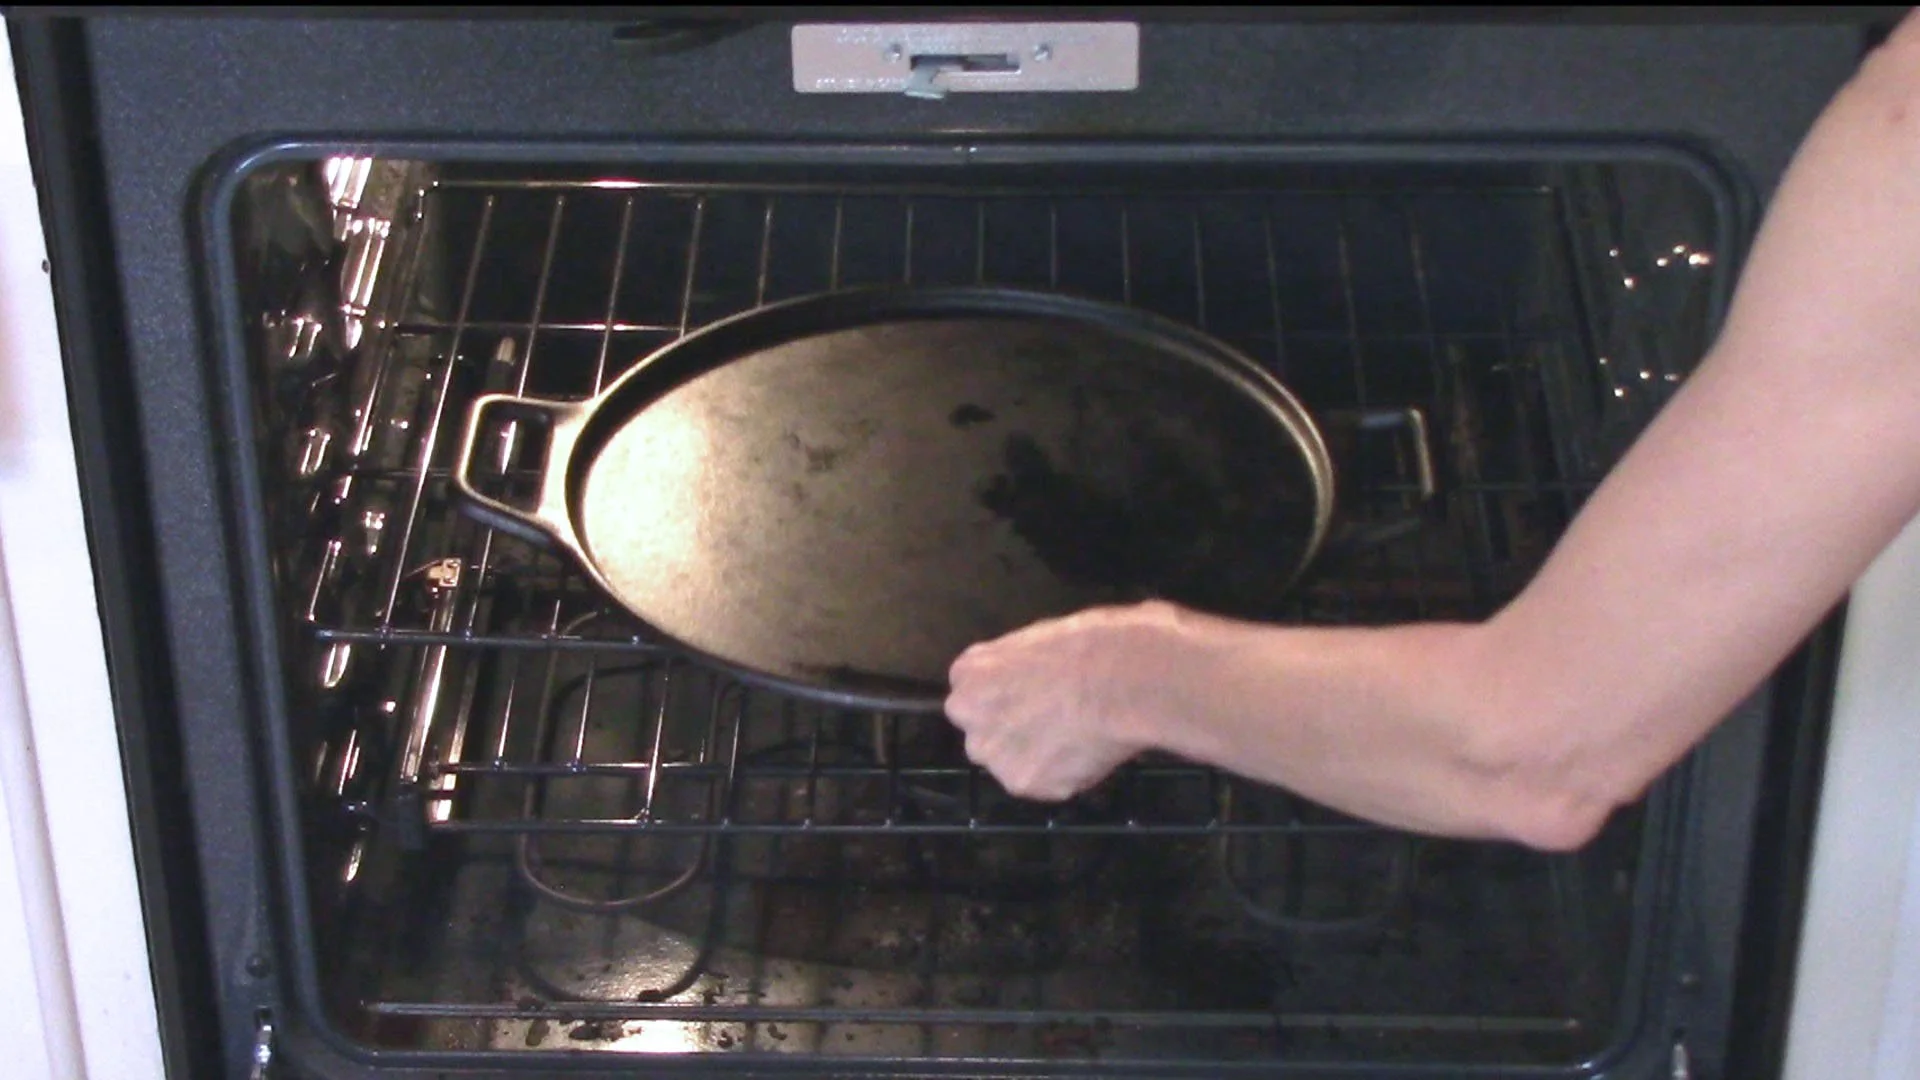
7
and the dissolved gelatin water.
8
Be sure to scrape out remaining gelatin as it will stick to sides of cup.
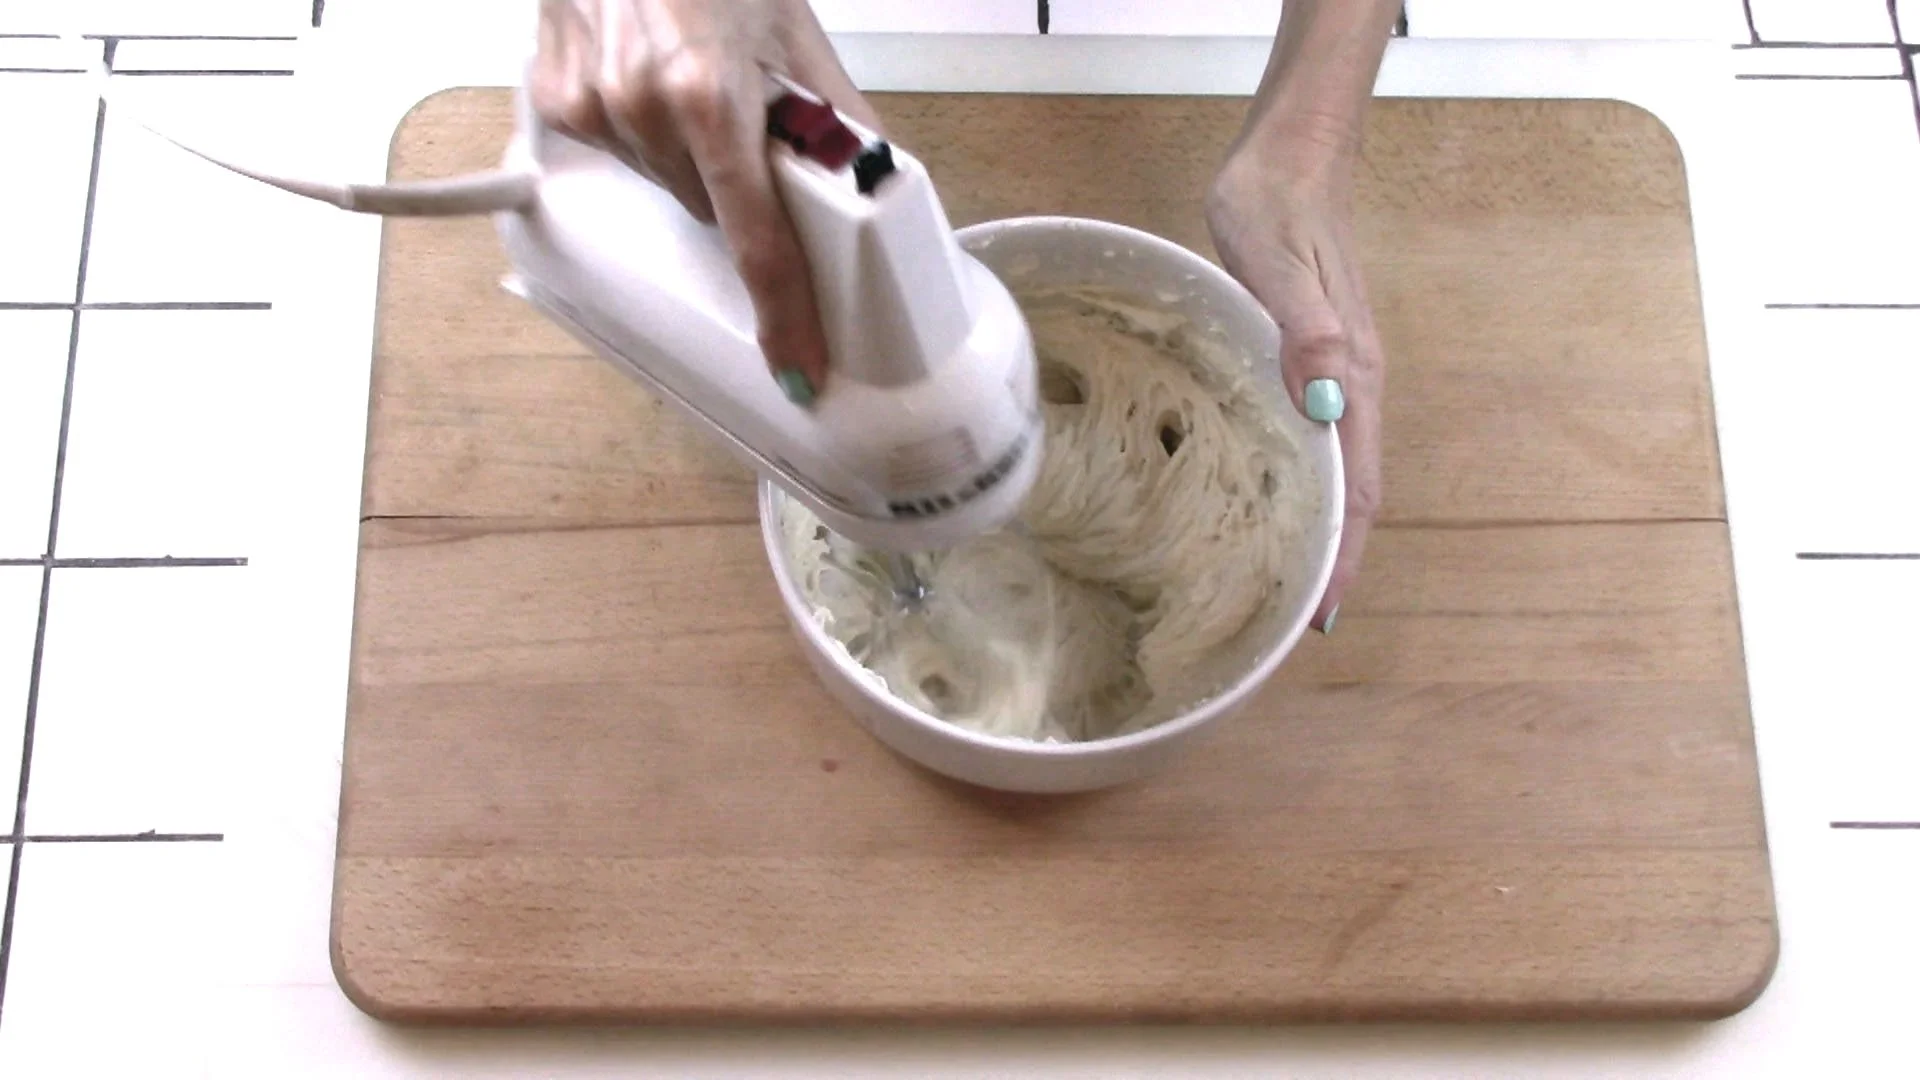
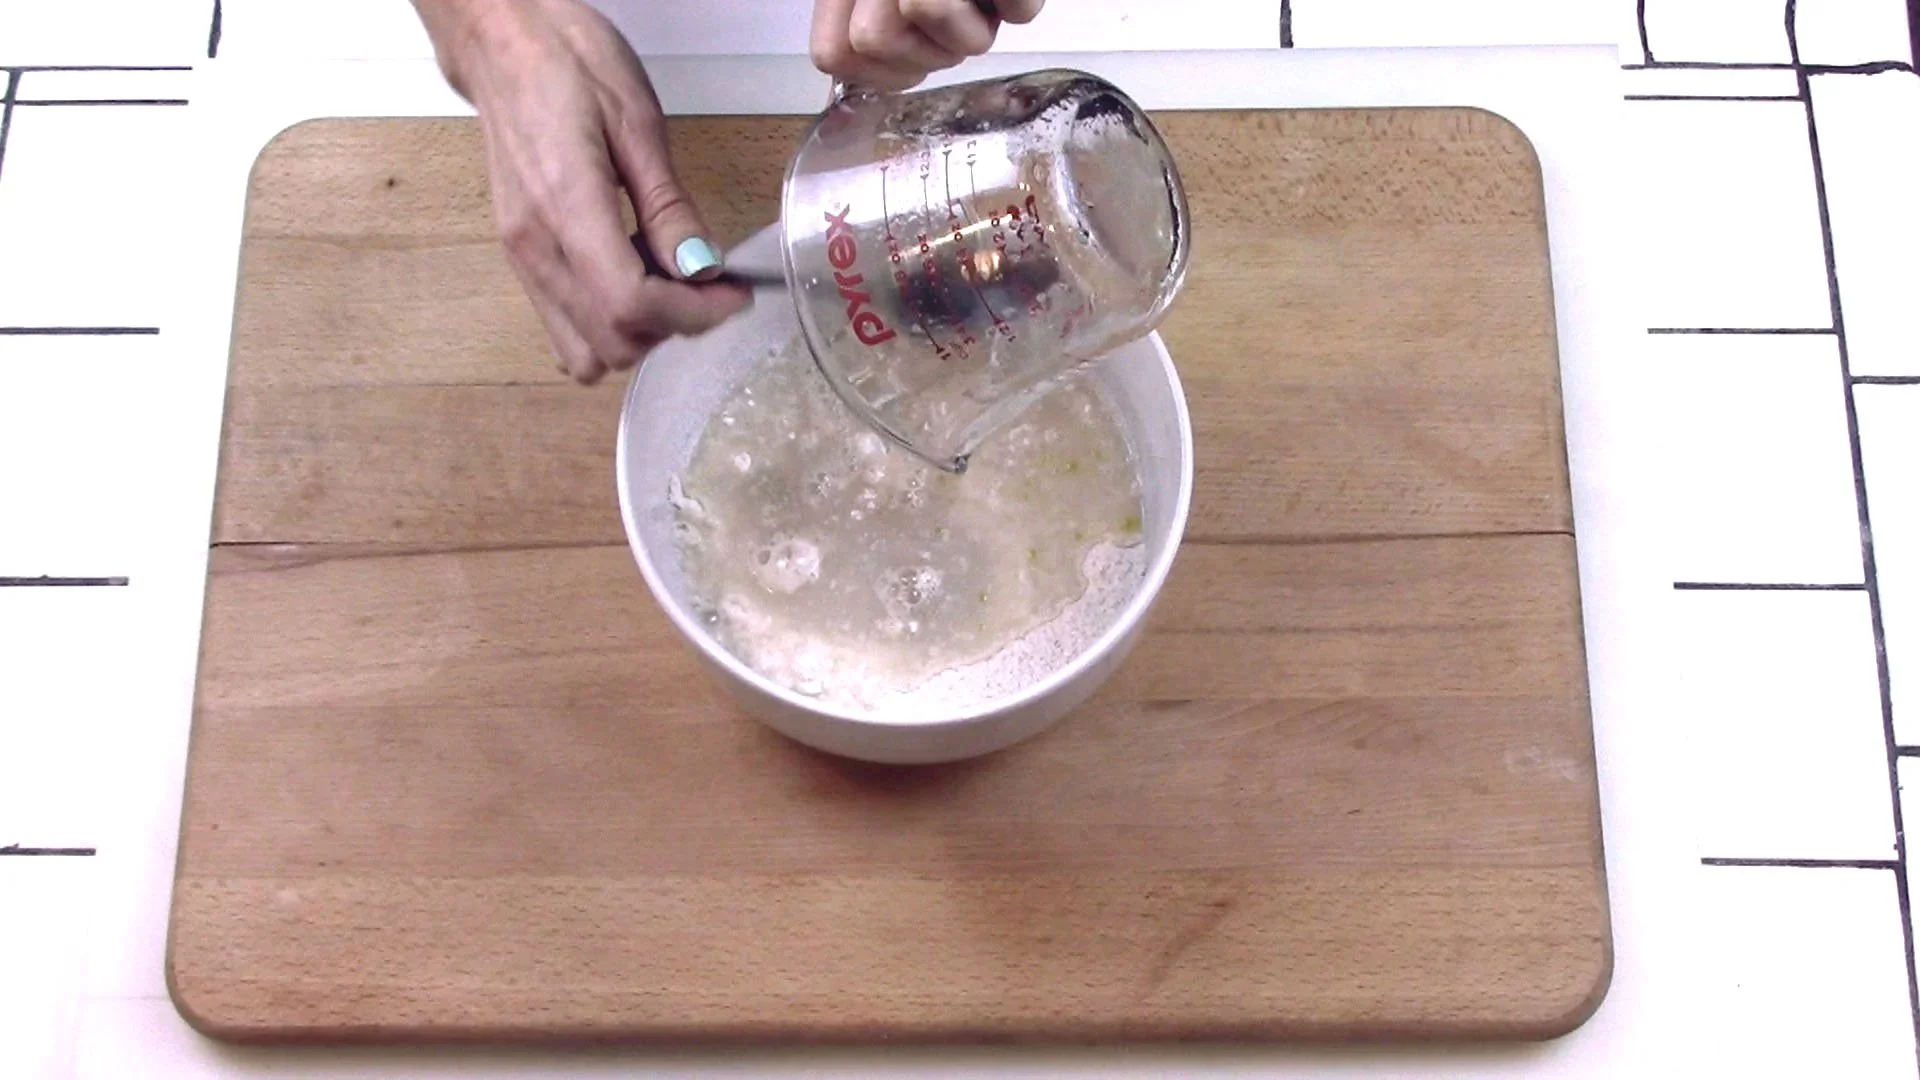
9
Mix at low speed until blended, and then high speed until dough is smooth (about 5 minutes).
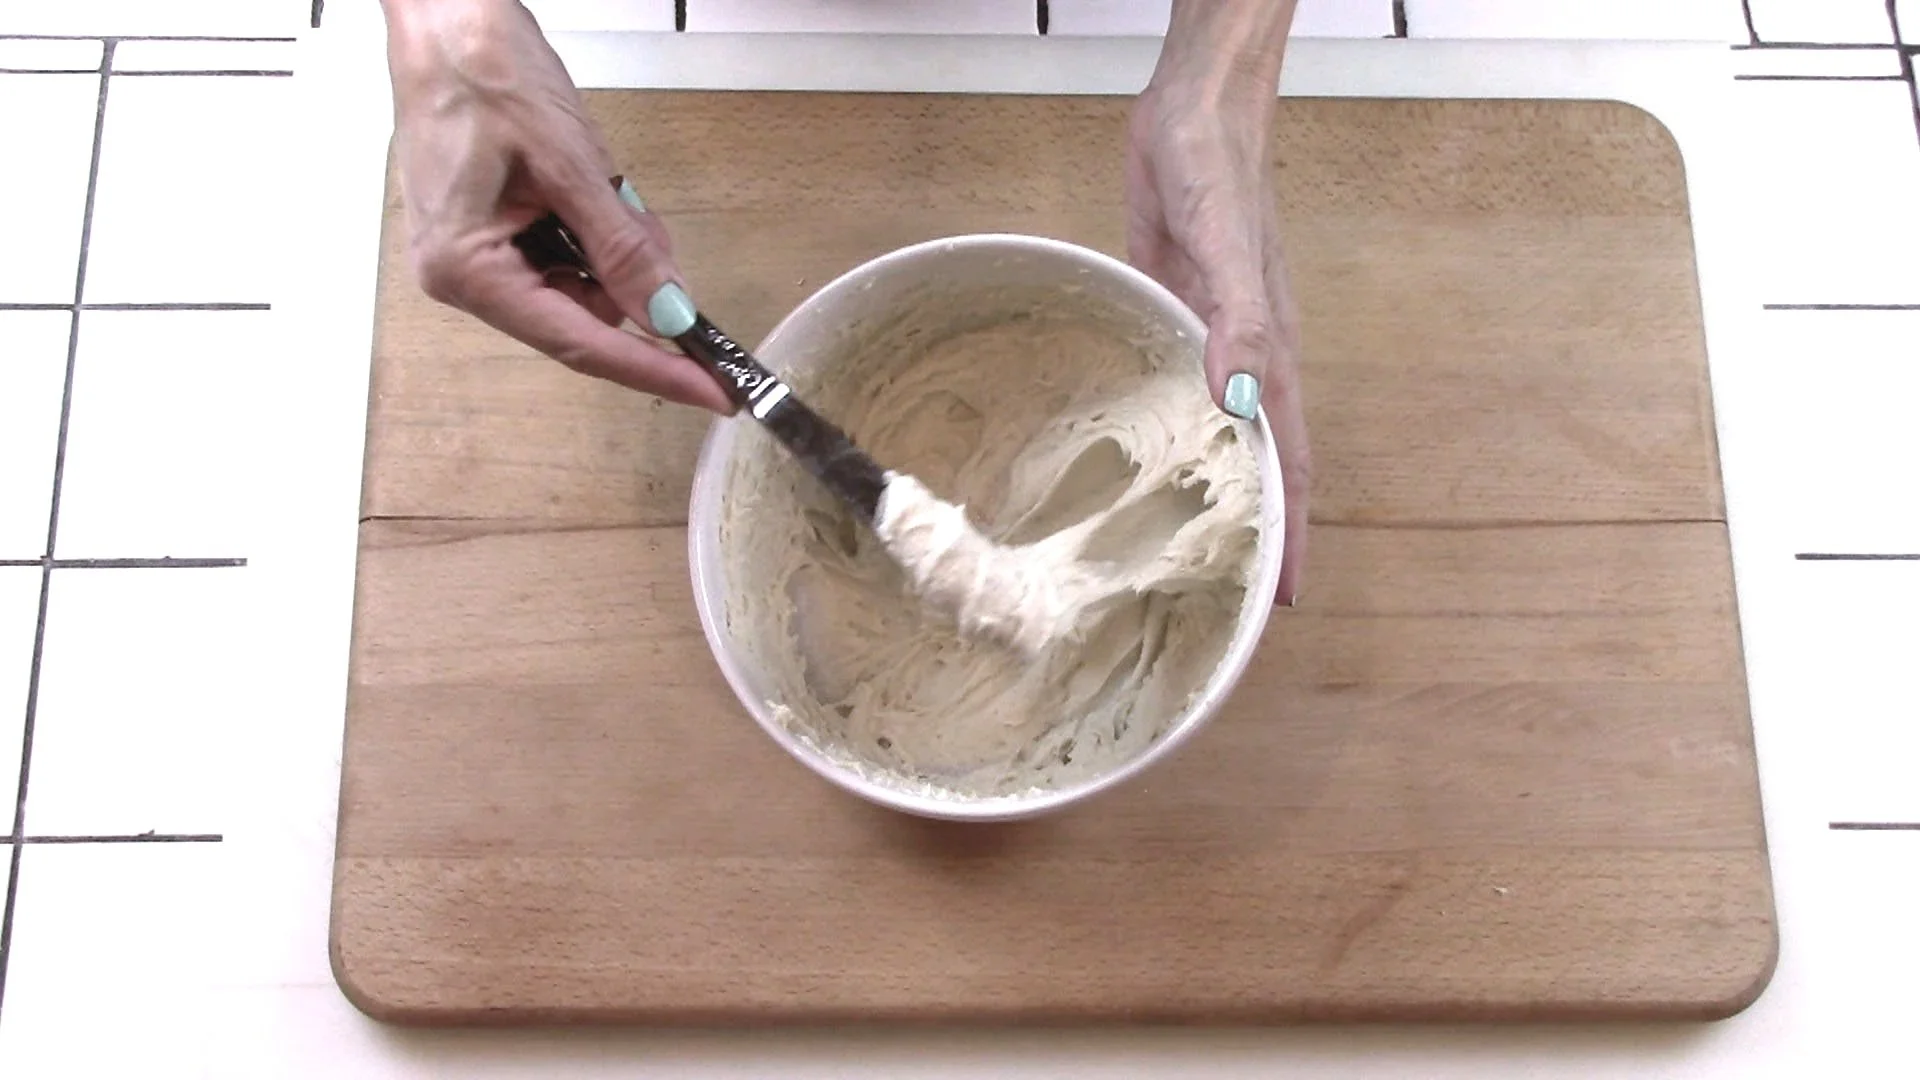
10
Dough will be sticky and will not resemble gluten dough. That’s ok!
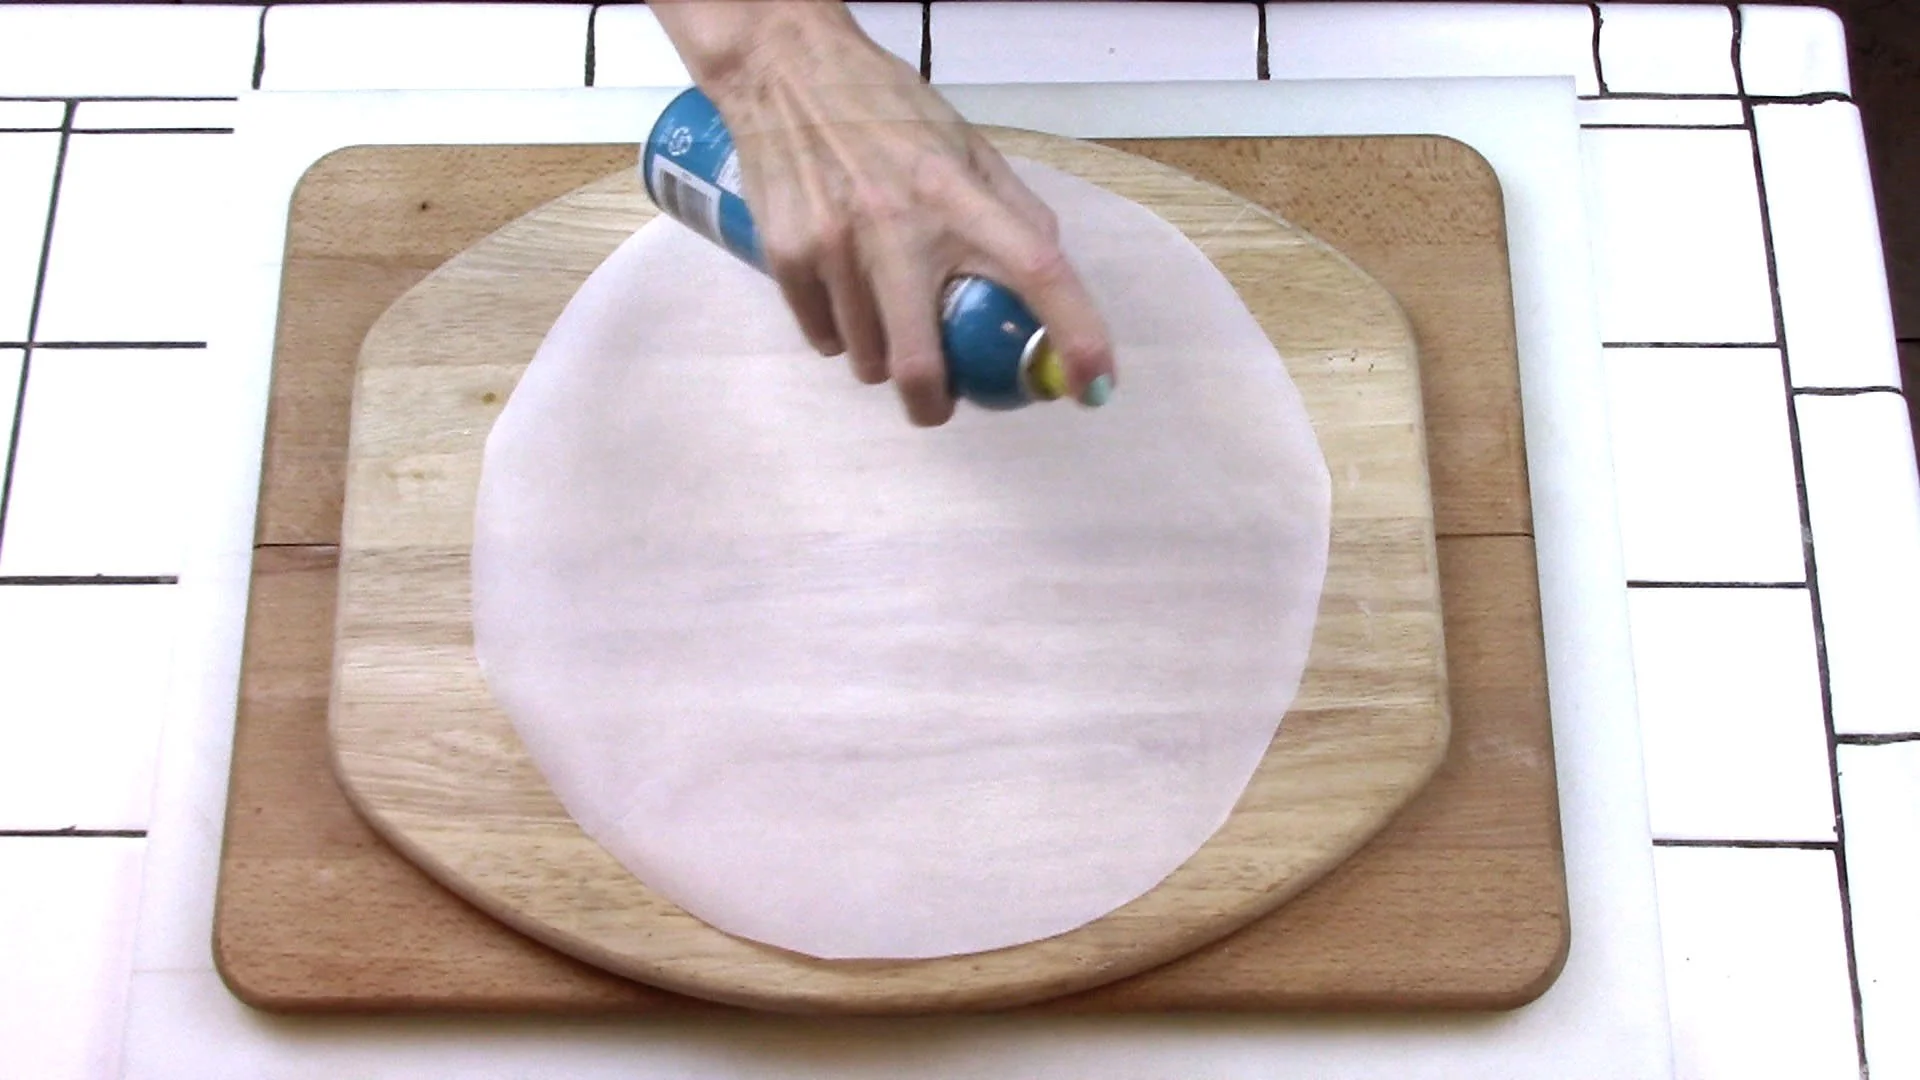
11
Spray your pre-cut parchment paper with non-stick cooking spray and lay it on a flat movable work surface like a large cutting board or cookie sheet (with no edges).
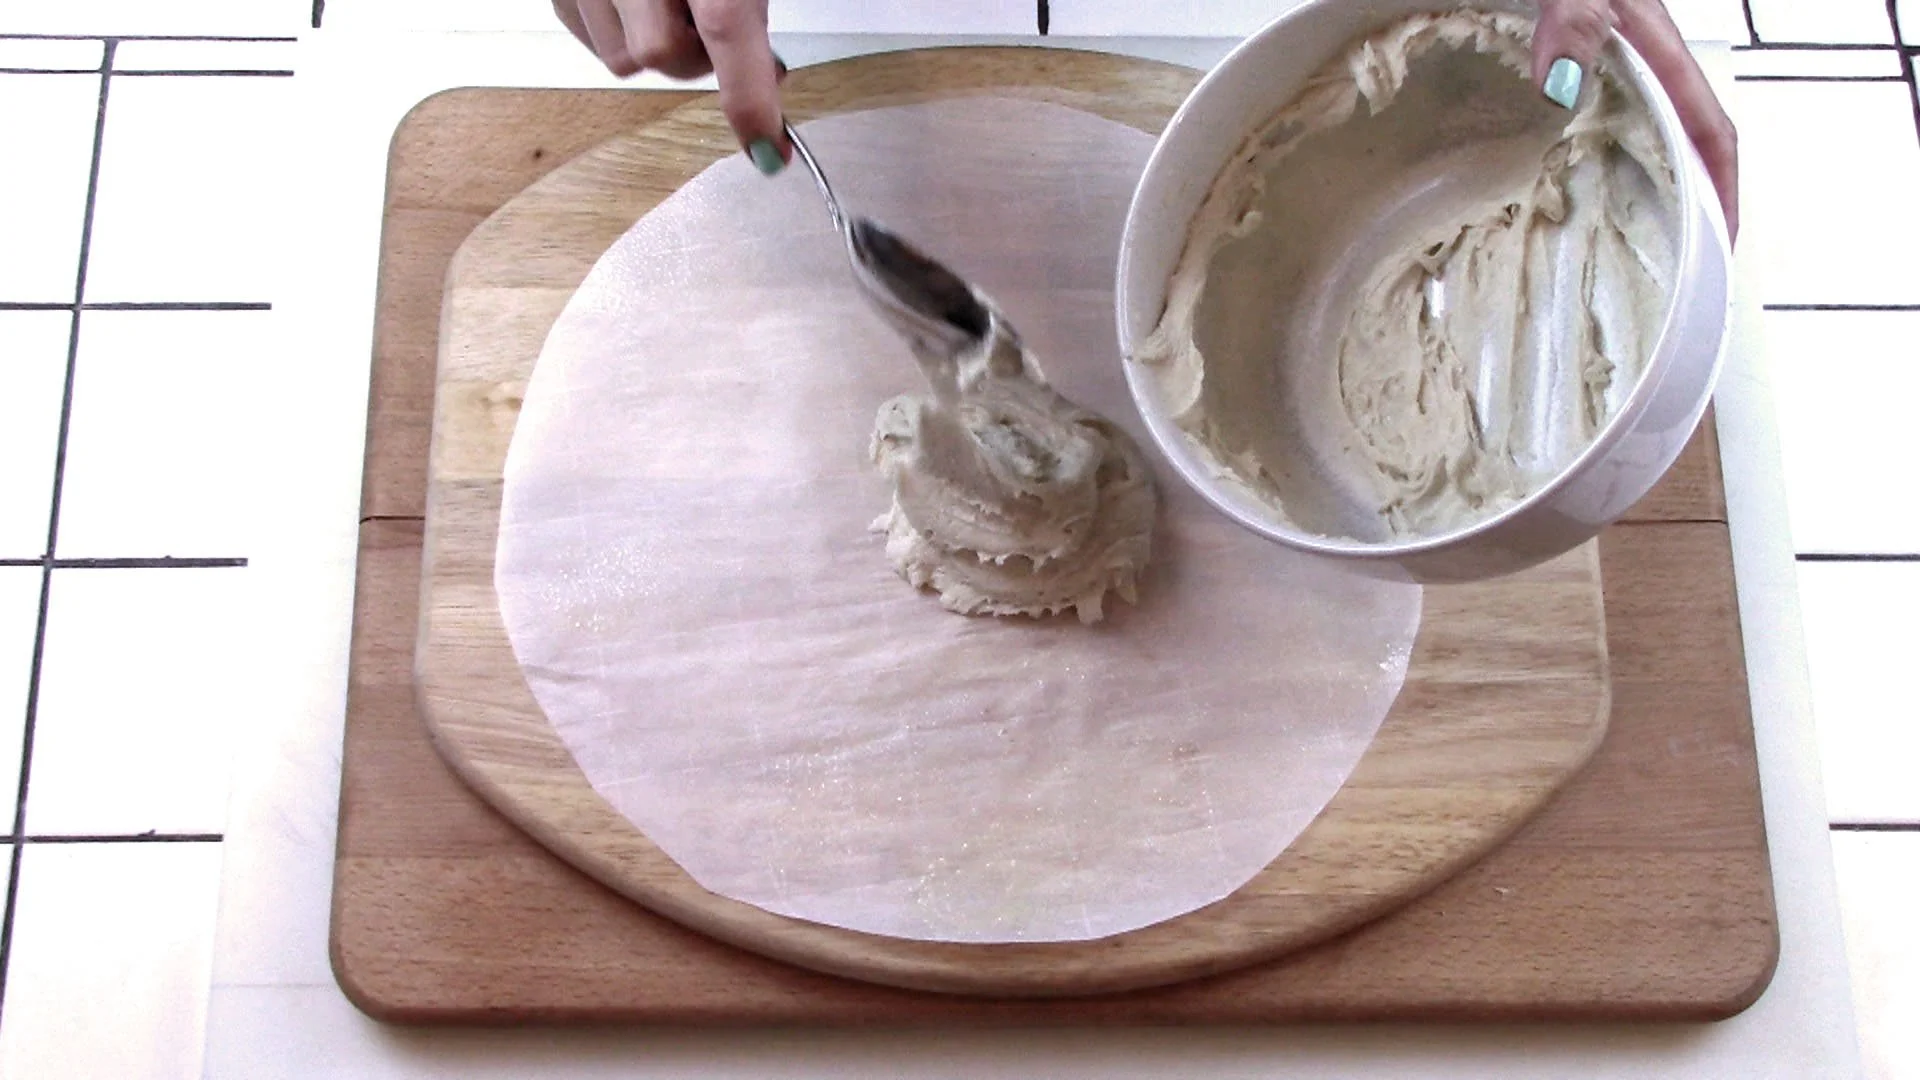
12
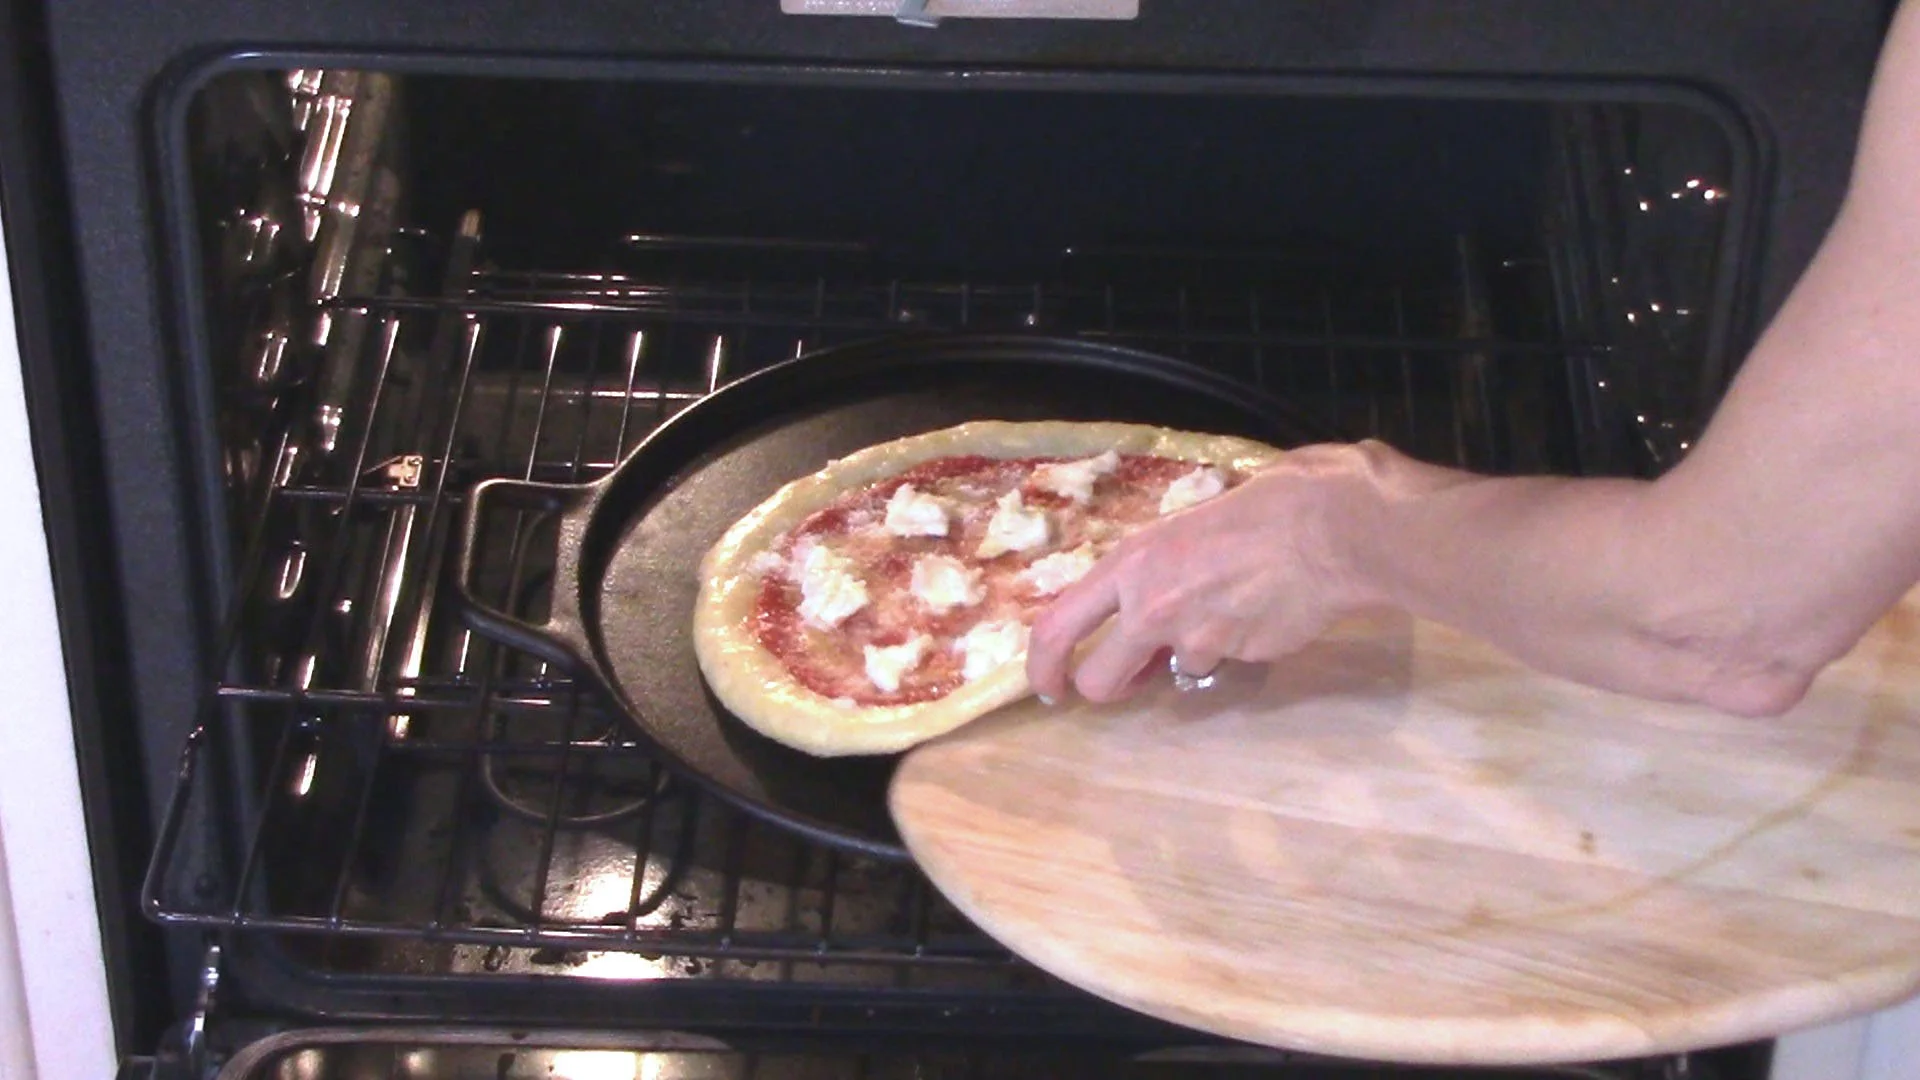
Place dough in center of parchment.
13
Lay another parchment on top (also sprayed with non-stick cooking spray.)
14
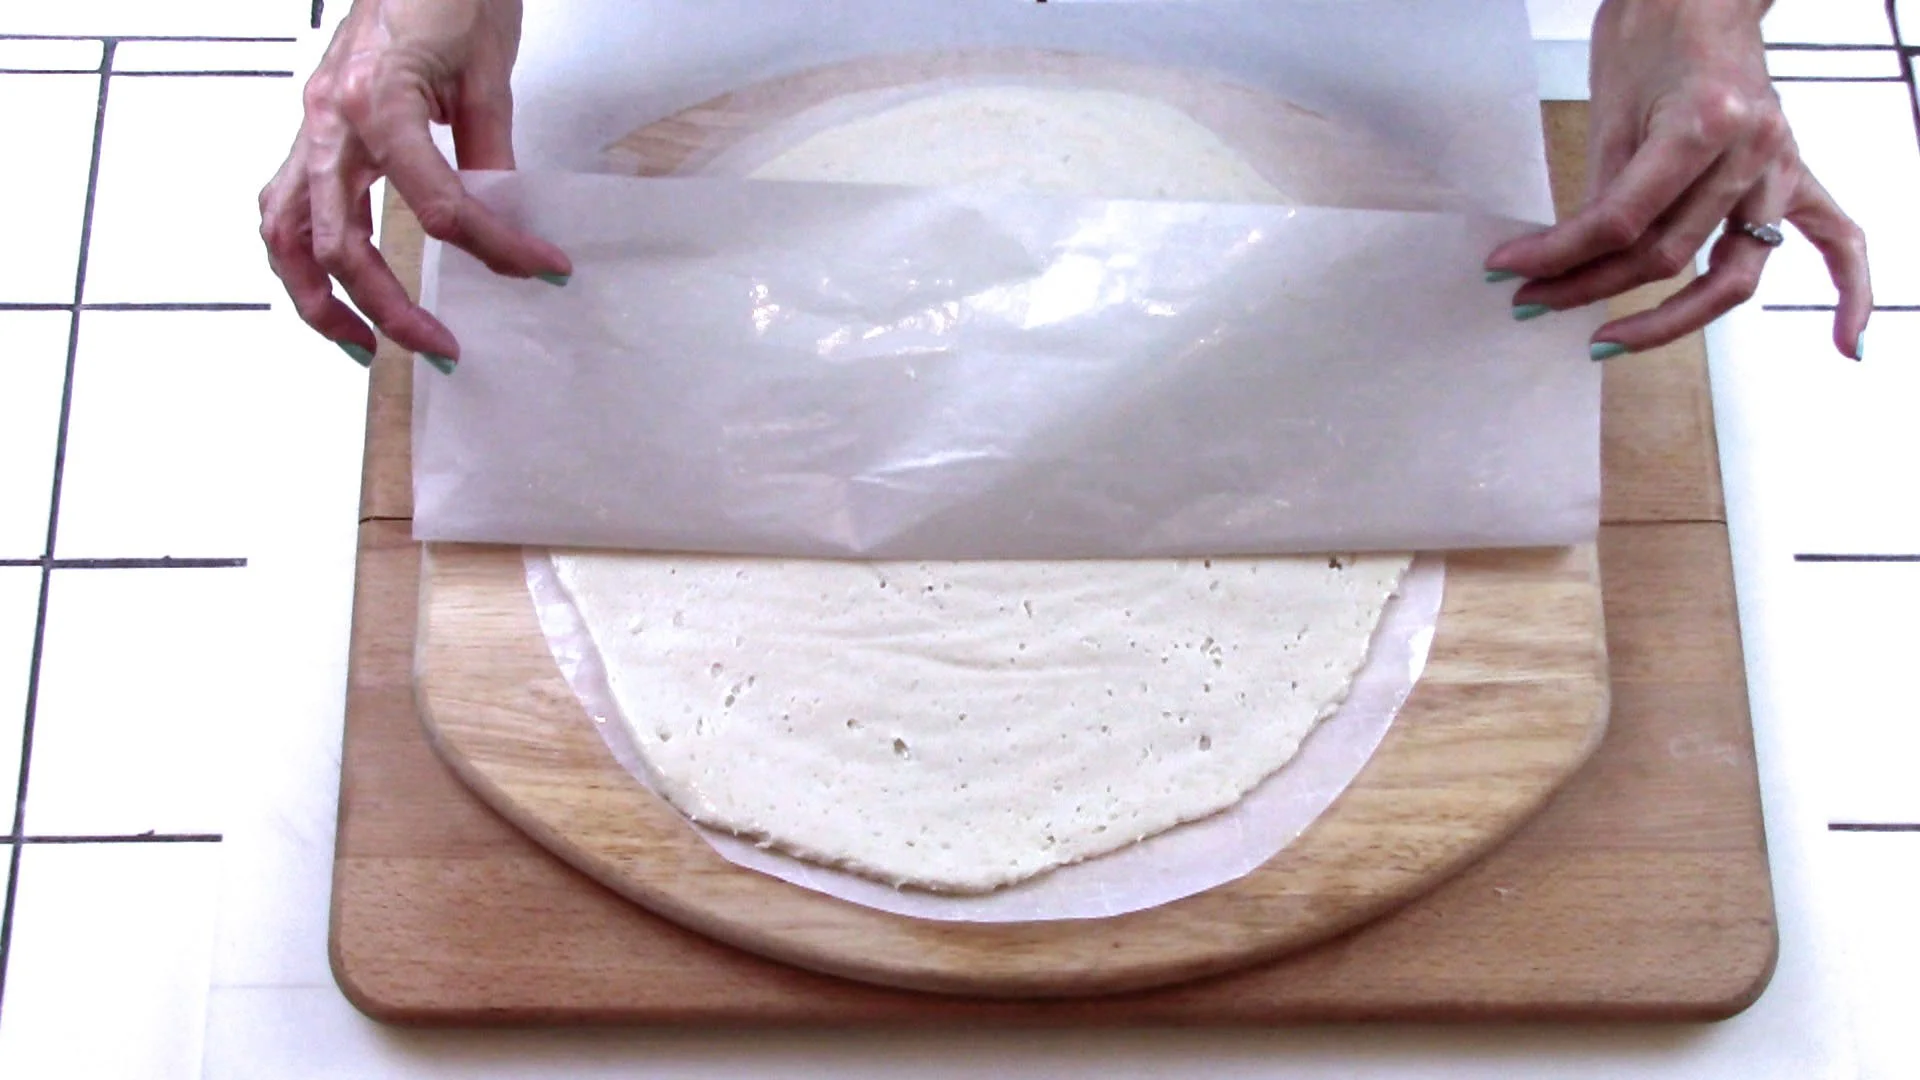
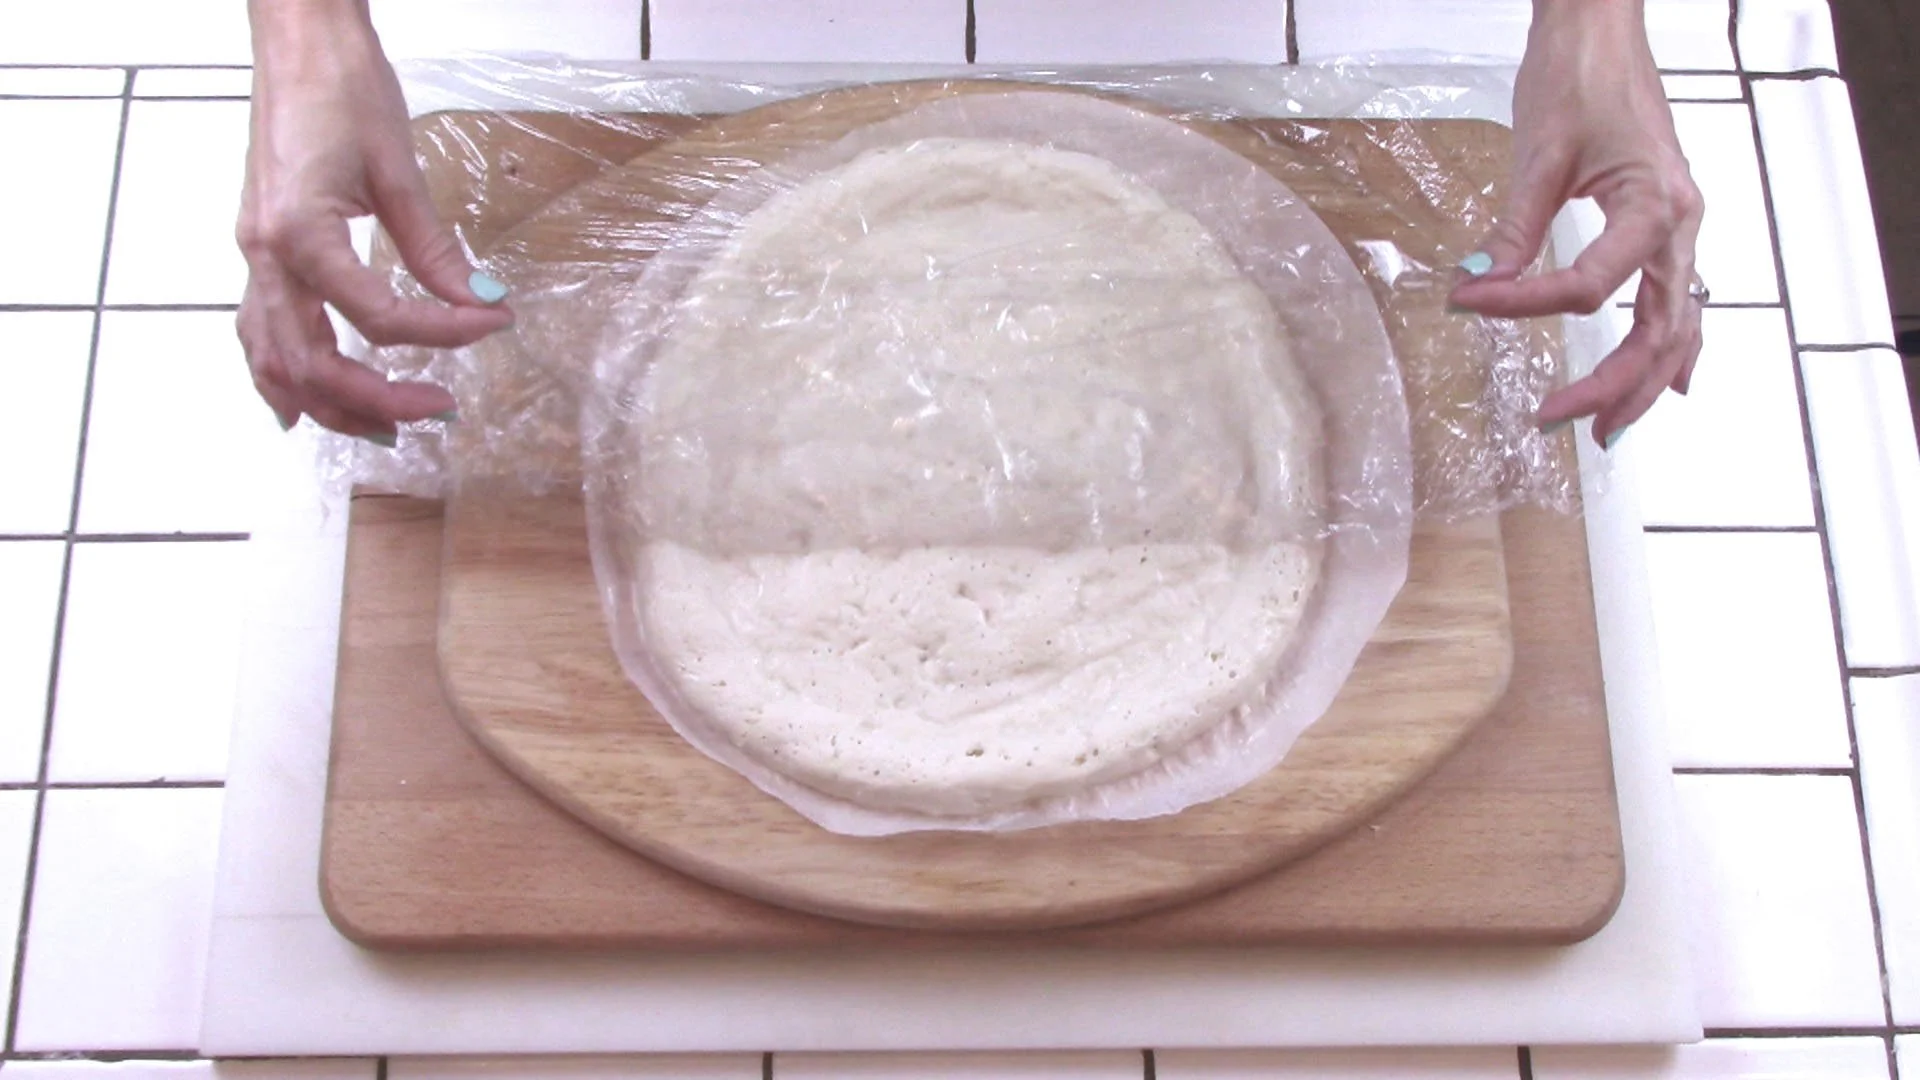
With your hands on top of parchment, press and smooth dough until it is about 12 inches in diameter.
15
Gently and slowly remove top paper.
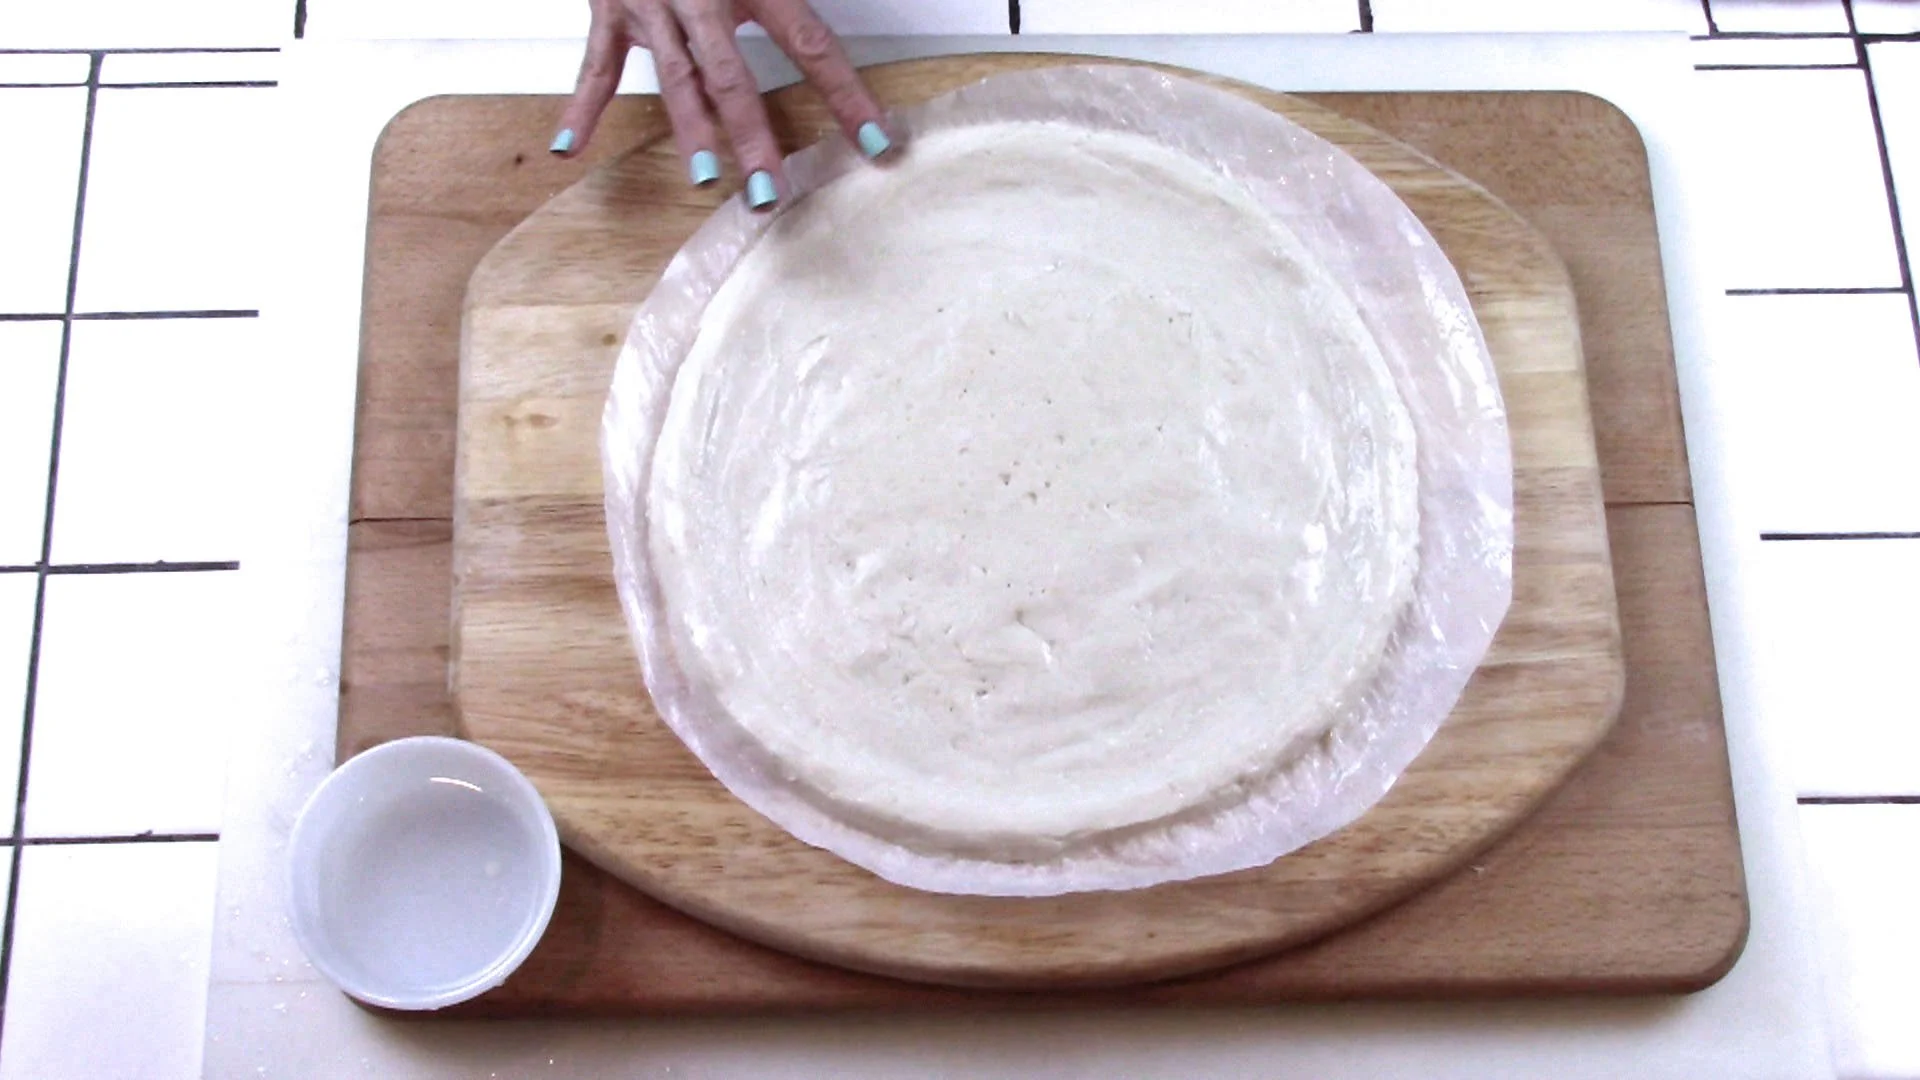
16
Finish shaping edges by hand. You’ll want to create a slightly thicker outer edge to keep in the sauce and toppings. To do this, place a cup of water nearby, and use dampened fingers to shape and smooth edges. When fully shaped, your pizza should now measure about 11 inches in diameter.
17

Loosely cover with plastic wrap sprayed with non-stick spray, and set in a warm place for 40 minutes. Dough will rise slightly.
18
While the dough is rising, preheat your oven to 450 degrees. Place your pan inside the oven while the oven heats so that it gets nice and hot BEFORE you put the dough on it. This will help the crust to get a little crispy on the bottom. I preheat my pan for about 20 minutes as my dough is rising, but all pans are different so decide for yourself how long your pan needs to be in the oven to really heat up.
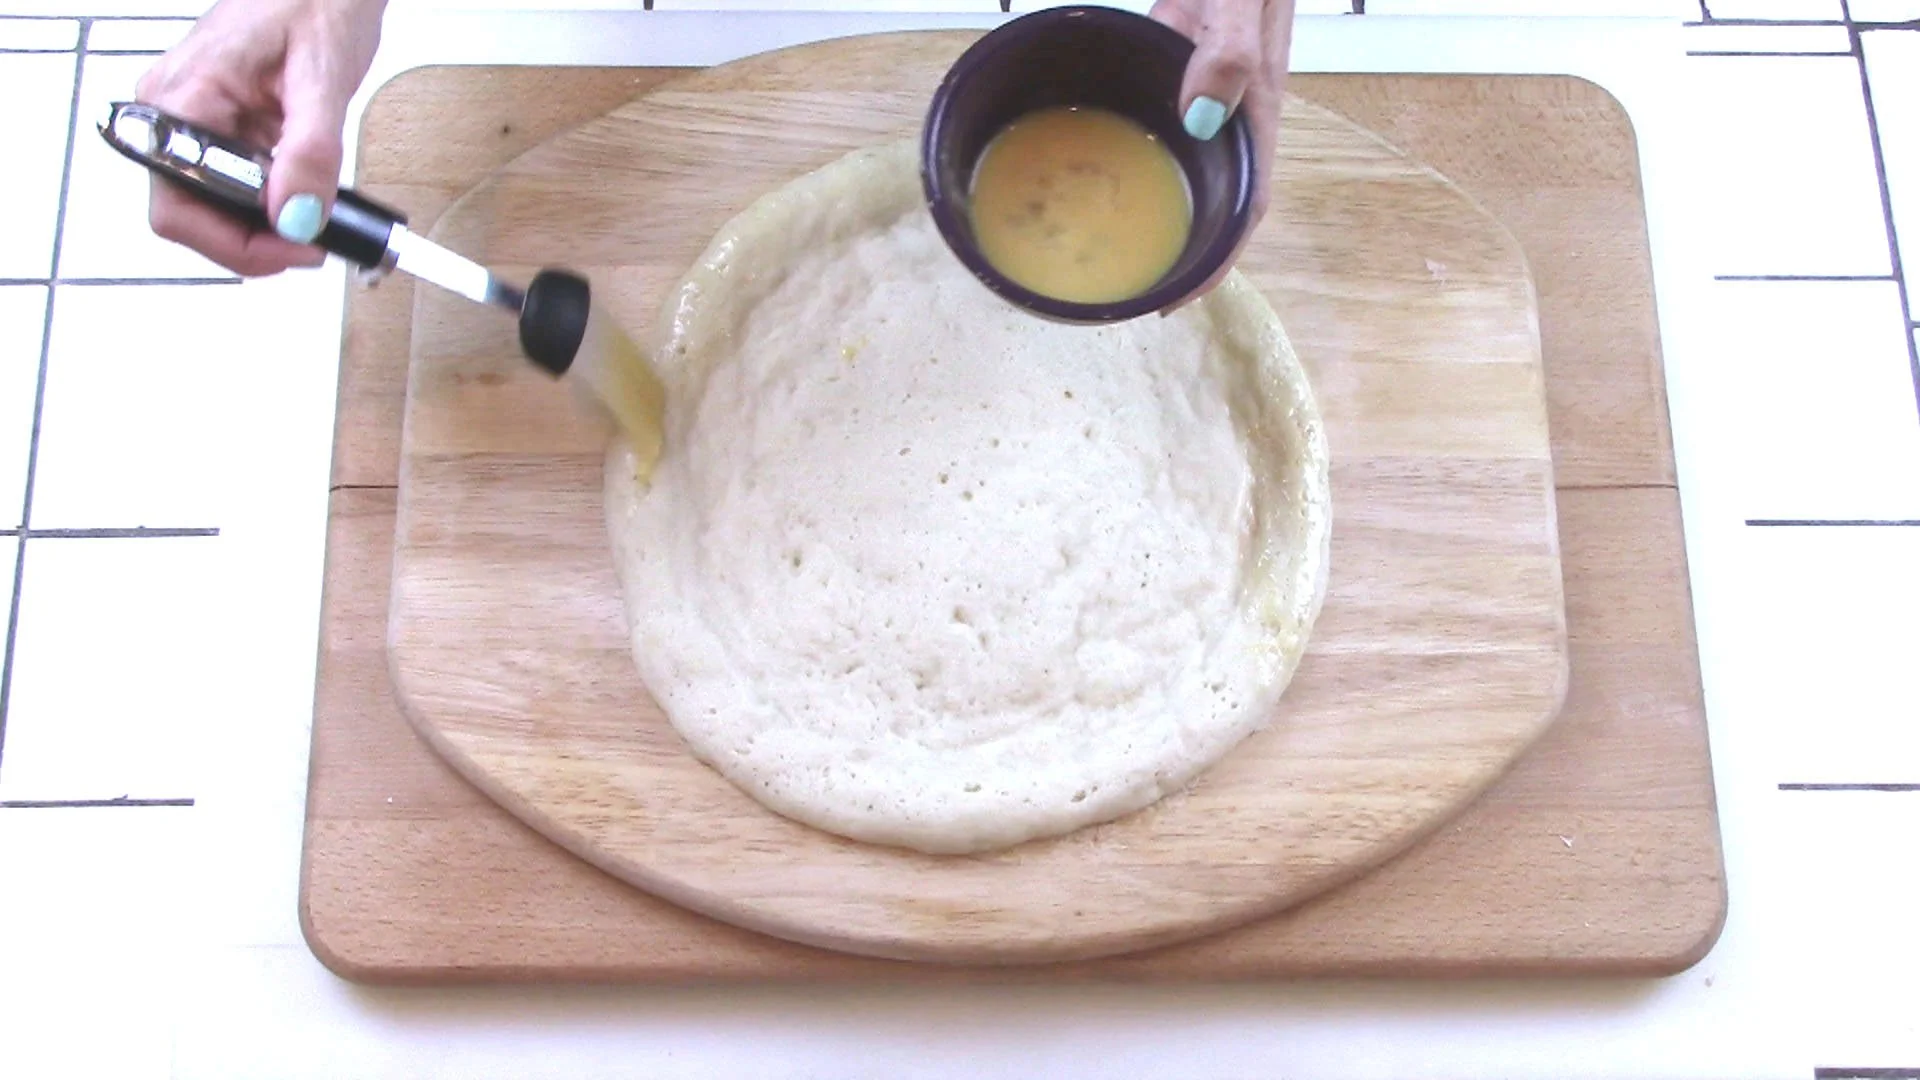
19
Also, while dough is rising, if you would like to do the optional egg wash later, prepare it now by mixing the egg and milk together. The egg wash simply helps the edges to become more golden and it also gives them a little shine. Set aside.
When rise time is done, carefully remove plastic wrap from dough.
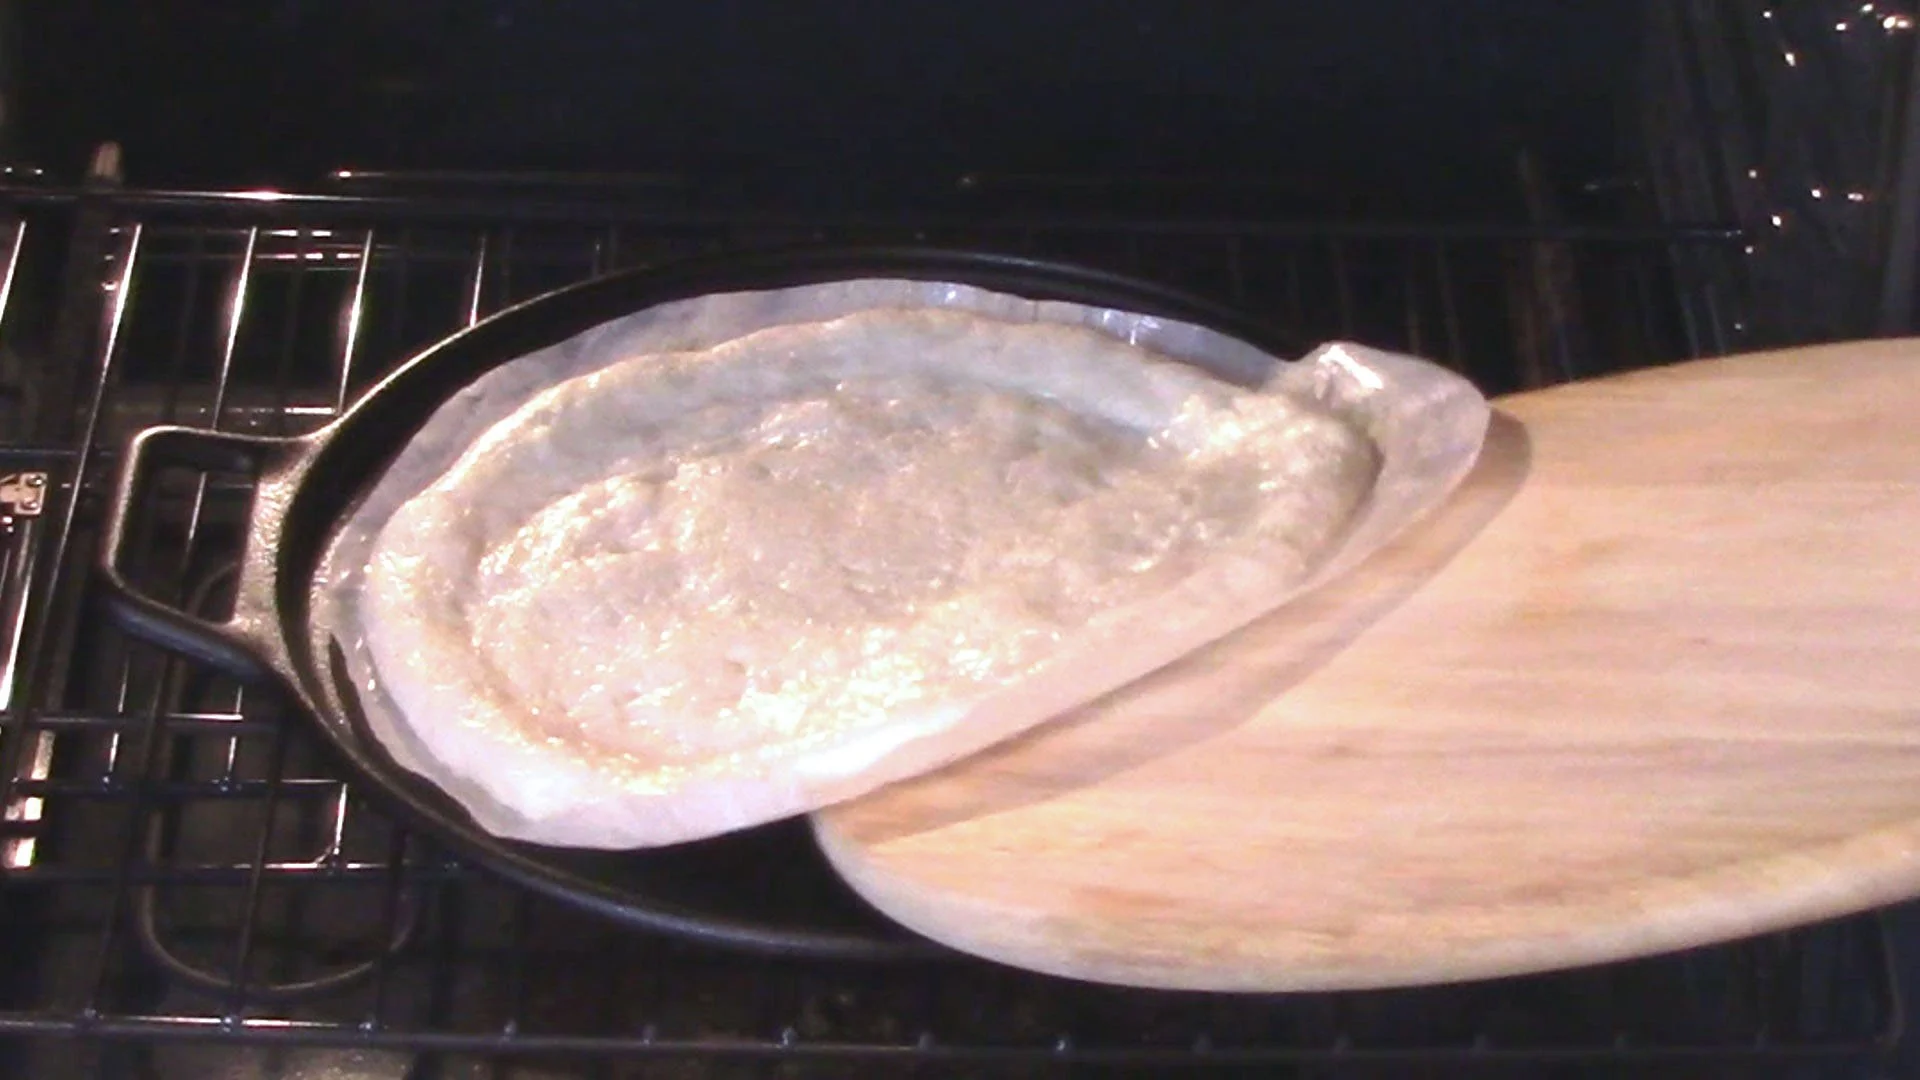
20
Transfer it to the preheated baking sheet in the oven by pulling out oven rack and sliding PARCHMENT PAPER WITH DOUGH carefully over to the heated pan (leave dough on the parchment).
21
Bake for 7 minutes. You will bake it again after topping the pizza.
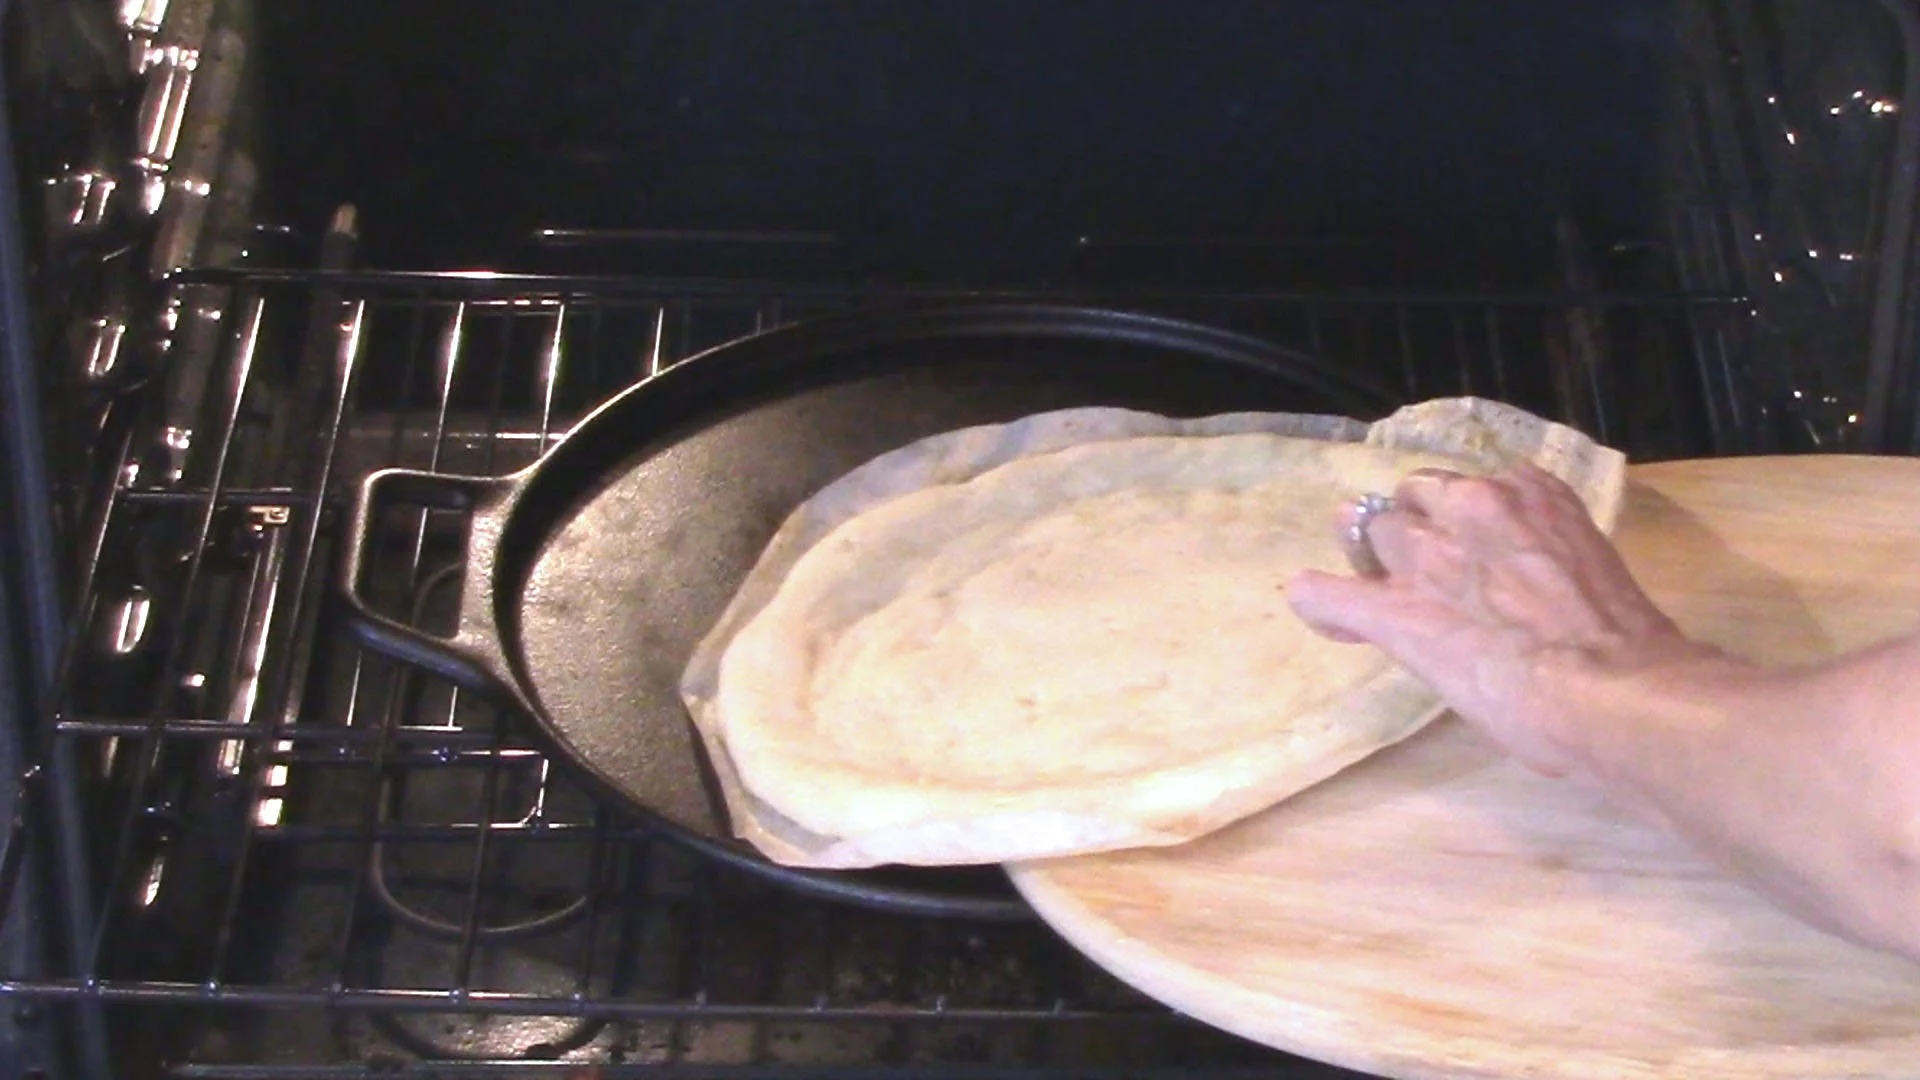
Remove from oven by sliding parchment back onto your cutting board or baking sheet, LEAVING THE PAN IN THE OVEN.
Increase oven temperature to 450 degrees.
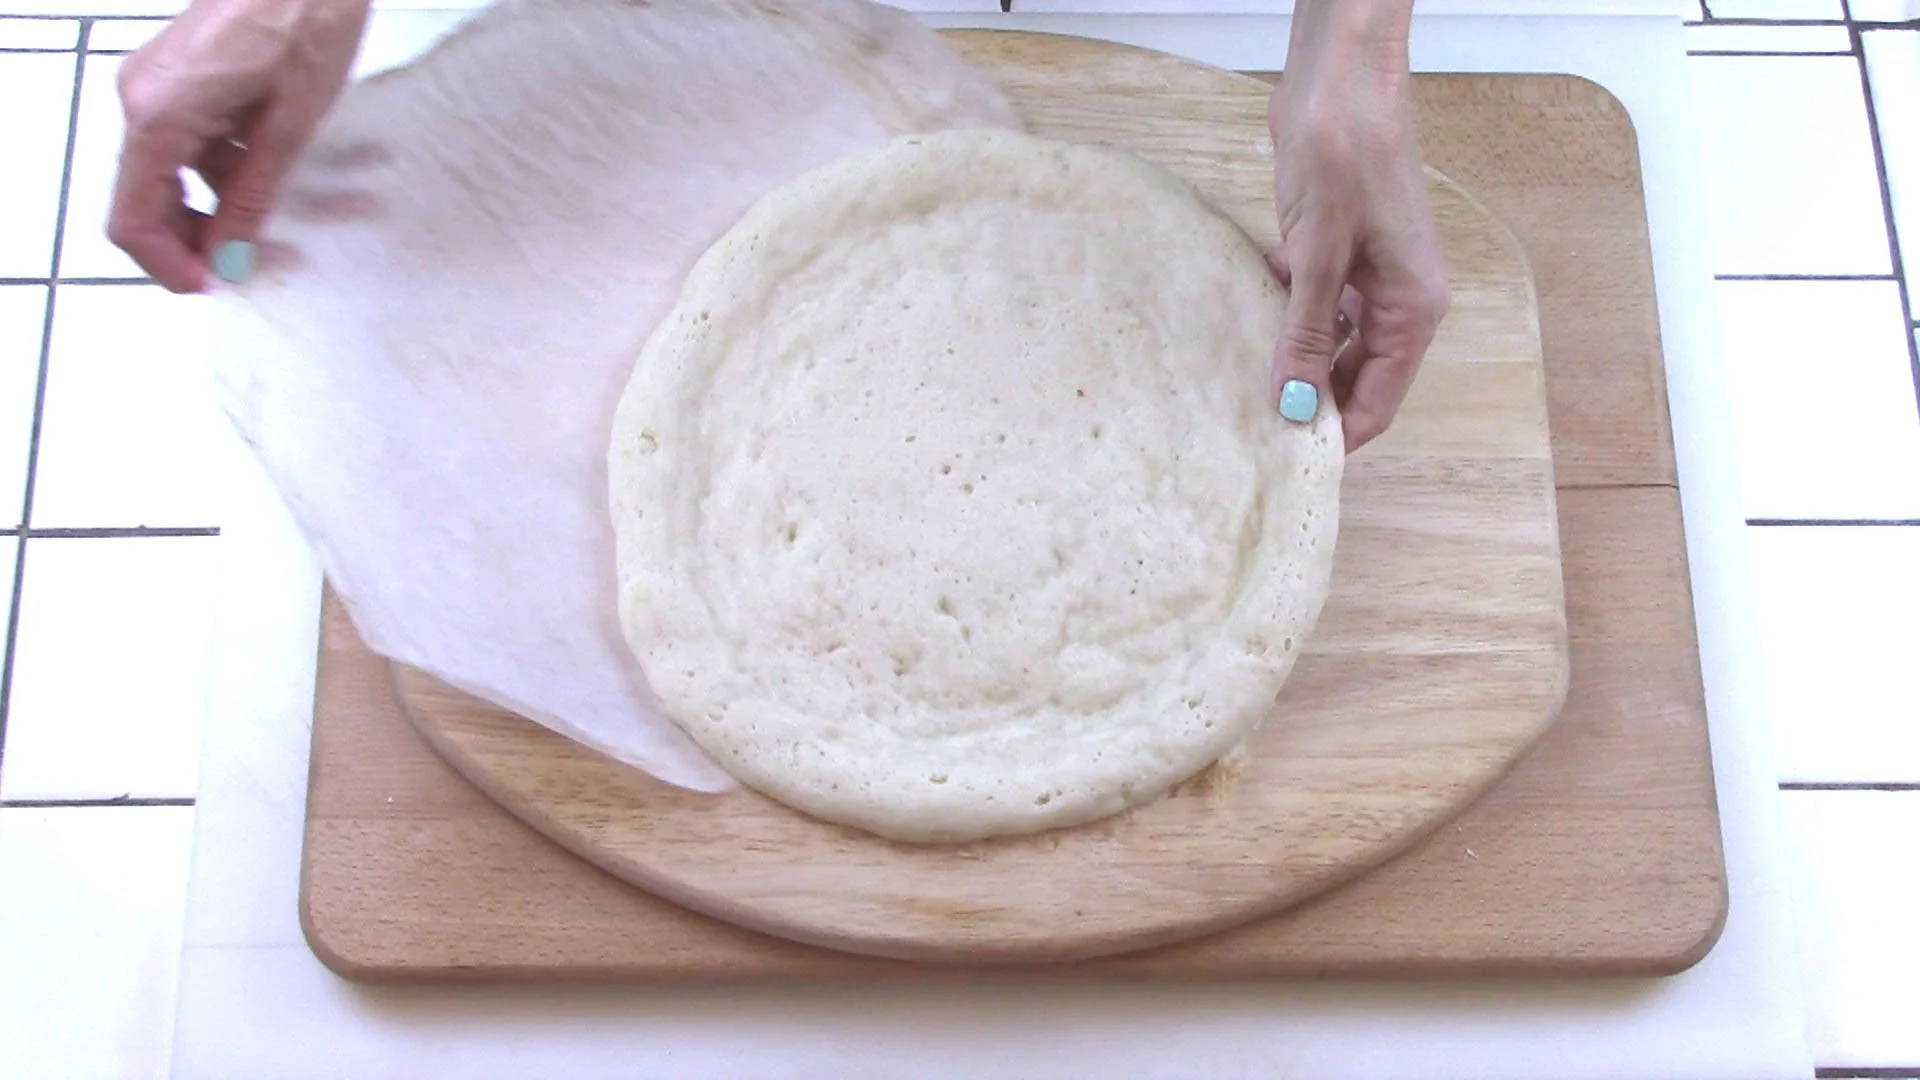
22
Remove parchment by sliding pizza crust onto your movable surface. Discard parchment.
23
Dough is only partially cooked and will still be floppy.
24
Brush on egg wash around outer edge of pizza now if desired.
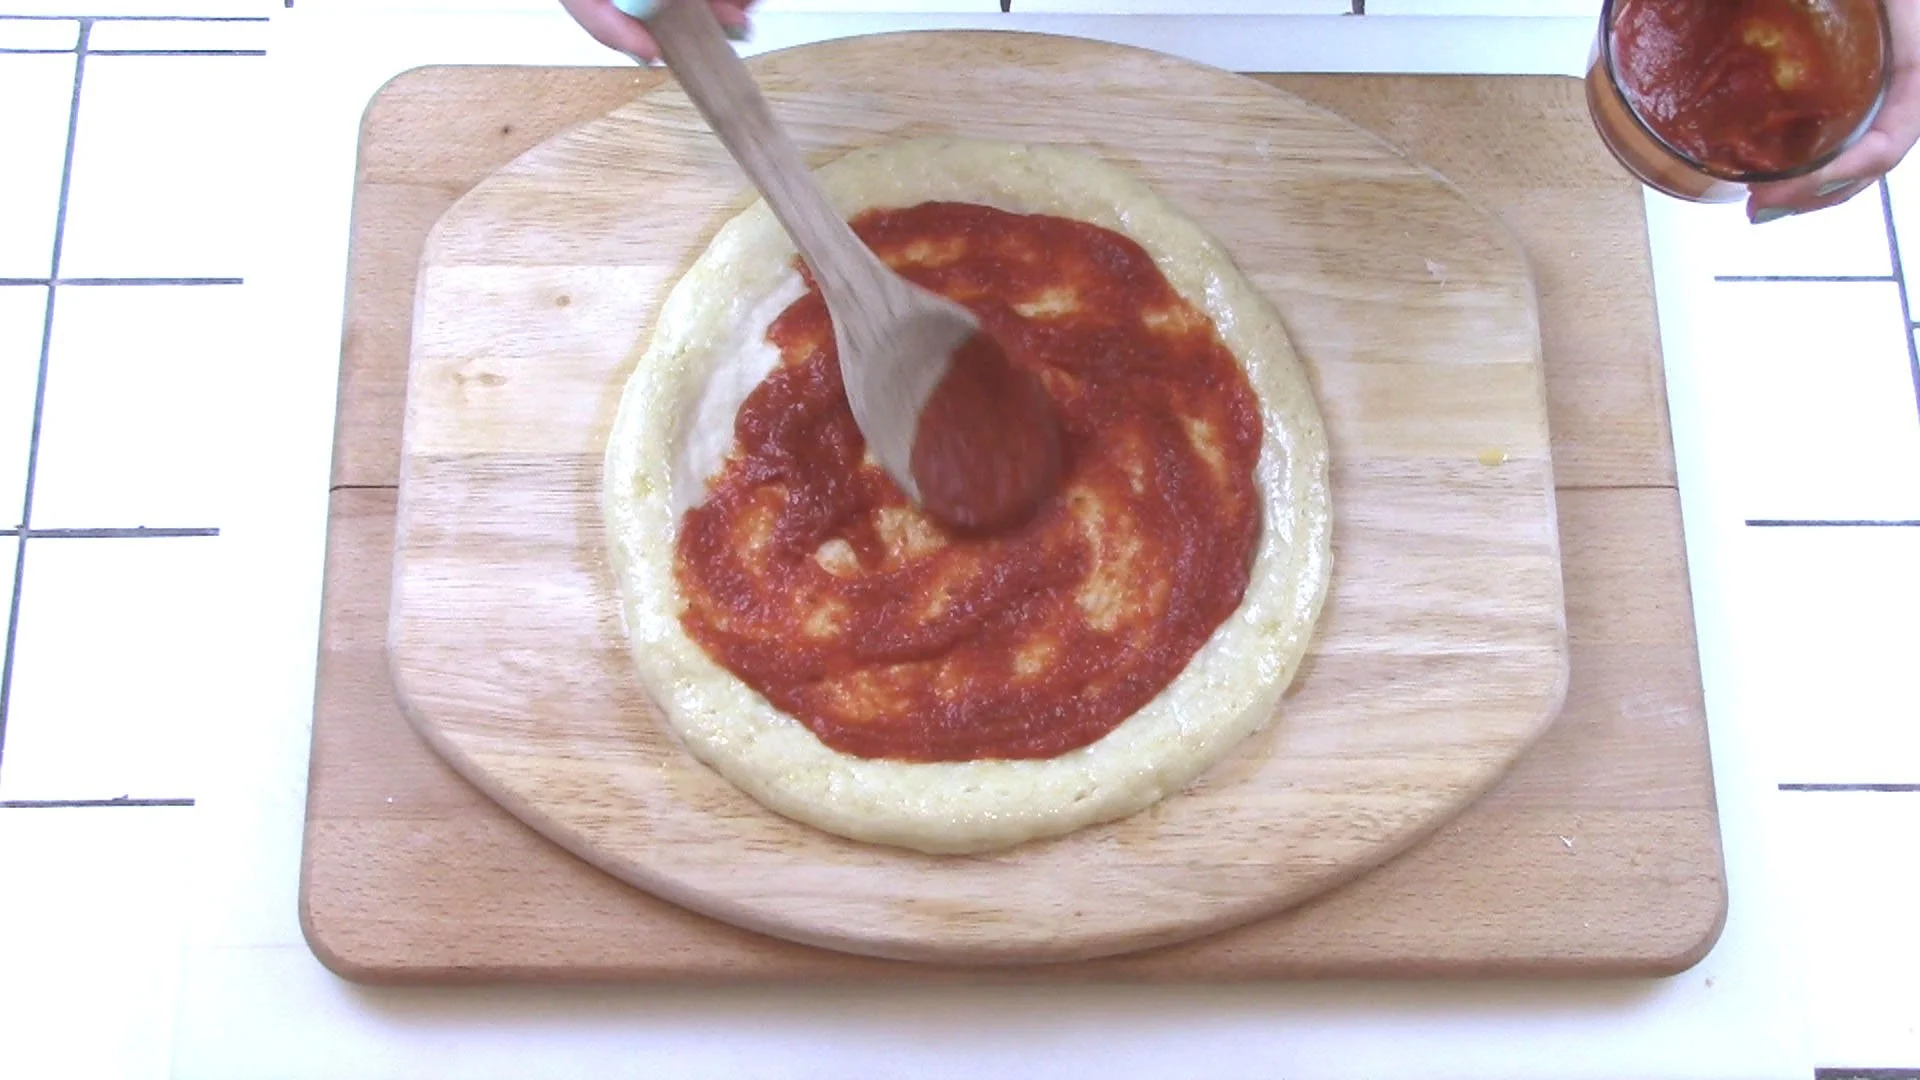
25
To make Pizza Margherita, top your pizza with your favorite gluten free sauce,
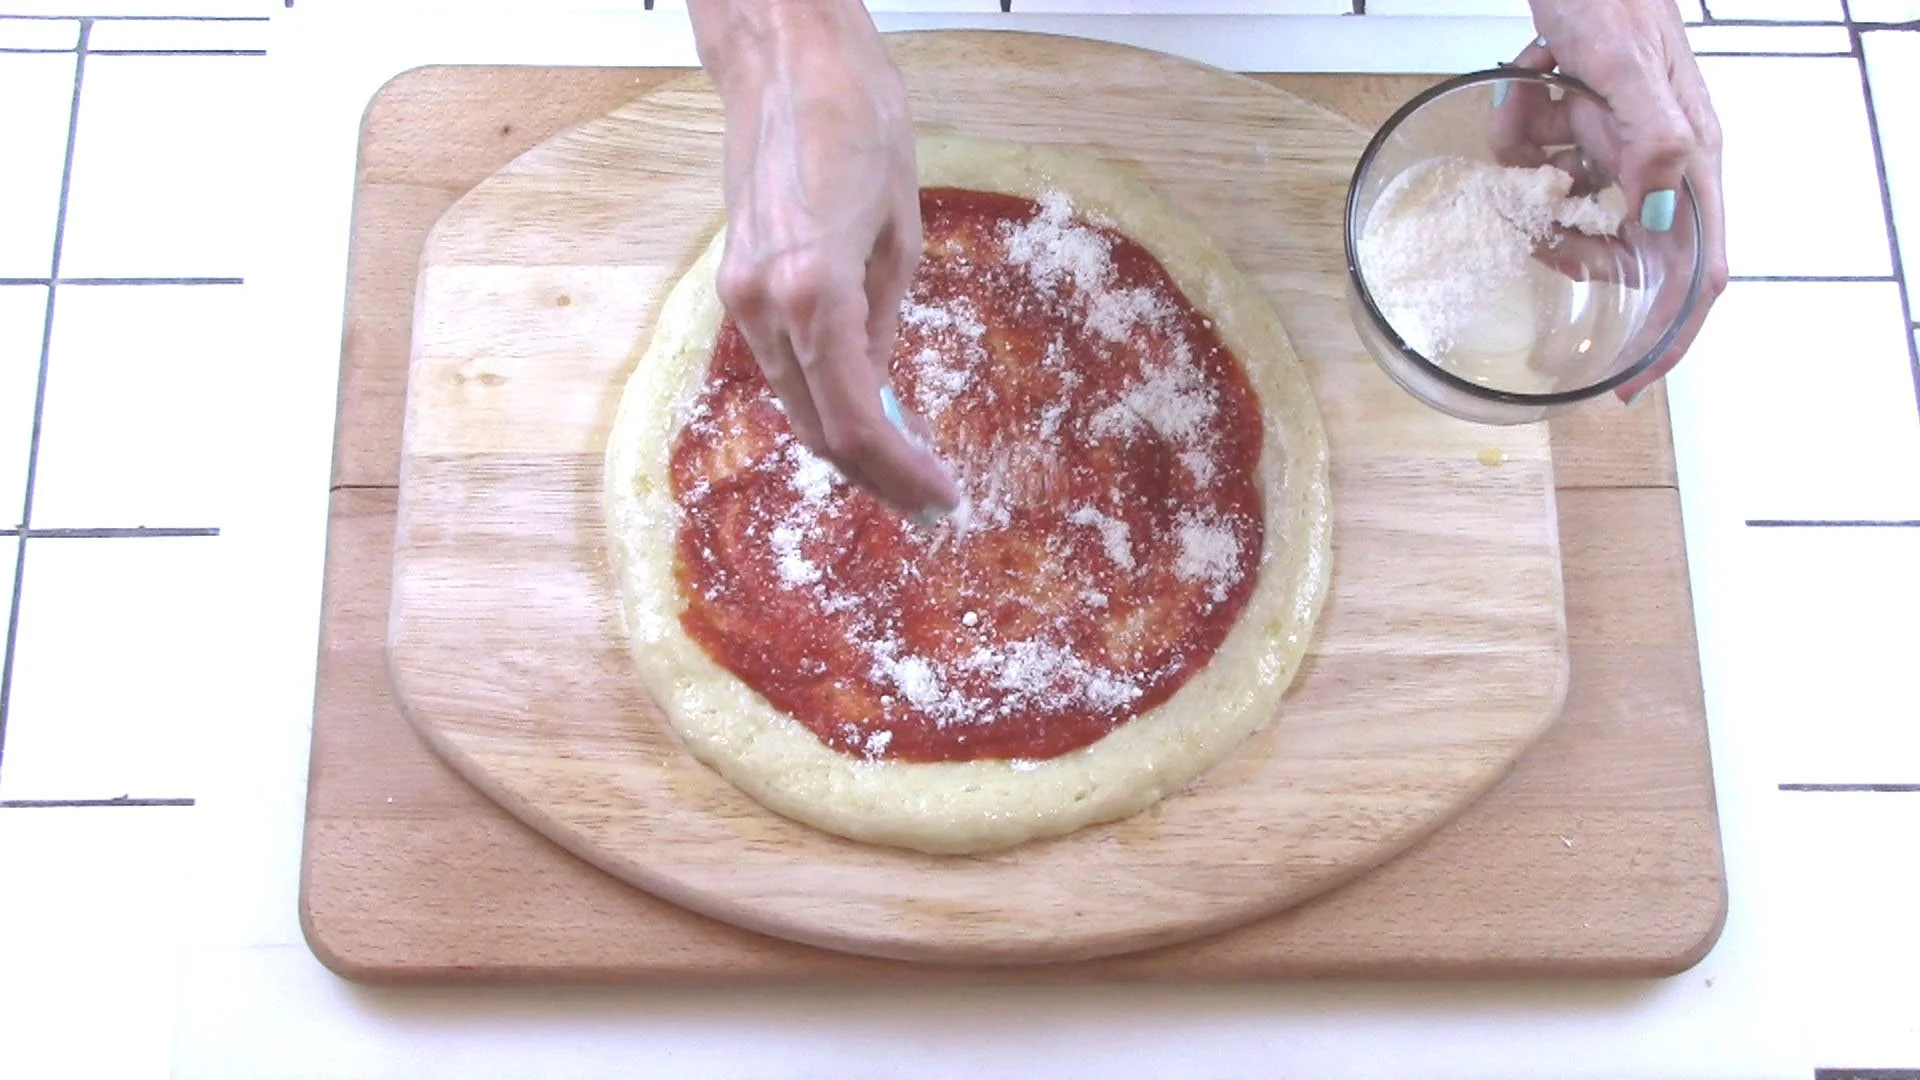
26
parmesan cheese,
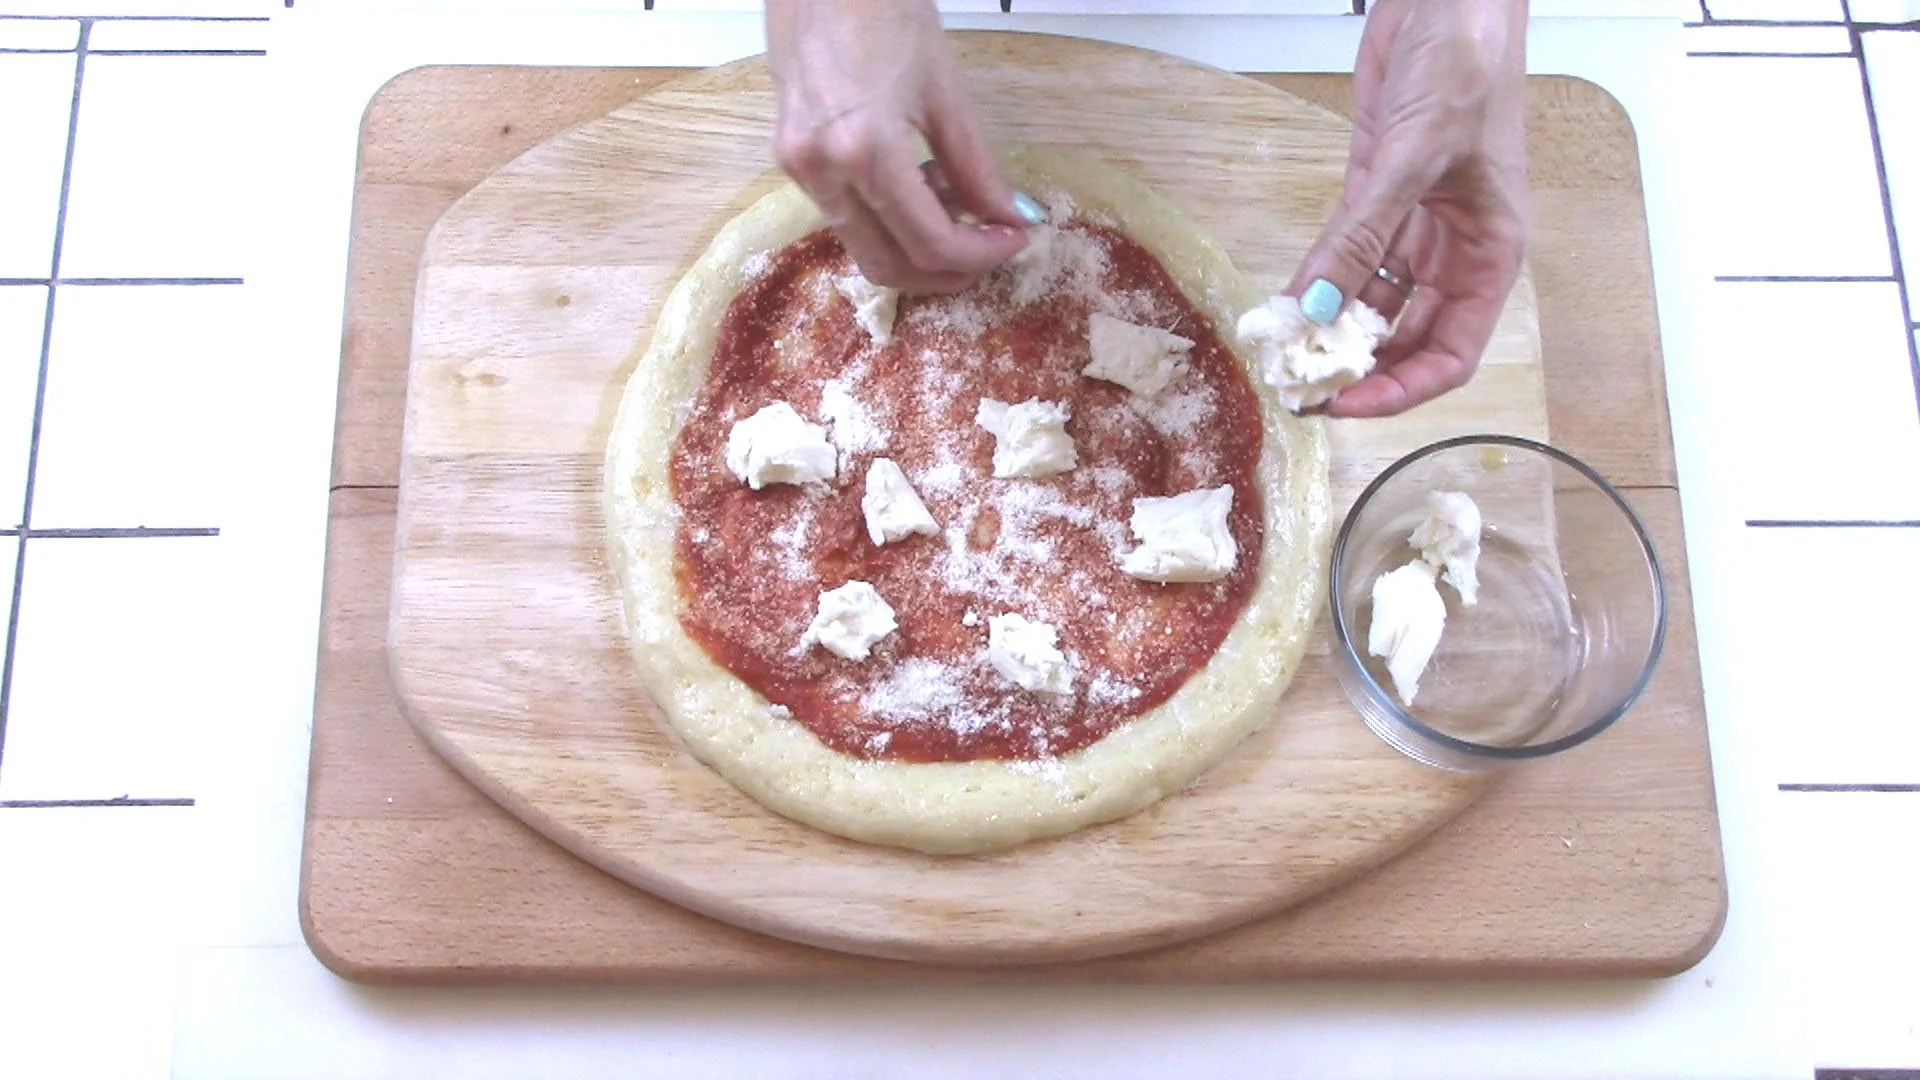
27
fresh mozarella,
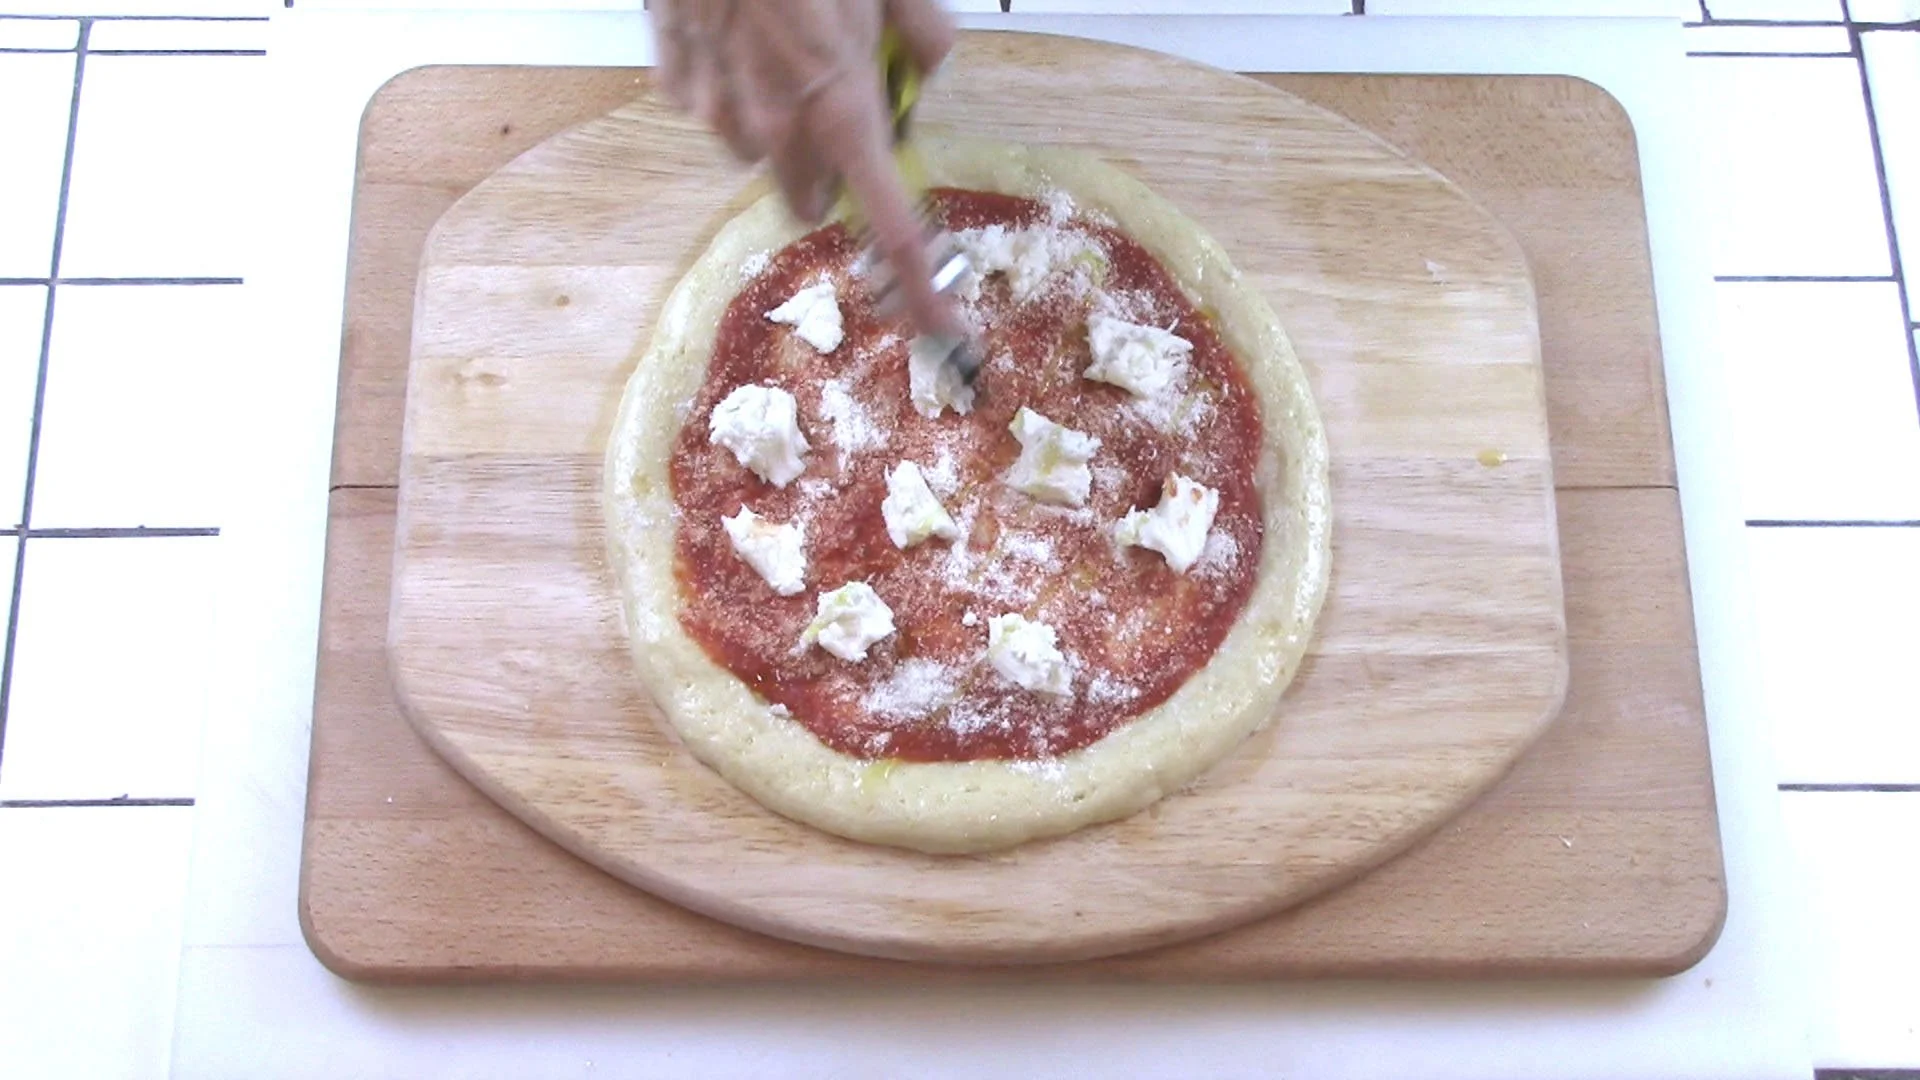
28
and a light drizzle of olive oil. (Don't add the basil yet as it might burn.)
29
After oven reaches 450 degrees, allow some time for the pan to heat up. I allow 15 minutes for my cast iron pan. Now, carefully slide your topped pizza onto the heated pan without the parchment. This will help to create a slightly crispy crust that is so important to great pizza! If the pan is hot enough, you may hear a small sizzle when the pizza hits the pan.
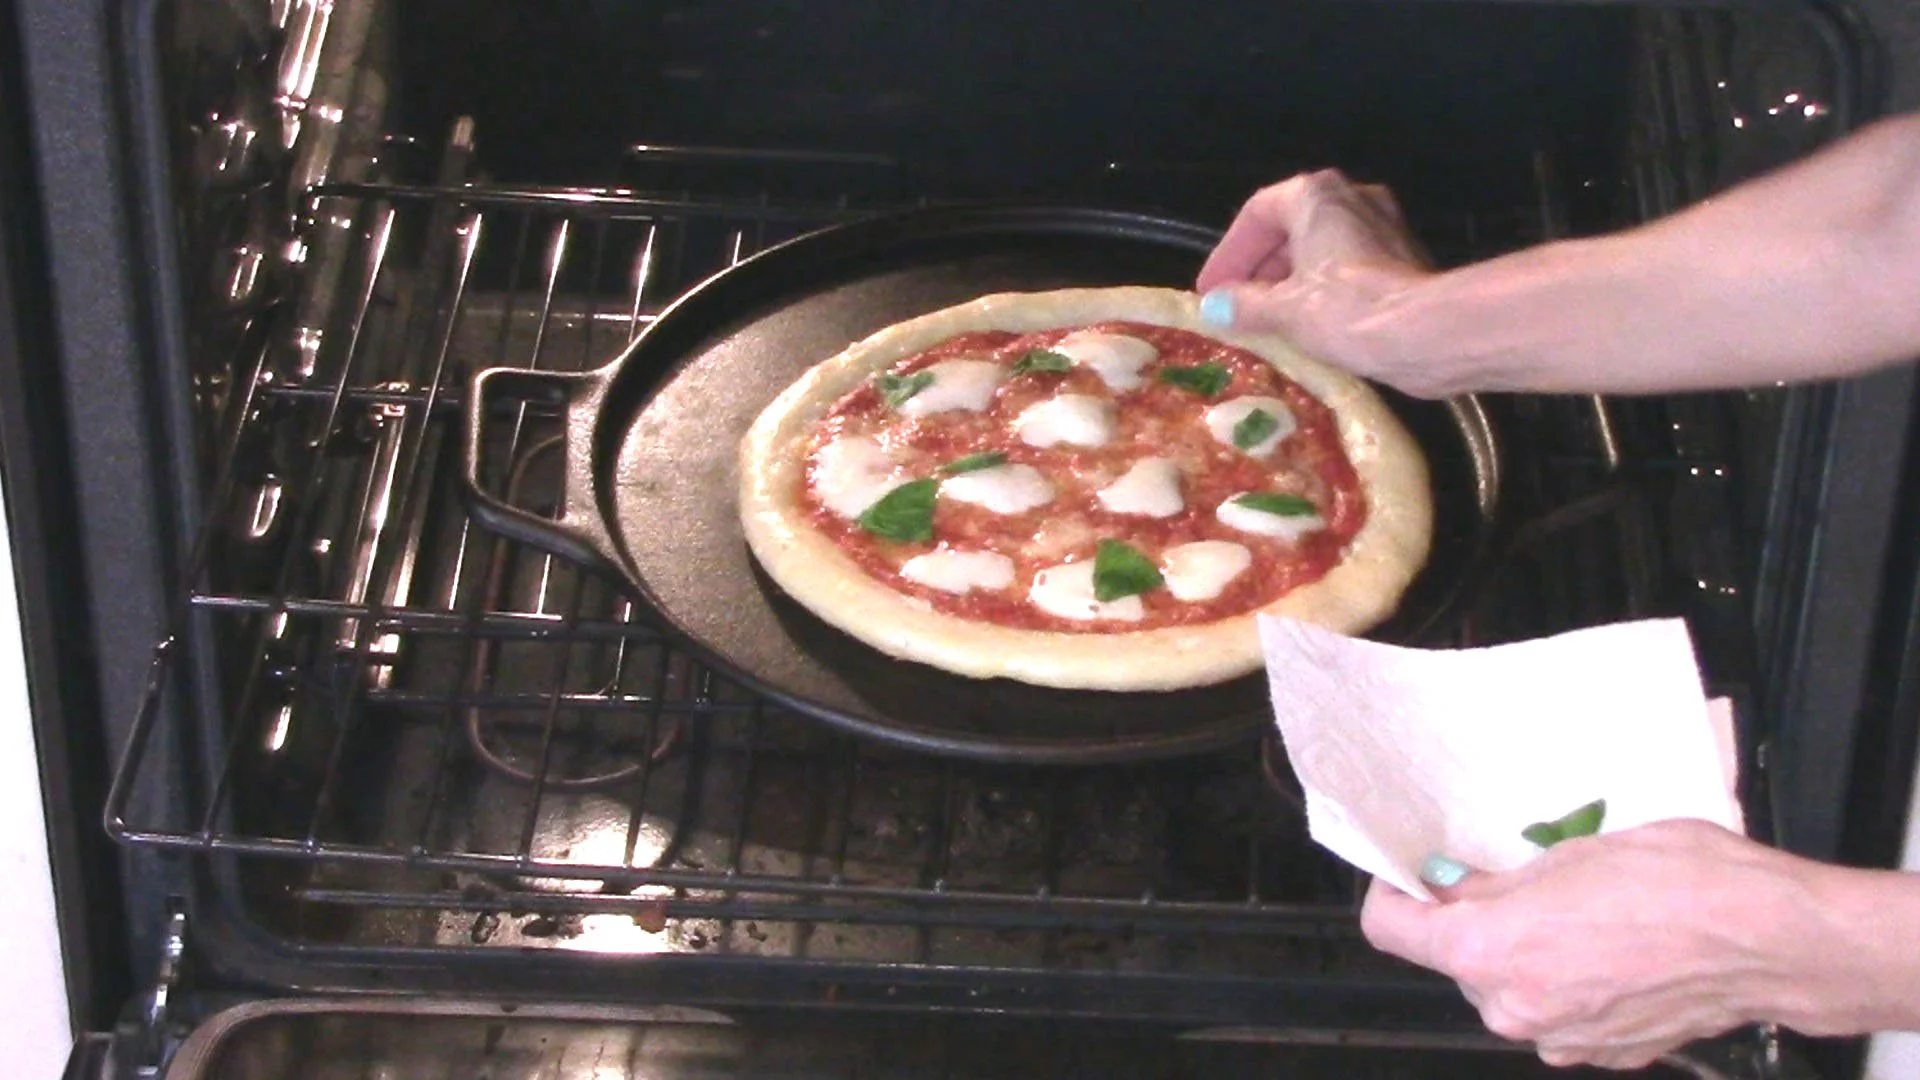
30
Bake for 5-6 more minutes. A couple minutes before baking is done, slide the oven rack out and add on the basil.
Finish baking the last couple of minutes or until the edges are golden and cheese is melted (total of both baking times is roughly 12-13 minutes, but every oven is different so please watch it carefully)
31
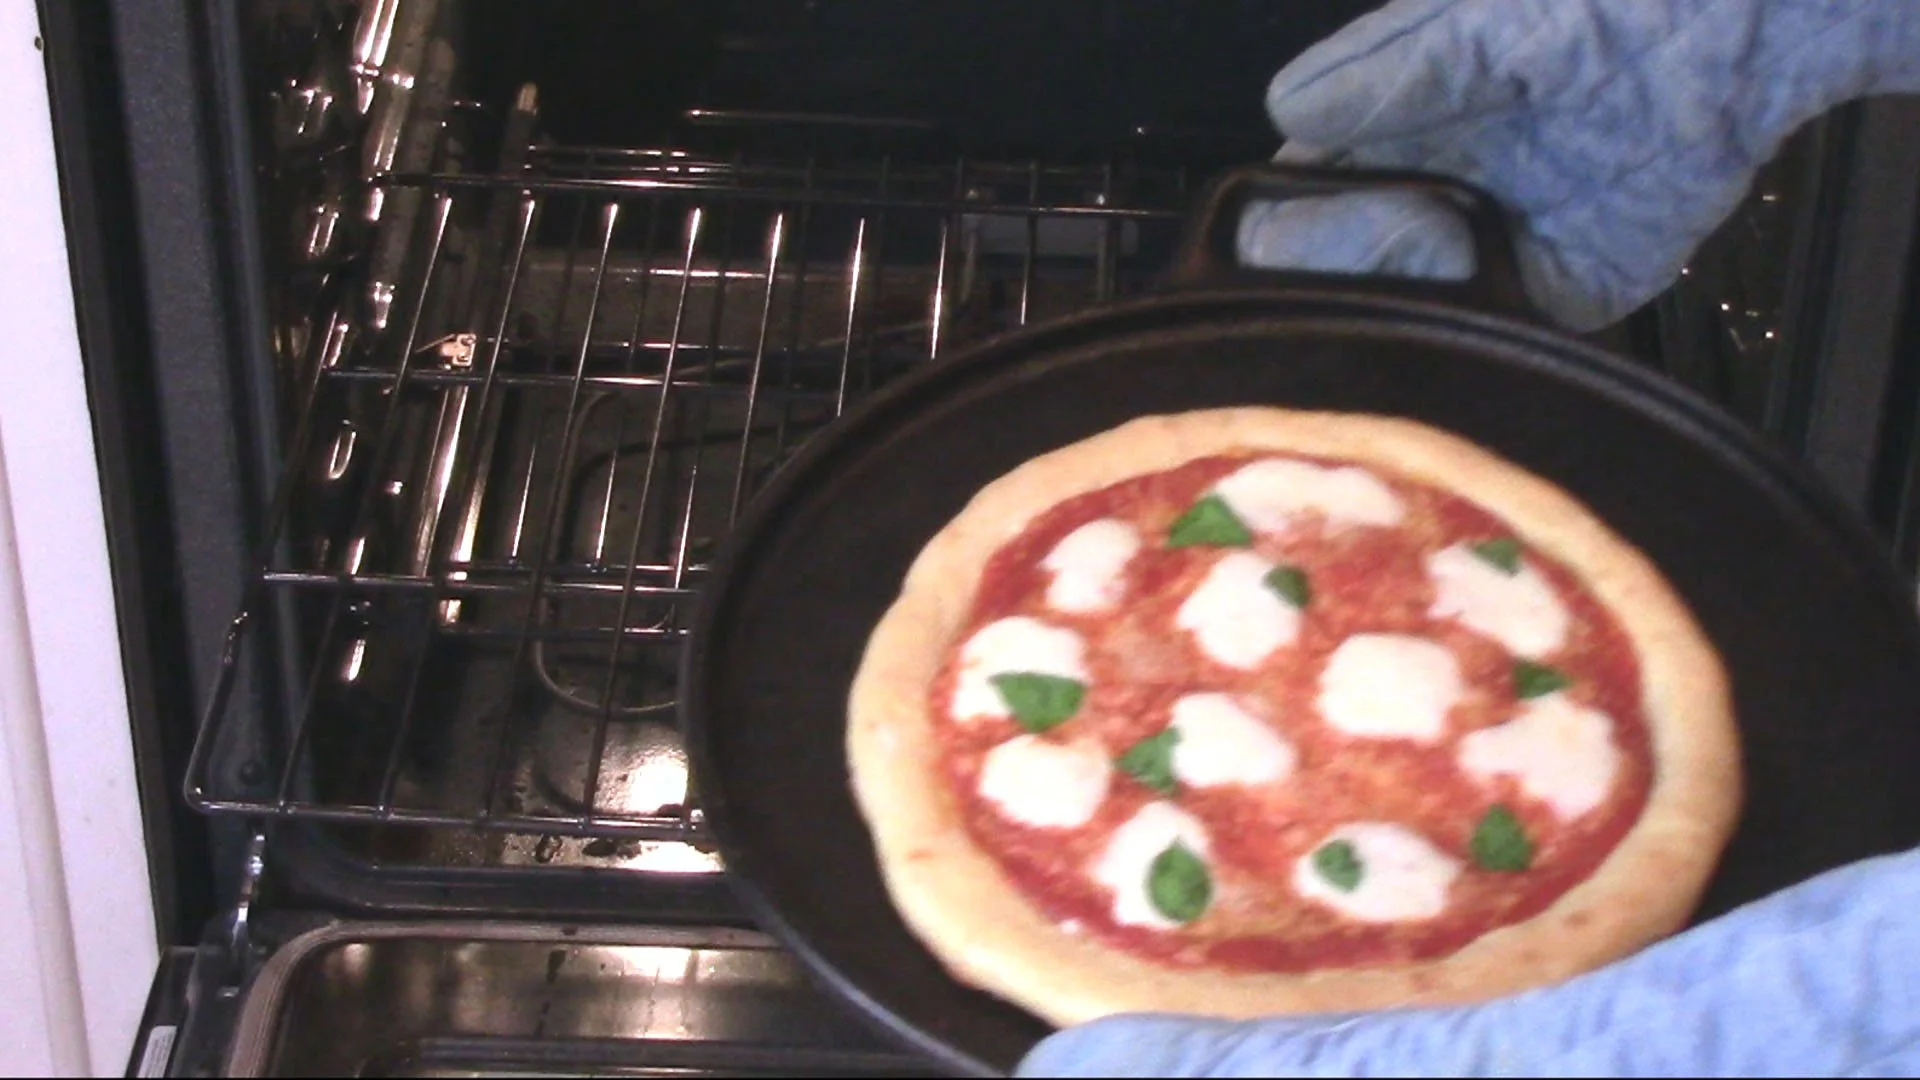
When pizza is done, remove from oven,
32
and IMMEDIATELY transfer pizza off the hot pan and onto a cutting surface. If left on the pan, the pizza will continue to bake from the pan’s heat and will become over-baked.
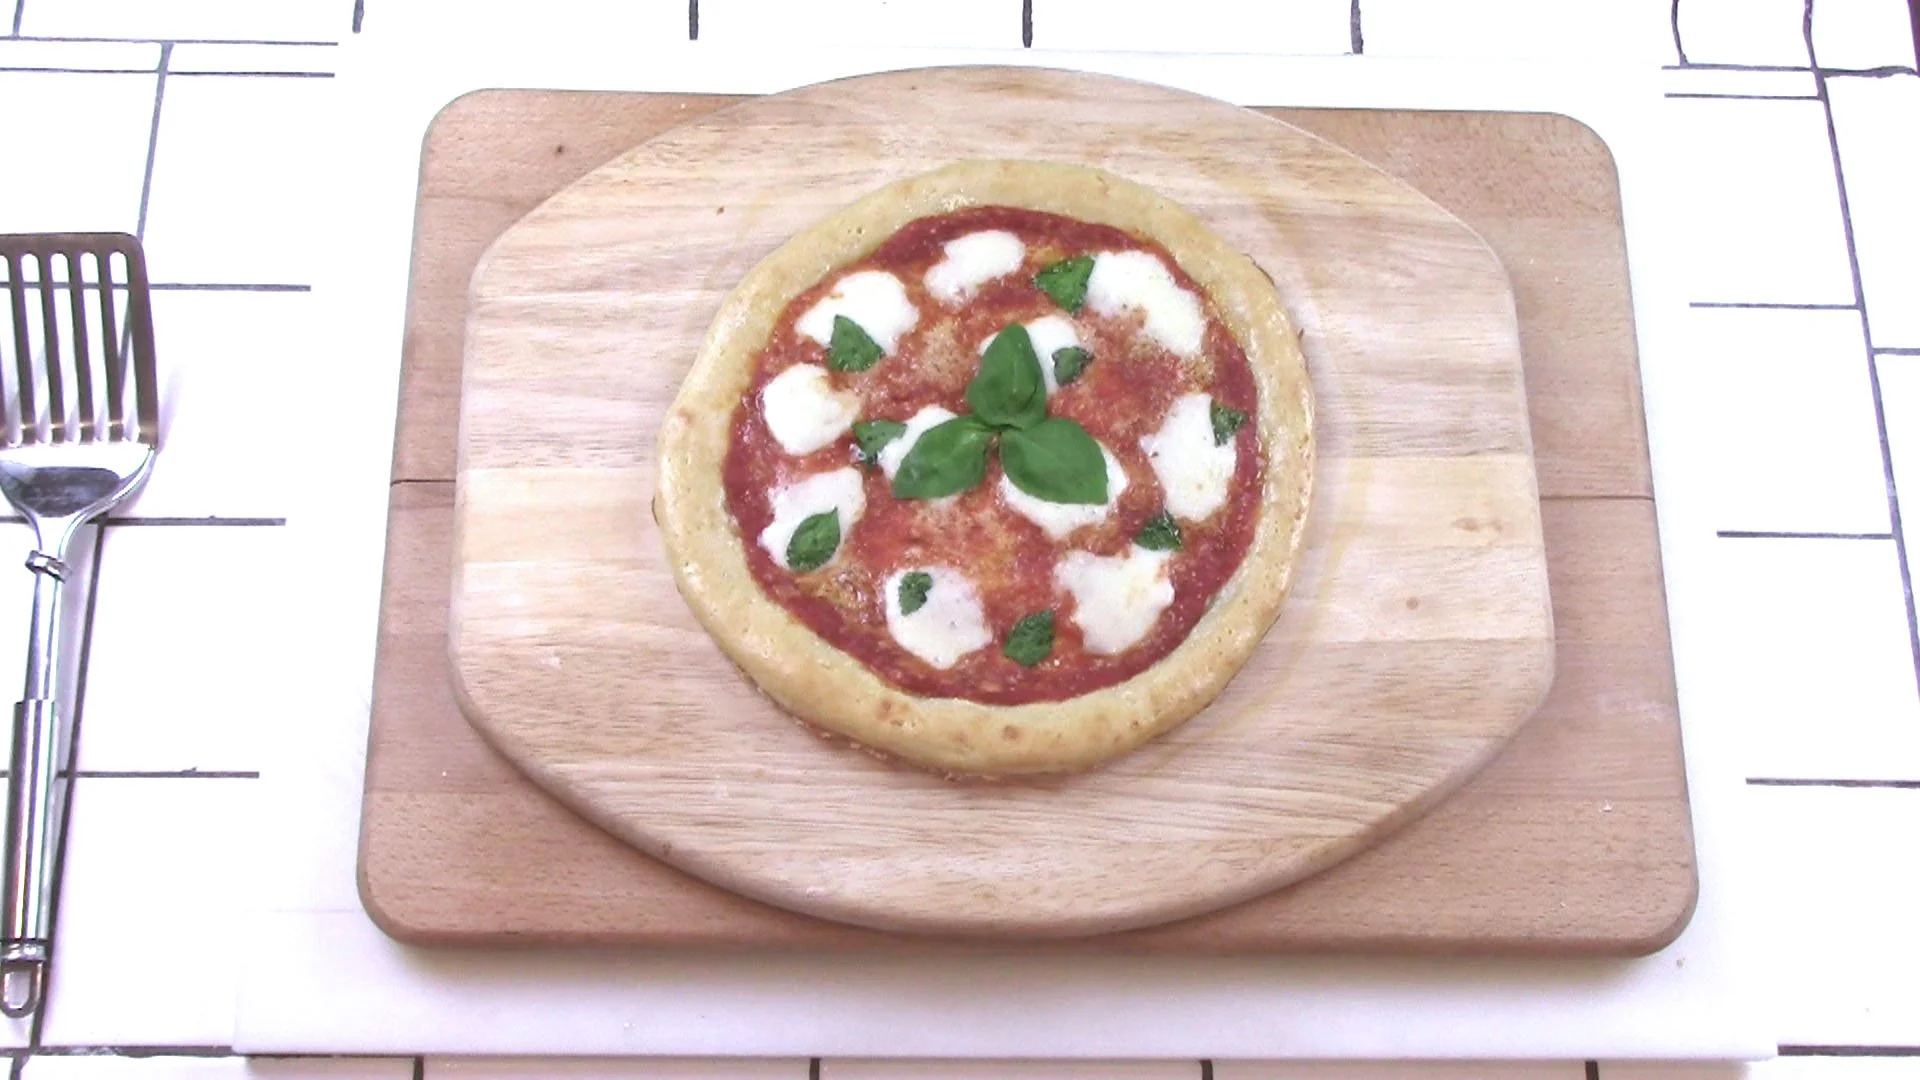
Yay! Time to eat!
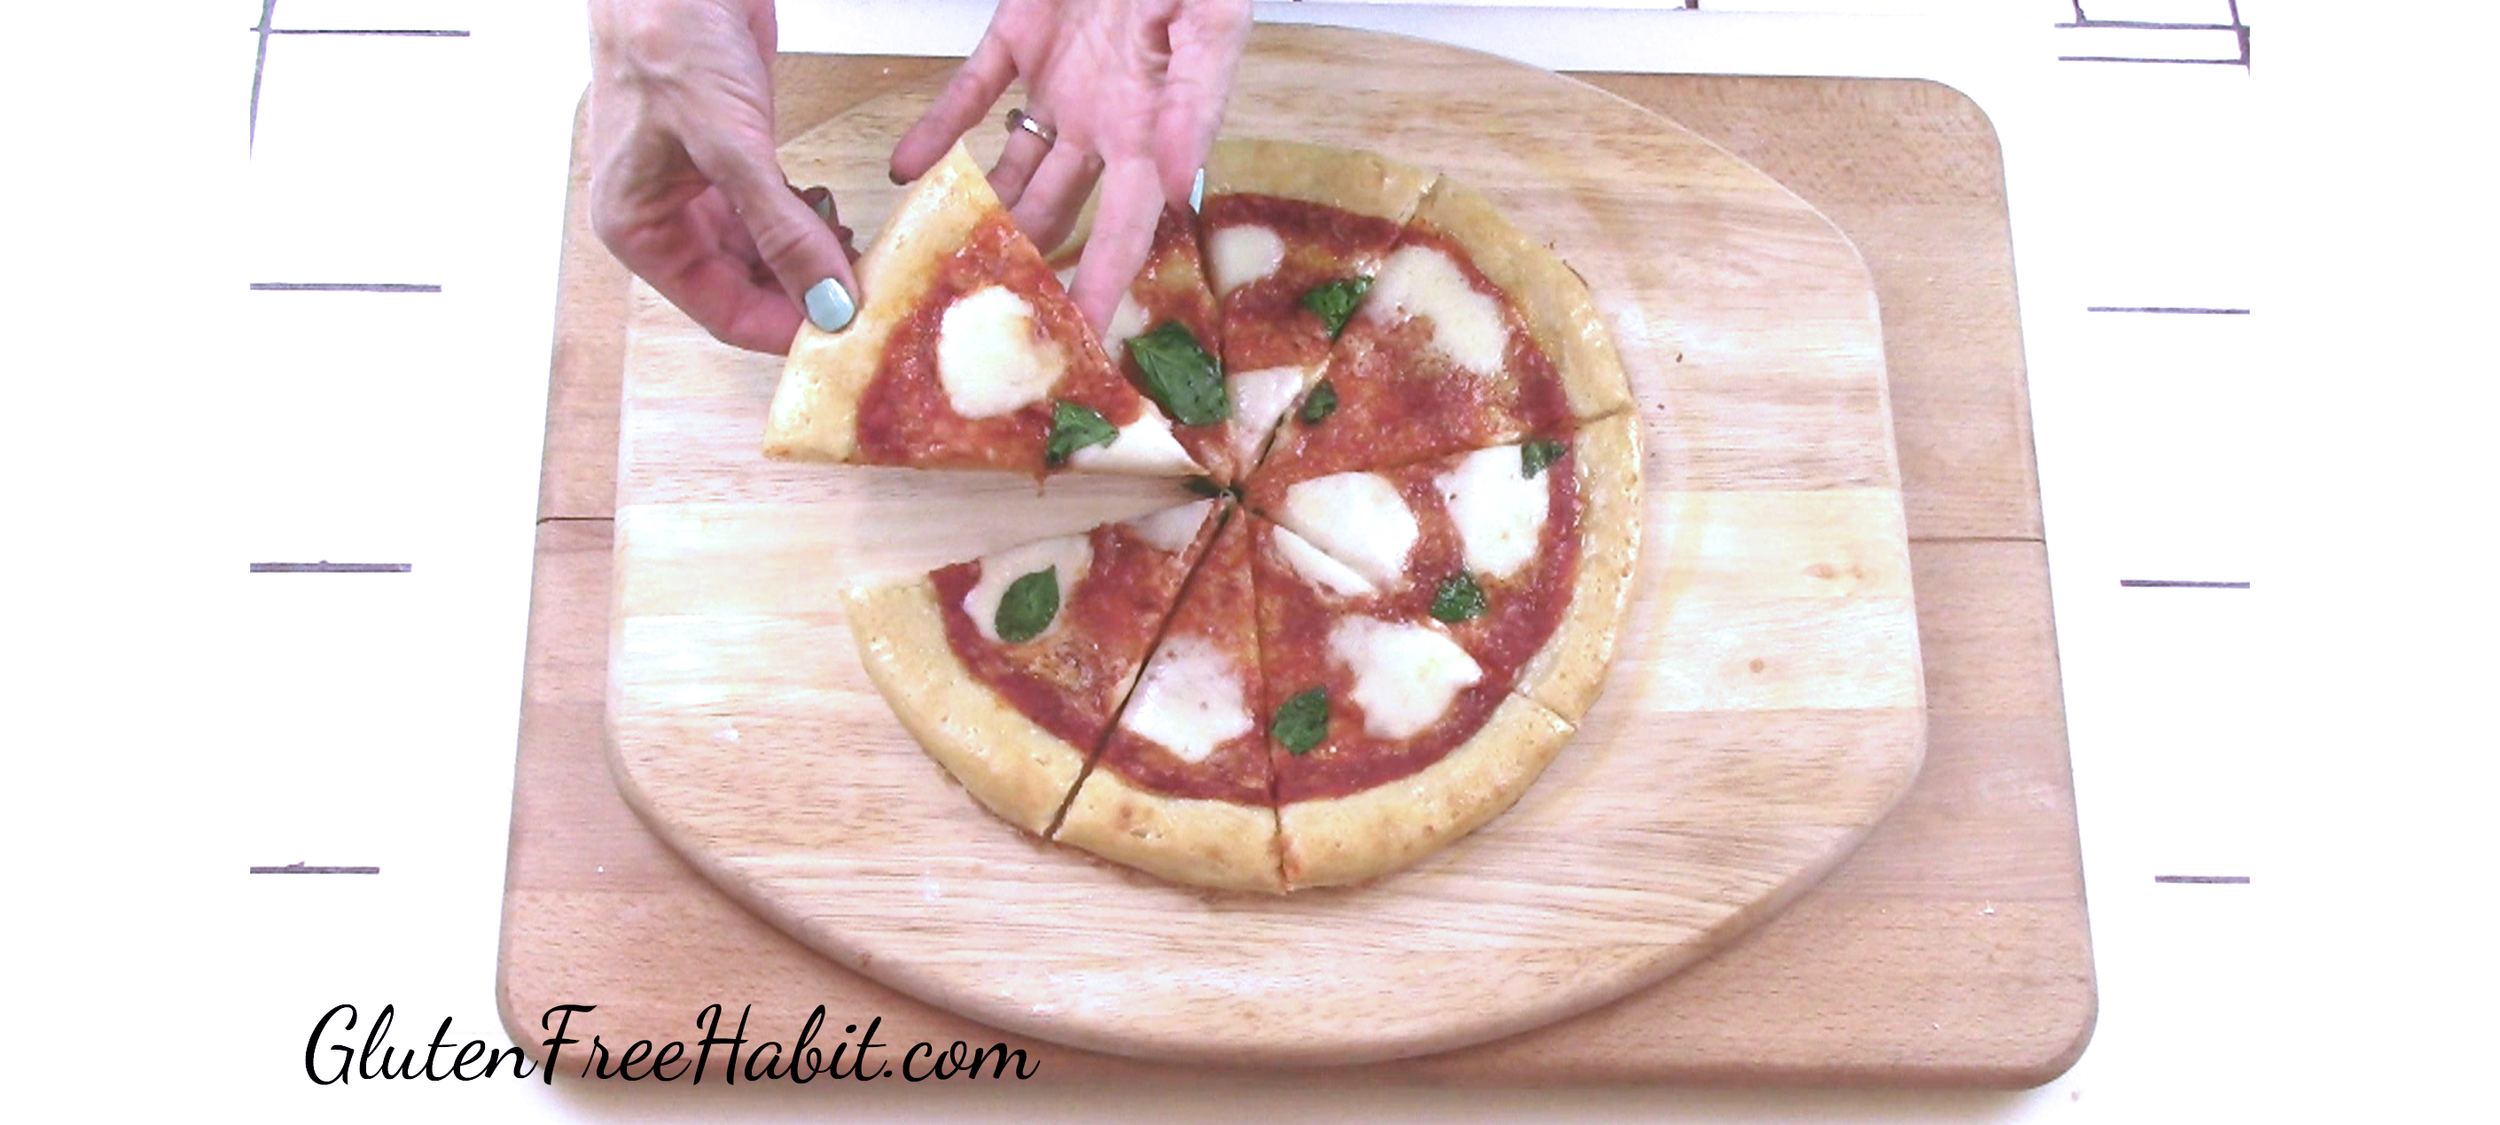
Slice and enjoy!
Ready to Make Some Gluten Free Pizza Margherita?
Make sure to start with all the right tools! Shop for cutting boards, serving dishes, and cookware in my Amazon shop!

The Recipe:
GLUTEN FREE PIZZA MARGHERITA
INGREDIENTS
Dry Ingredients:
1/2 cup brown rice flour (2.0 oz.)
1/4 cup white rice flour (1.3 oz.)
3/4 cup potato starch (3.7 oz.)
1/2 tsp. salt
1 tsp. xanthan gum
1 tsp. garlic powder
1 tsp. instant yeast
1 tsp. baking powder
1 Tbsp. granulated sugar
3/4 cup hot tap water
1 ¼ tsp. unflavored gelatin
1 Tbsp. olive oil
To Top:
Your favorite GF pizza sauce
Fresh mozzarella (3 oz. +/-)
Grated parmesan (2-3 Tbsp.)
7-10 basil leaves
To Brush on Crust:
(optional)
1 egg
1 Tbsp. milk
DIRECTIONS
Getting Ready
Cut a piece of parchment paper to fit the size of your pan
Wash and pat dry basil leaves, and tear into desired size. Save 3 whole leaves to garnish.
Let’s Get Started!
In a large mixing bowl, whisk together brown rice flour, white rice flour, potato starch, salt, xanthan gum, garlic powder, yeast, baking powder, and sugar. Set aside.
Now, put ¾ cup hot tap water into a measuring cup and sprinkle in the gelatin. Give it a stir and let it dissolve.
To your flour mix, add the olive oil and the dissolved gelatin water. Be sure to scrape out remaining gelatin as it will stick to sides of cup.
Mix at low speed until blended, and then high speed until dough is smooth (about 5 minutes). Dough will be sticky and will not resemble gluten dough. That’s ok!
To spread the dough: Spray your pre-cut parchment paper with non-stick cooking spray and lay it on a flat movable work surface like a large cutting board or cookie sheet (with no edges).
Place dough in center of parchment.
Lay another parchment on top (also sprayed with non-stick cooking spray.)
With your hands on top of parchment, press and smooth dough until it is about 12 inches in diameter. Remove top paper and finish shaping edges by hand. You’ll want to create a slightly thicker outer edge to keep in the sauce and toppings. To do this, place a cup of water nearby, and use dampened fingers to shape and smooth edges. When fully shaped, your pizza should now measure about 11 inches in diameter.
Loosely cover with plastic wrap sprayed with non-stick spray, and set in a warm place for 40 minutes. Dough will rise slightly.
While the dough is rising, preheat your oven to 450 degrees. Place your pan inside the oven while the oven heats so that it gets nice and hot BEFORE you put the dough on it. This will help the crust to get a little crispy on the bottom. I preheat my pan for about 20 minutes as my dough is rising, but all pans are different so decide for yourself how long your pan needs to be in the oven to really heat up.
Also while dough is rising, if you would like to do the optional egg wash later, prepare it now by mixing the egg and milk together. The egg wash simply helps the edges to become more golden and it also gives them a little shine. Set aside.
When rise time is done, carefully remove plastic wrap from dough, and transfer it to the pre-heated baking pan in the oven by pulling out oven rack and sliding PARCHMENT WITH PIZZA DOUGH carefully over to the heated pan (leave dough on the parchment).
Bake for 7 minutes. You will bake it again after topping the pizza.
Remove from oven by sliding parchment back onto your cutting board or baking sheet, LEAVING THE PAN IN THE OVEN.
Increase oven temperature to 450 degrees.
Remove parchment by sliding pizza crust onto your movable surface. Discard parchment.
Brush on egg wash around outer edge of pizza now if desired.
Top your pizza with your favorite gluten free sauce, parmesan, fresh mozzarella, and a light drizzle of olive oil (don’t add the basil yet or it might burn).
After oven reaches 450 degrees, allow some time for the pan to heat up. I allow 15 minutes for my cast iron pan.
Now, carefully slide your topped pizza onto the heated pan without the parchment. This will help to create a slightly crispy crust that is so important to great pizza! If the pan is hot enough, you may hear a small sizzle when the pizza hits the pan.
Bake for 5-6 more minutes
A couple minutes before baking is done, slide the oven rack out and on add the basil.
Finish baking the last couple of minutes or until the edges are golden and cheese is melted (total of both baking times is roughly 12-13 minutes, but every oven is different so please watch it carefully)
Remove from oven and immediately transfer pizza off the hot pan and onto a cutting surface. If left on the pan, the pizza will continue to bake from the pan’s heat and will become over-baked.
Slice and enjoy!

Tip: Please follow all directions exactly!! If you skip steps or swap ingredients then you may or may not like the end result :)
Tip: I highly recommend a cast-iron pan (flat) because they can heat to a high temperature and hold the heat. This gives the crust a slight crisp on the bottom that makes the pizza really great!
Tip: Want to have your crust pre-made for tomorrow? You can par-bake your pizza crust (complete up to step 16), then cool it on a wire rack, double-wrap it in plastic wrap, and leave it in the fridge overnight. To use it the next day, heat your pan in a 450 degree oven while you leave your pizza crust on the counter to bring to room temperature. Continue at step 17 with the egg wash and then the toppings... then bake! So easy.
Looking for Comments?
Please leave and read comments in the "Comments" section of the YouTube video above.
I can’t wait to hear from you!